
Prior to enabling the IMMIX integration, ensure the inbound and outbound connections listed below are properly configured.
Inbound (Forwarded from the IMMIX IP Address to the XV Gateway)
HTTPS: TCP/443
-
Used by IMMIX to gather camera and alert information from the XV Gateway
RTSP: TCP/554 and UDP/554
-
Video streaming from XV Gateway to IMMIX
Source: Hostname provided by your IMMIX provider
Outbound
-
SMTP: TCP/25
-
Alerts from XV Gateway to IMMIX
-
If your ISP blocks port 25, try port 1025.
-
If port 1025 is also blocked, contact your ISP
-
-
Destination: Same address used in the SMTP Server field in Dealer Admin Final Setup
Enable IMMIX Monitoring with the XV Gateway
Note: Ensure all devices are added to the XV Gateway before adding it to your IMMIX account. Refer to Add Devices to the XV Gateway for more information.
-
Log in to Dealer Admin (dealer.securecomwireless.com).
-
Go to Customers, then select the System Name that the XV Gateway is connected to.
-
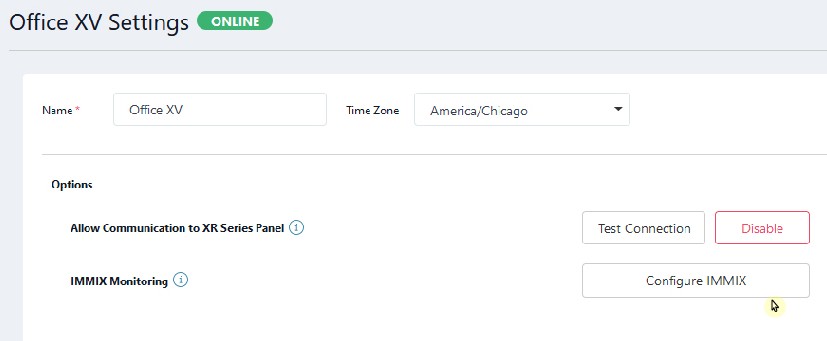
At Video, select the name of the XV Gateway.
-
In XV Gateway Settings, select Configure IMMIX.
Note: If Configure IMMIX Monitoring does not display, ensure the Monitoring Center Video Verification feature is enabled. Refer to Enable Monitoring Center Video Verification for more information.
-
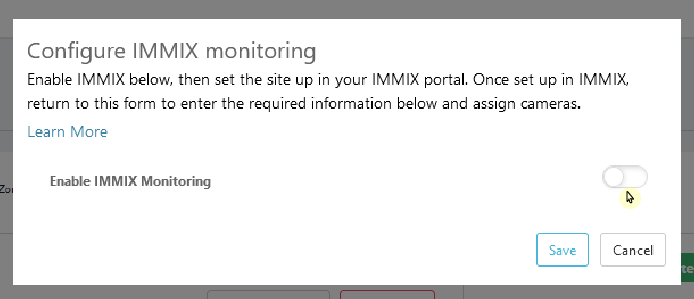
Toggle Enable IMMIX Monitoring ON.
-
Keep the IMMIX pop-up open on Dealer Admin and refer to the the steps below to setup the XV Gateway with IMMIX.
Setup the XV Gateway with IMMIX
-
Log in to IMMIX (camect.immixcs.net/)
-
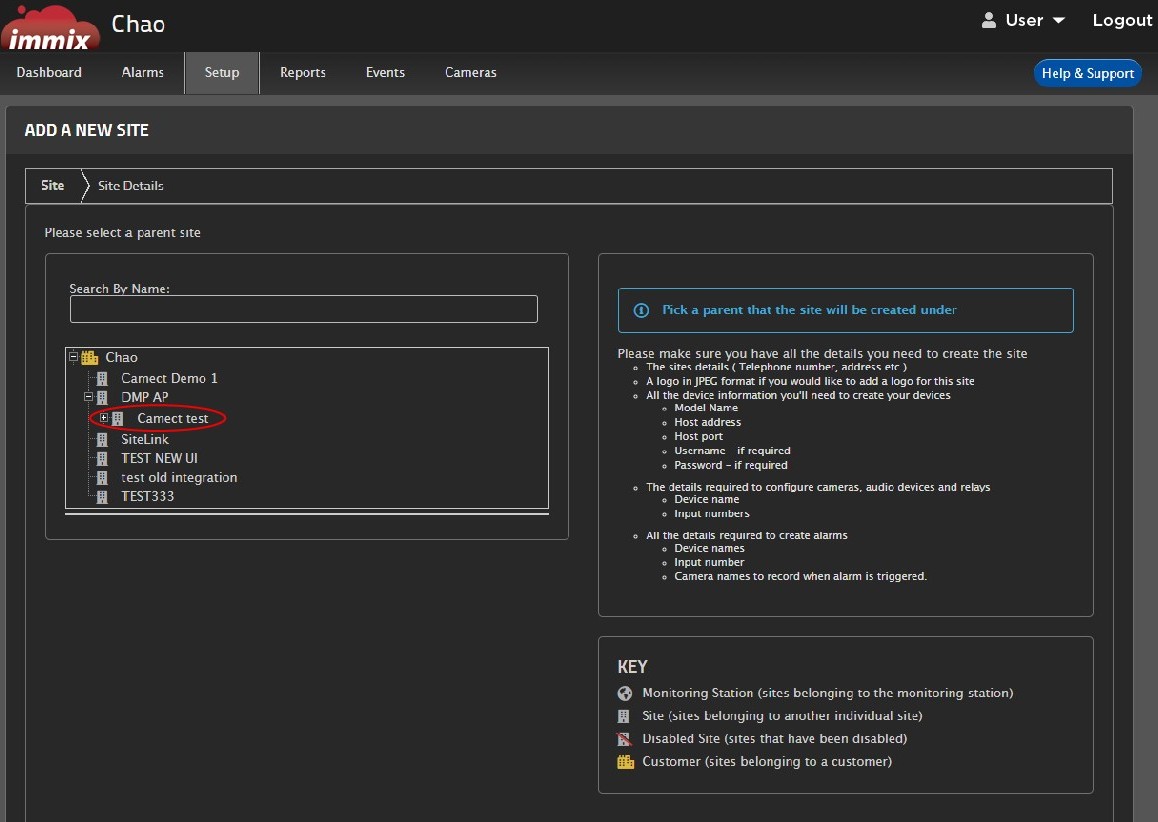
At the top of the screen, select Setup, then select Add a Site.
.jpg?cb=5b341ea33dd56d38eb56664dff4d393c)
-
In Site Details, select a parent site that the site is created under.
-
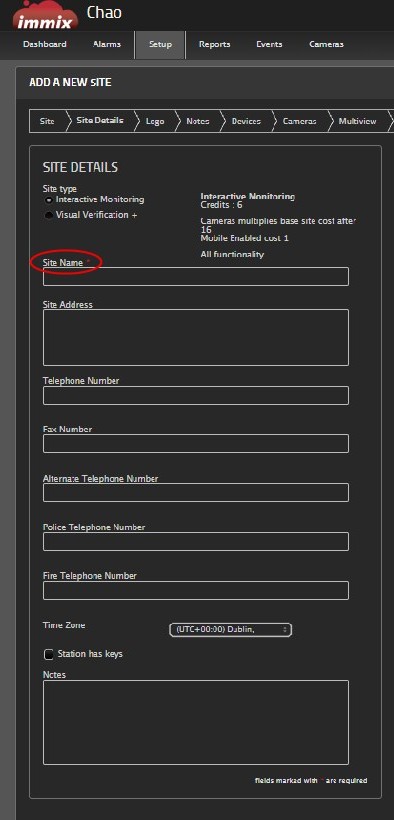
At Site Details, add a Name for the site along with any additional information. Then, select Next.
.jpg?cb=d1ca2cc7b83abe466236d0f3d490e54b)
-
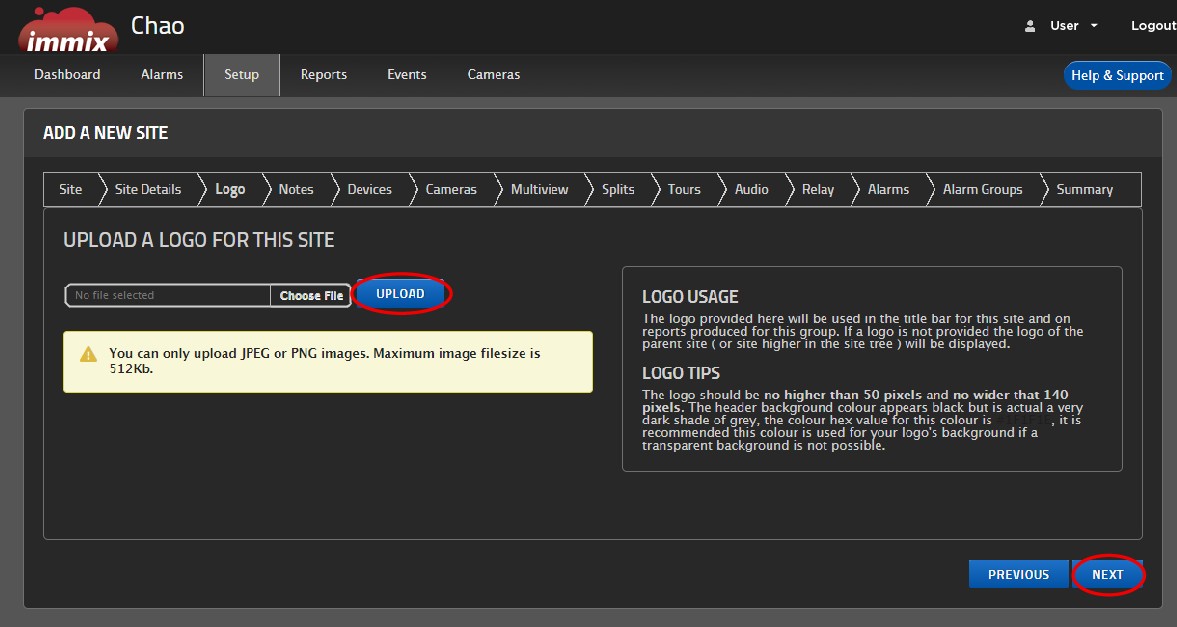
(OPTIONAL) At Upload a Logo For This Site, select Upload to add a logo. If you do not want to upload a logo, select Next.
-
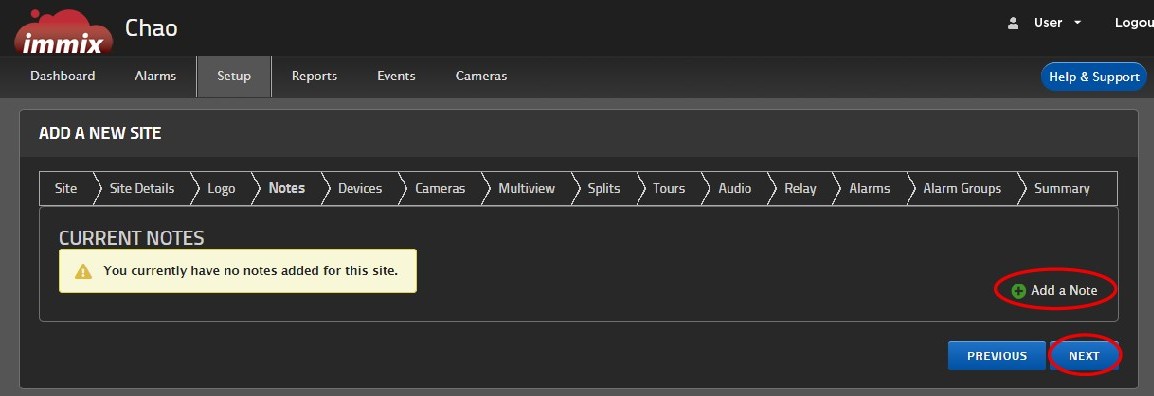
(OPTIONAL) At Current Notes, select Add a Note to add notes to the site. If you do not want to add notes, select Next.
-
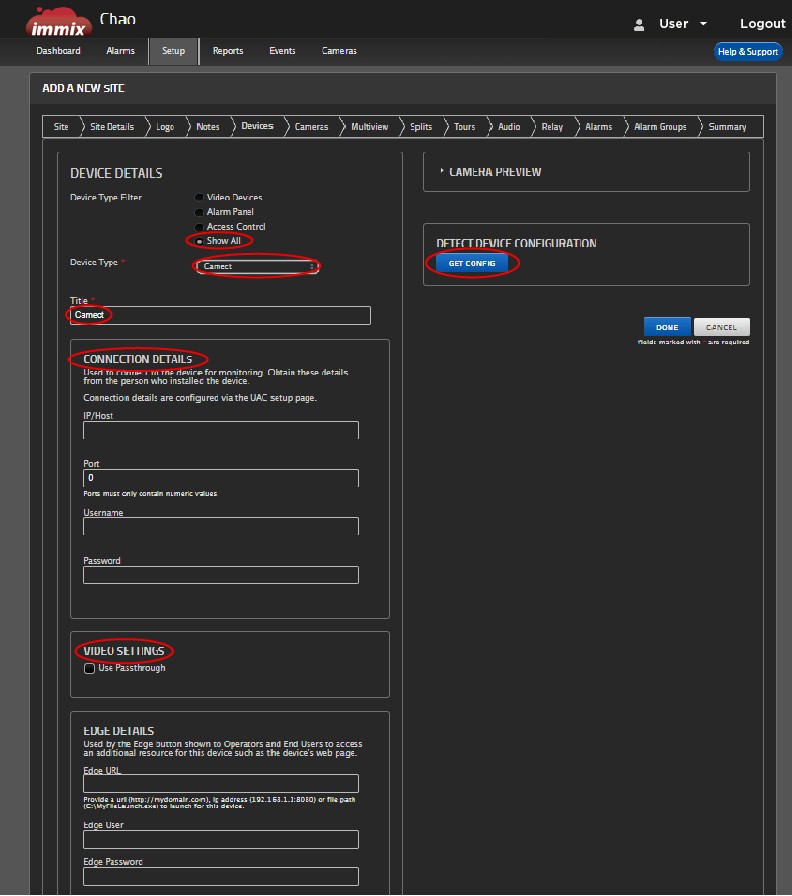
At Current Devices, select Add a Device.

-
At Device Details, enter the following information.
-
At Device Type Filter, select Show All.
-
At Device Type, use the drop-down menu to select Camect.
-
Give the device a Title.
-
At IP/Host, enter the WAN your gateway is connected to.
-
At Port, enter 443.
-
At Username, enter immix.
-
At Password, enter the MAC Address.
-
At Video Settings, select the Use Passthrough checkbox.
-
On the right side of the screen, select Get Config. This finds gateway and all of the devices connected to it. Once it has been connected, select Done.
-
-
Navigate to the Summary tab. This includes additional information needed to configure the integration in Dealer Admin.
-
Keep the Summary tab open and navigate back to Dealer Admin.
Configure IMMIX Monitoring on Dealer Admin
-
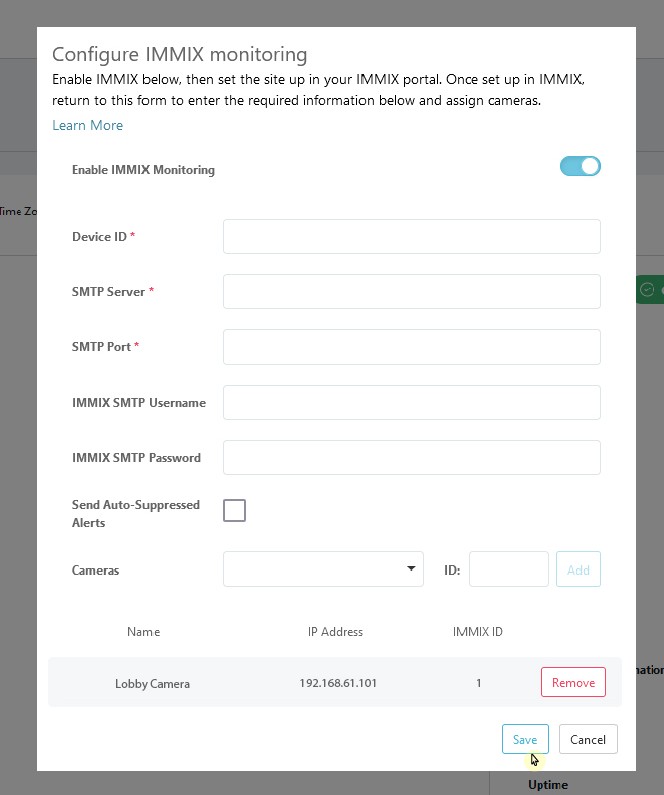
Use the Summary tab in IMMIX to enter the following information in the Configure IMMIX Monitoring pop-up in Dealer Admin:
-
Device ID (Identifier in IMMIX)
-
SMTP Server (SMTP Server Address based on your IMMIX provider)
-
SMTP Port (set to 25)
-
-
(OPTIONAL) At IMMIX SMTP Username and IMMIX SMTP Password, enter a username and password for the IMMIX integration.
-
(OPTIONAL) Check the Send Auto-Suppressed Alerts checkbox.
-
At Cameras, select the drop-down menu to select your camera. Then, add the ID that matches what appears in IMMIX for that camera.
-
Select Save.
-
Test the connection between the XV Gateway and the Monitoring Center by triggering alarms and ensuring live video and events are being sent.