Add and Edit Cameras
Note: If the XV Gateway was on a different system before, ensure the XV Gateway has been deleted from the previous system on Dealer Admin before adding to the new system.
Refer to Delete an XV Gateway below for more information.
There are two types of cameras that can be added to the XV Gateway:
Auto-Discovered Cameras: The cameras are automatically discovered if they exist on the same subnet as the XV Gateway.
Manually Added Cameras: The cameras are outside of the XV Gateway subnet and can be manually added with the camera’s IP Address or RTSP stream.
Refer to the sections below for details on how to add both types of cameras to an XV Gateway.
Auto-Discovered Cameras
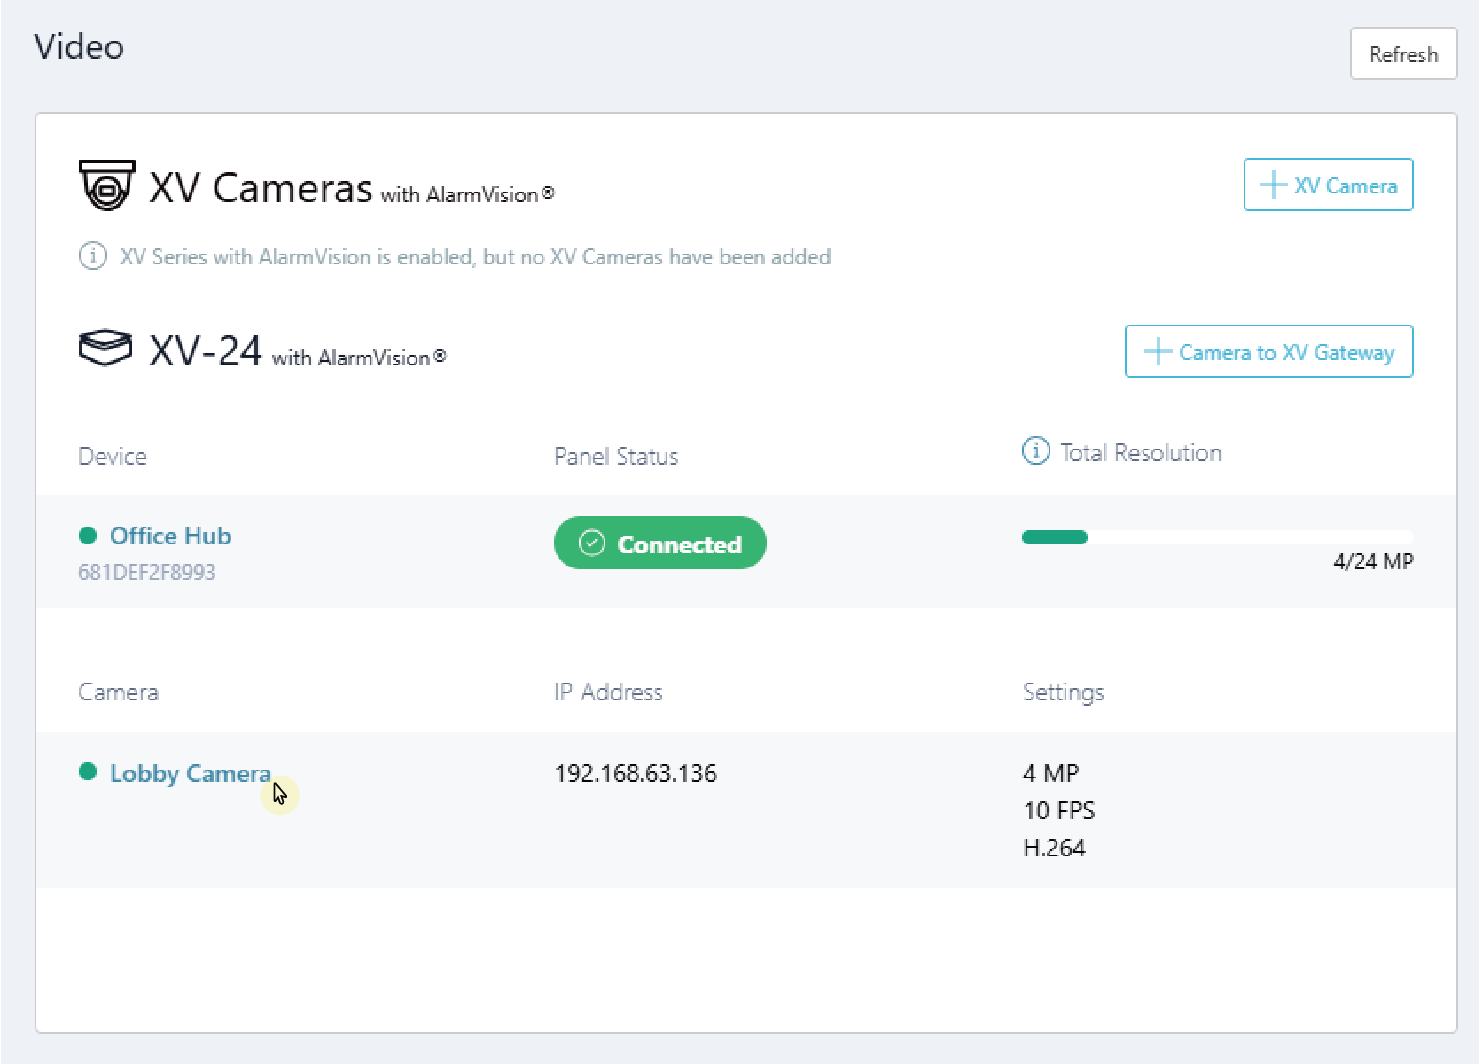
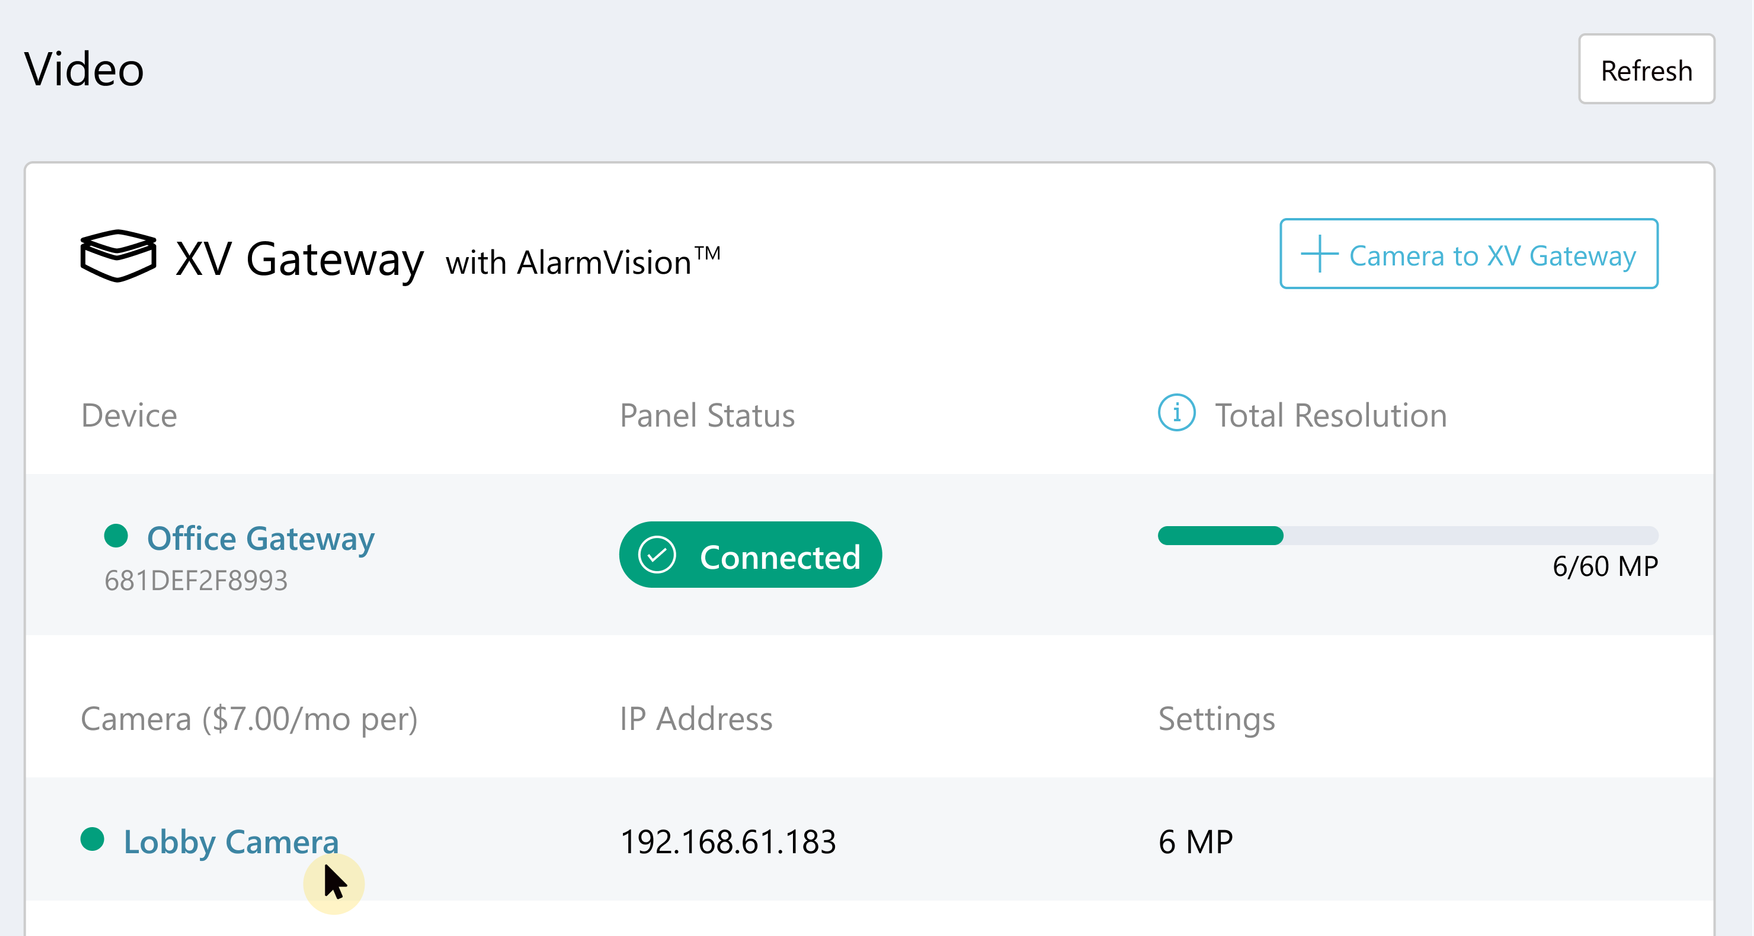
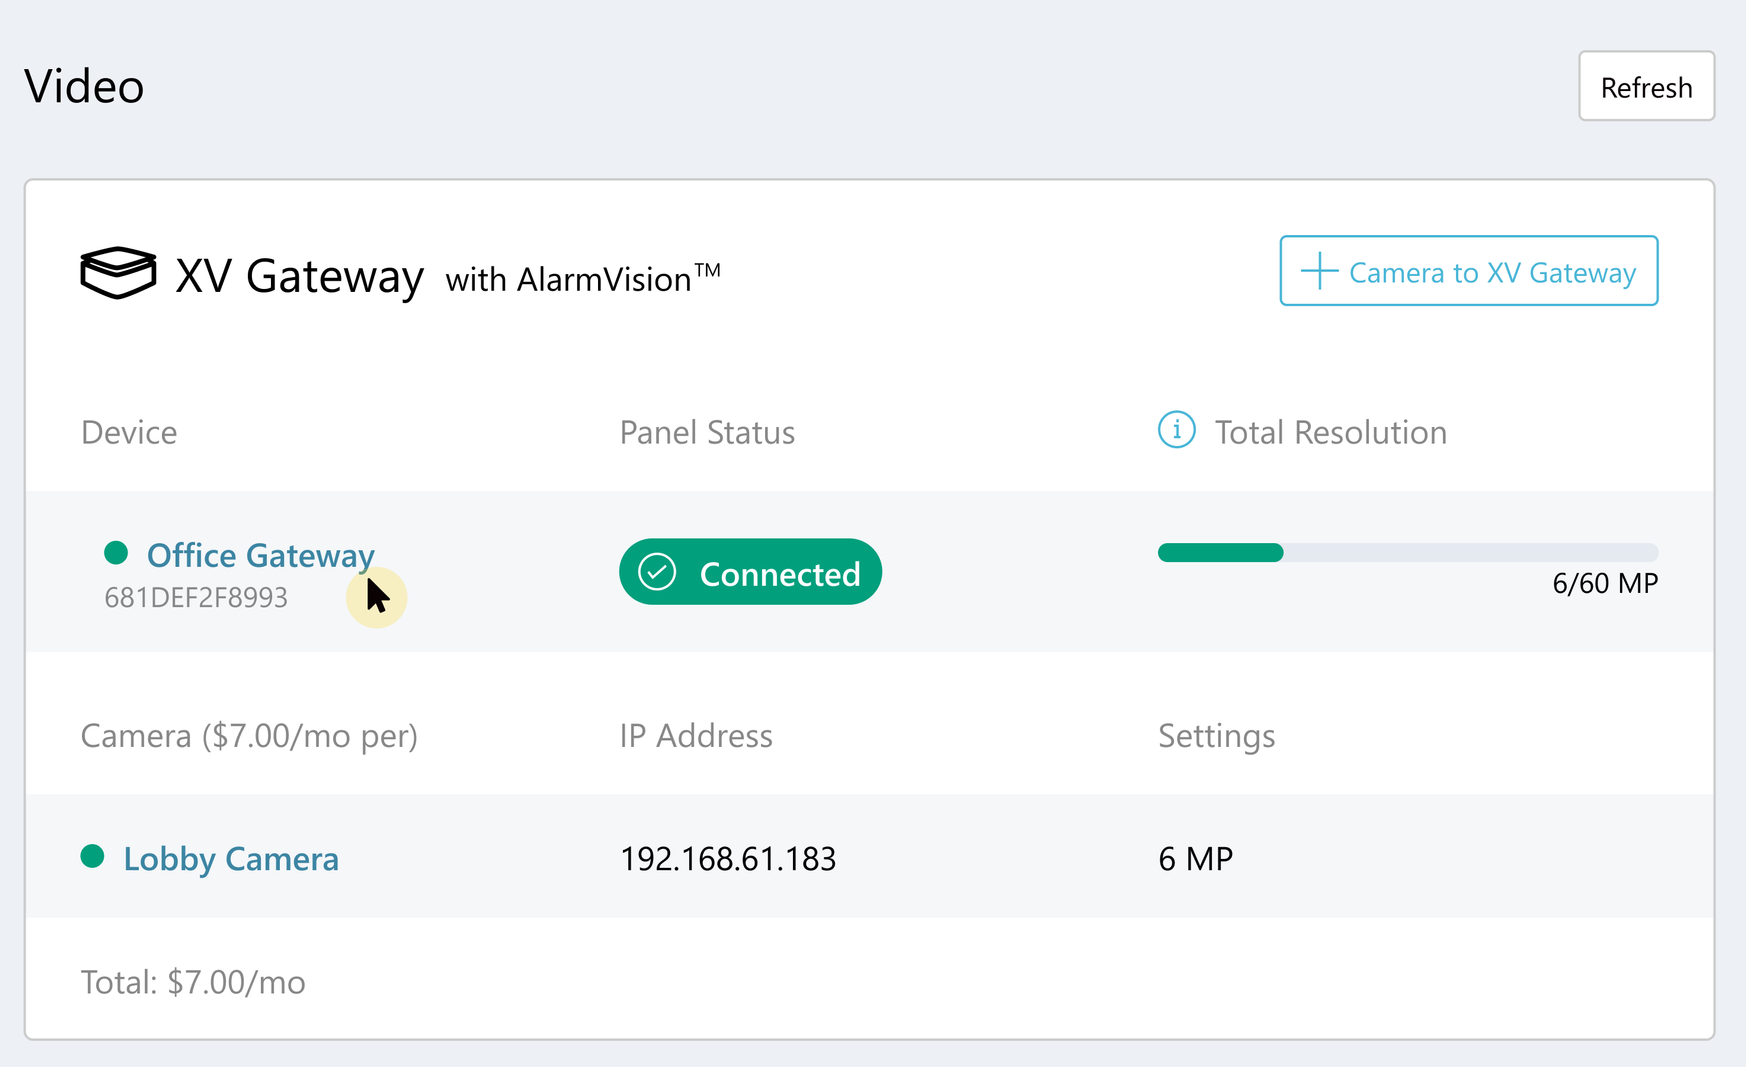
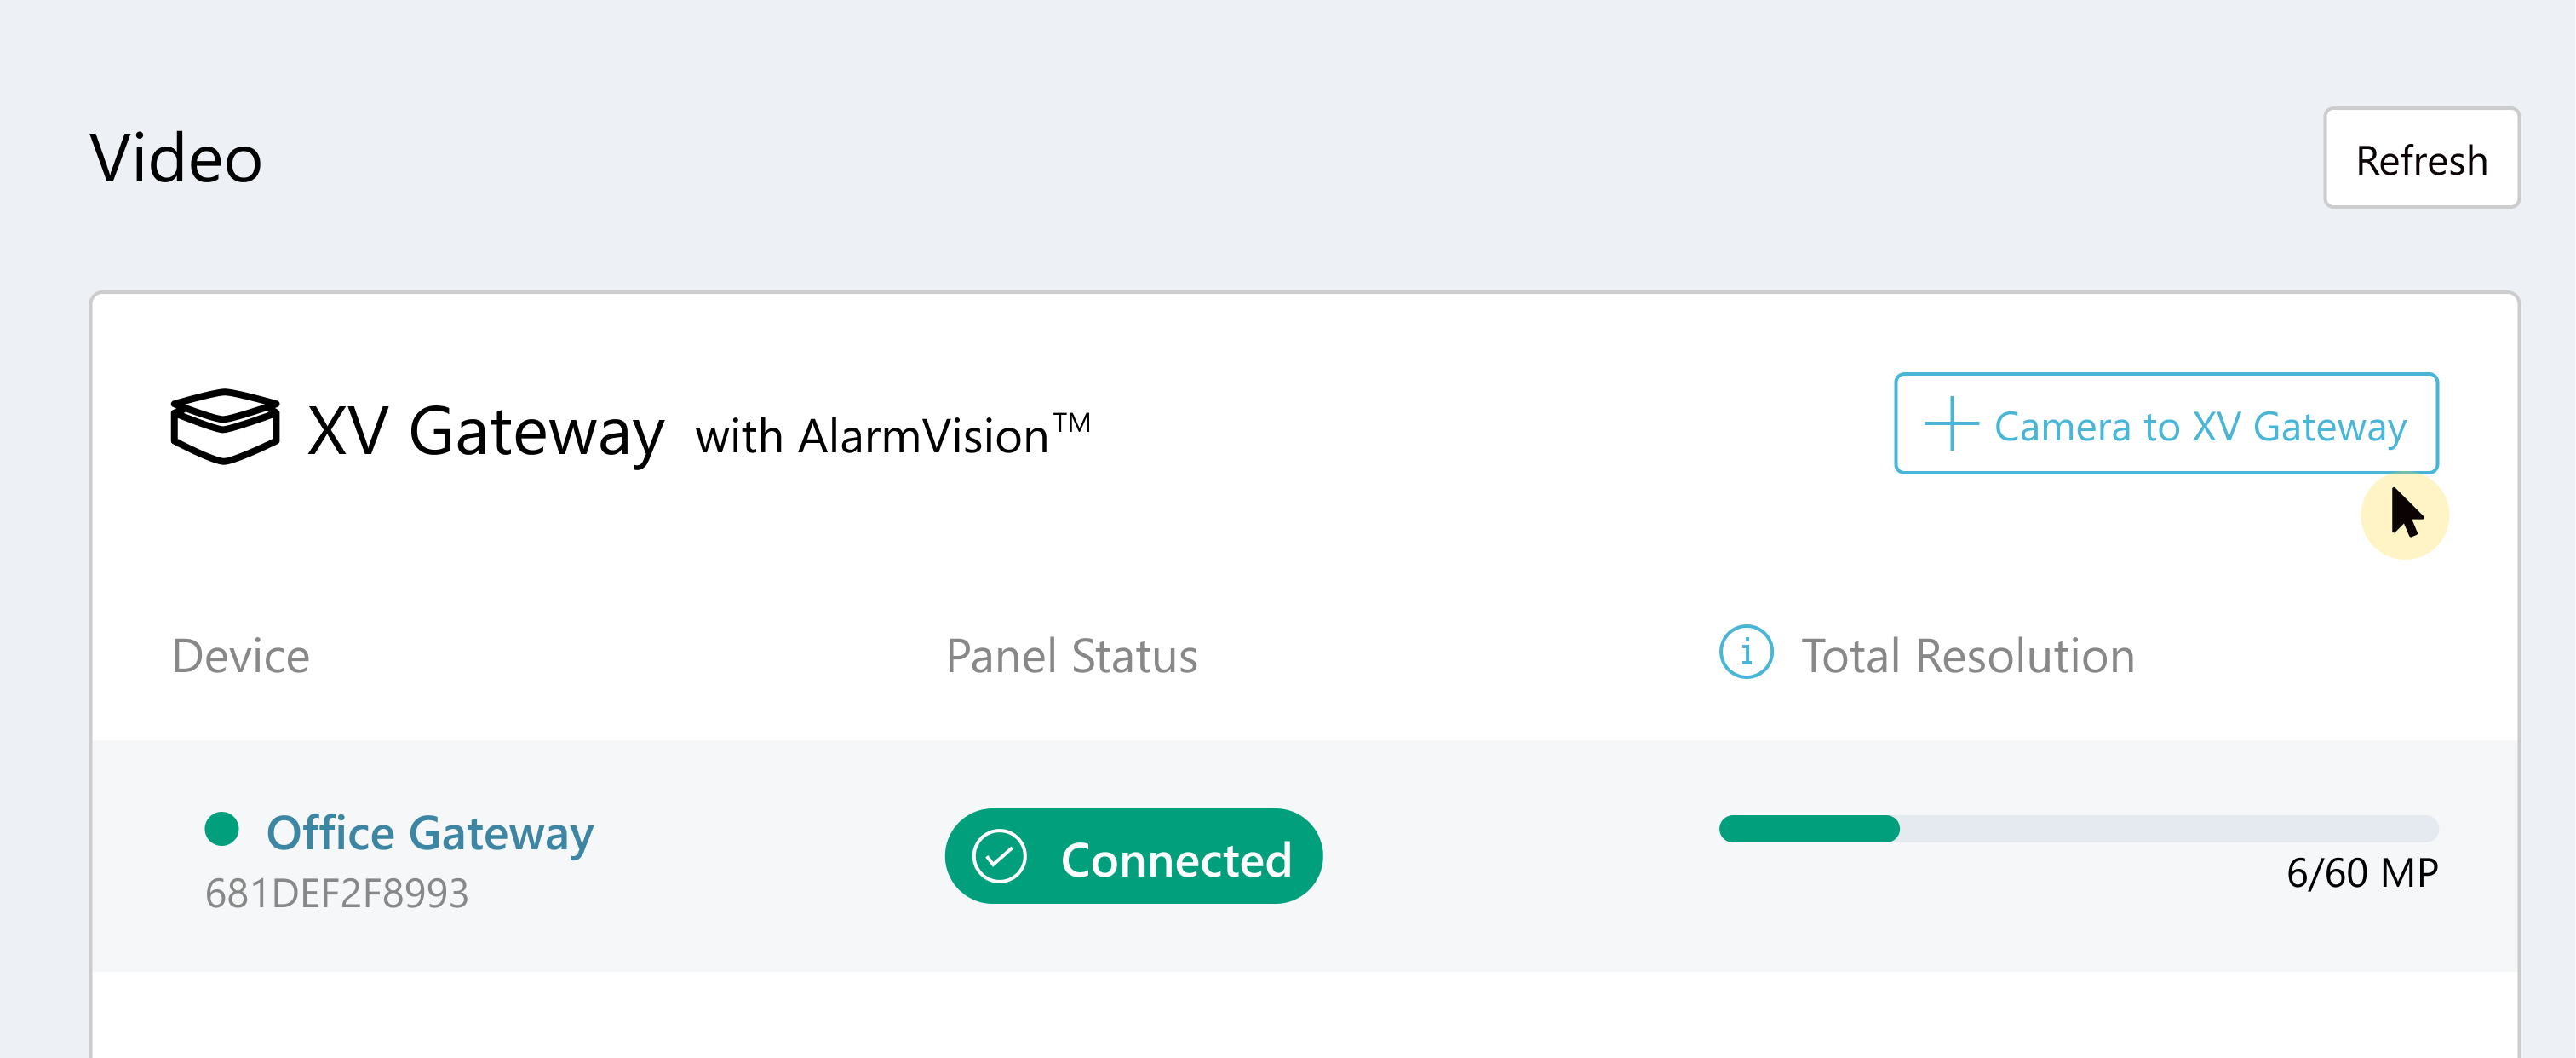
In the XV-60 with AlarmVision® section, click + Camera to XV Gateway to add a camera to an XV Gateway.
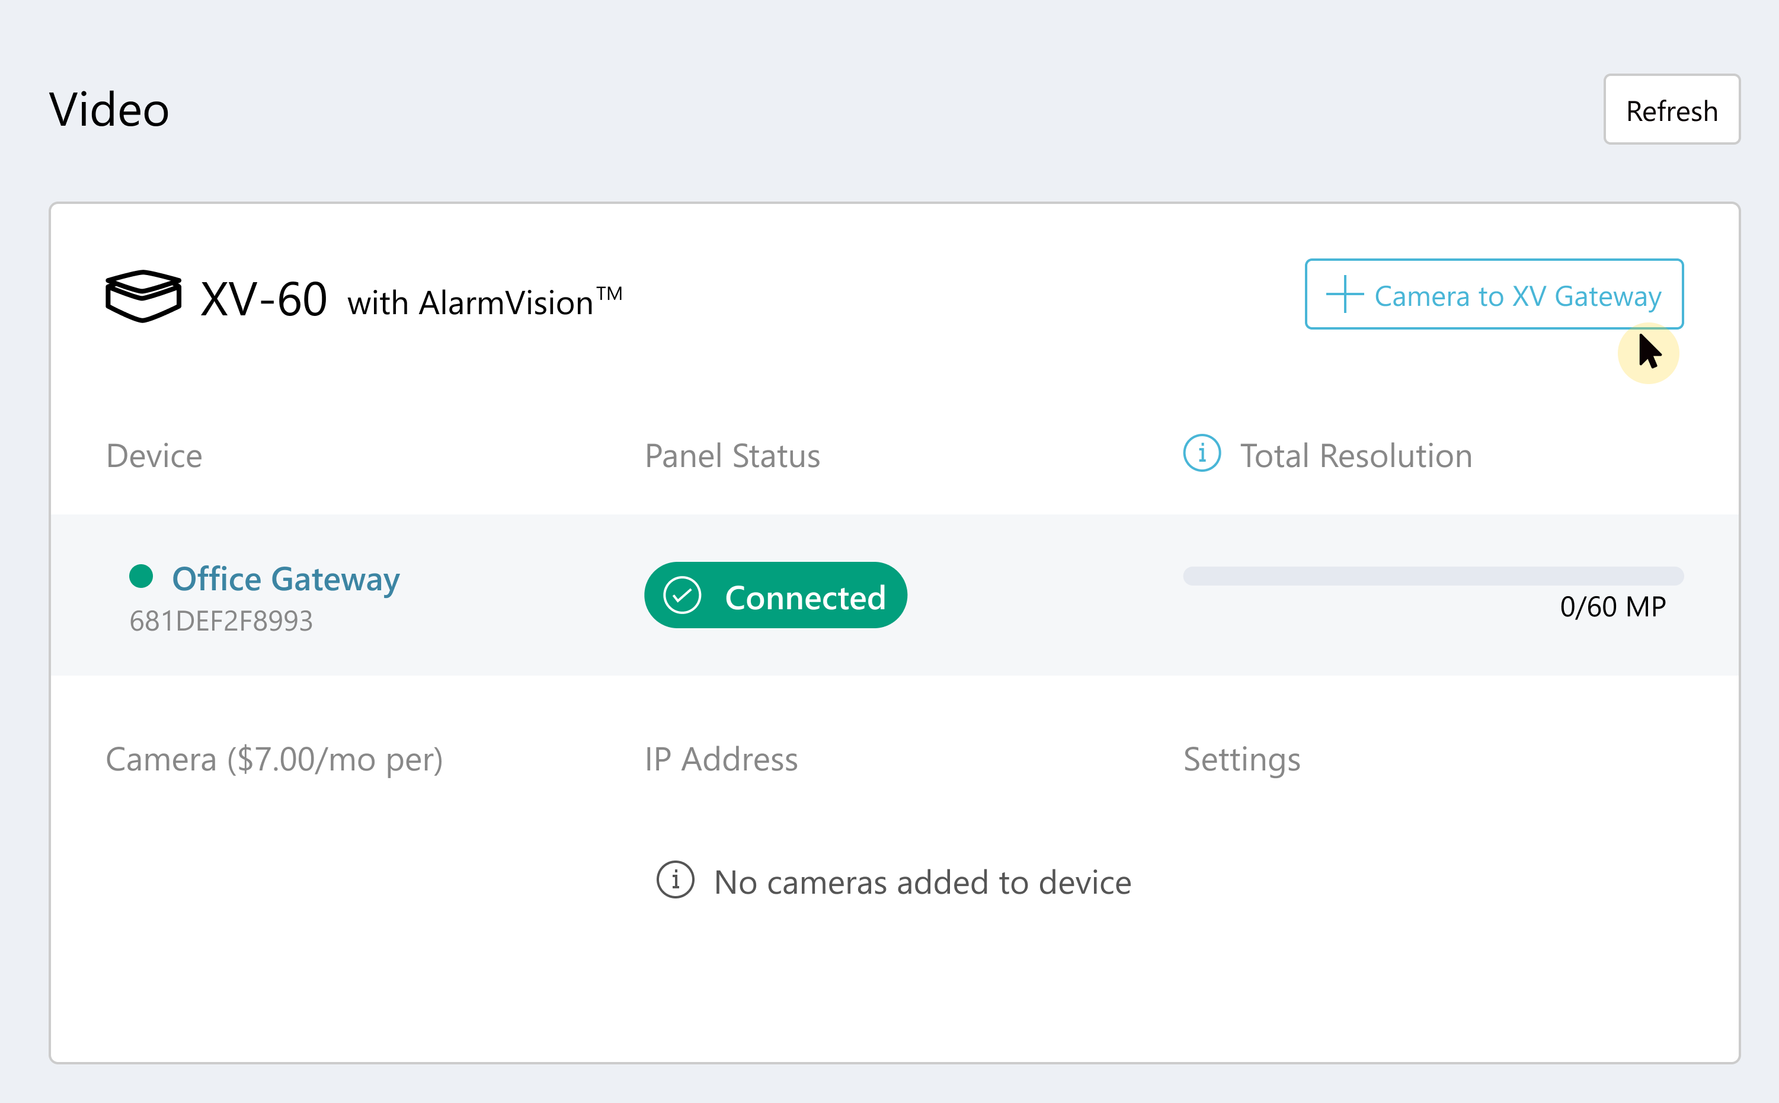
Add Camera to XV Gateway
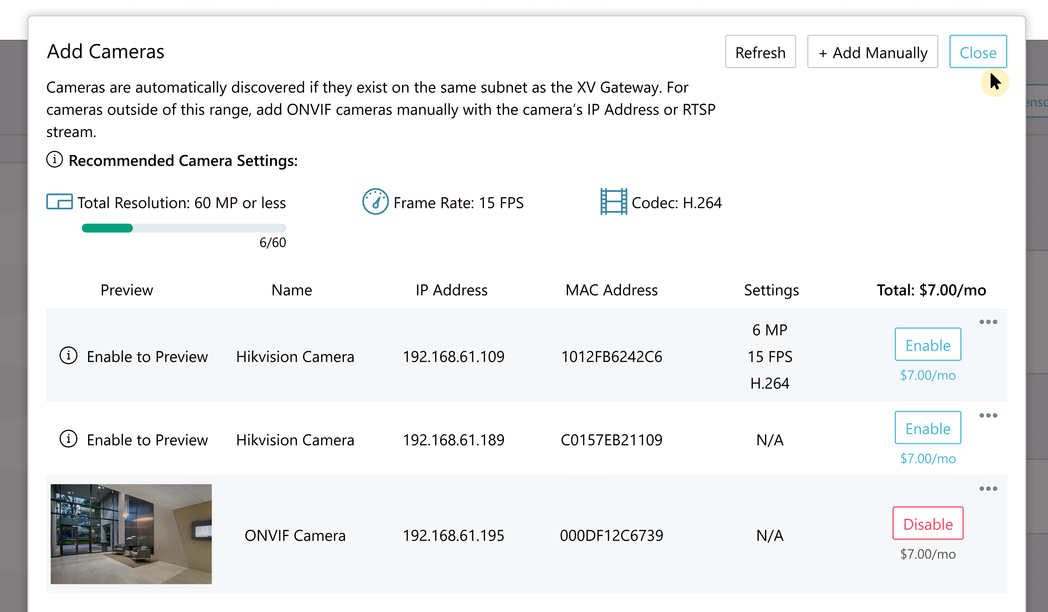
Cameras that already exist on the same subnet as the XV Gateway automatically display in the camera list. Click Enable to add the camera to the XV Gateway.
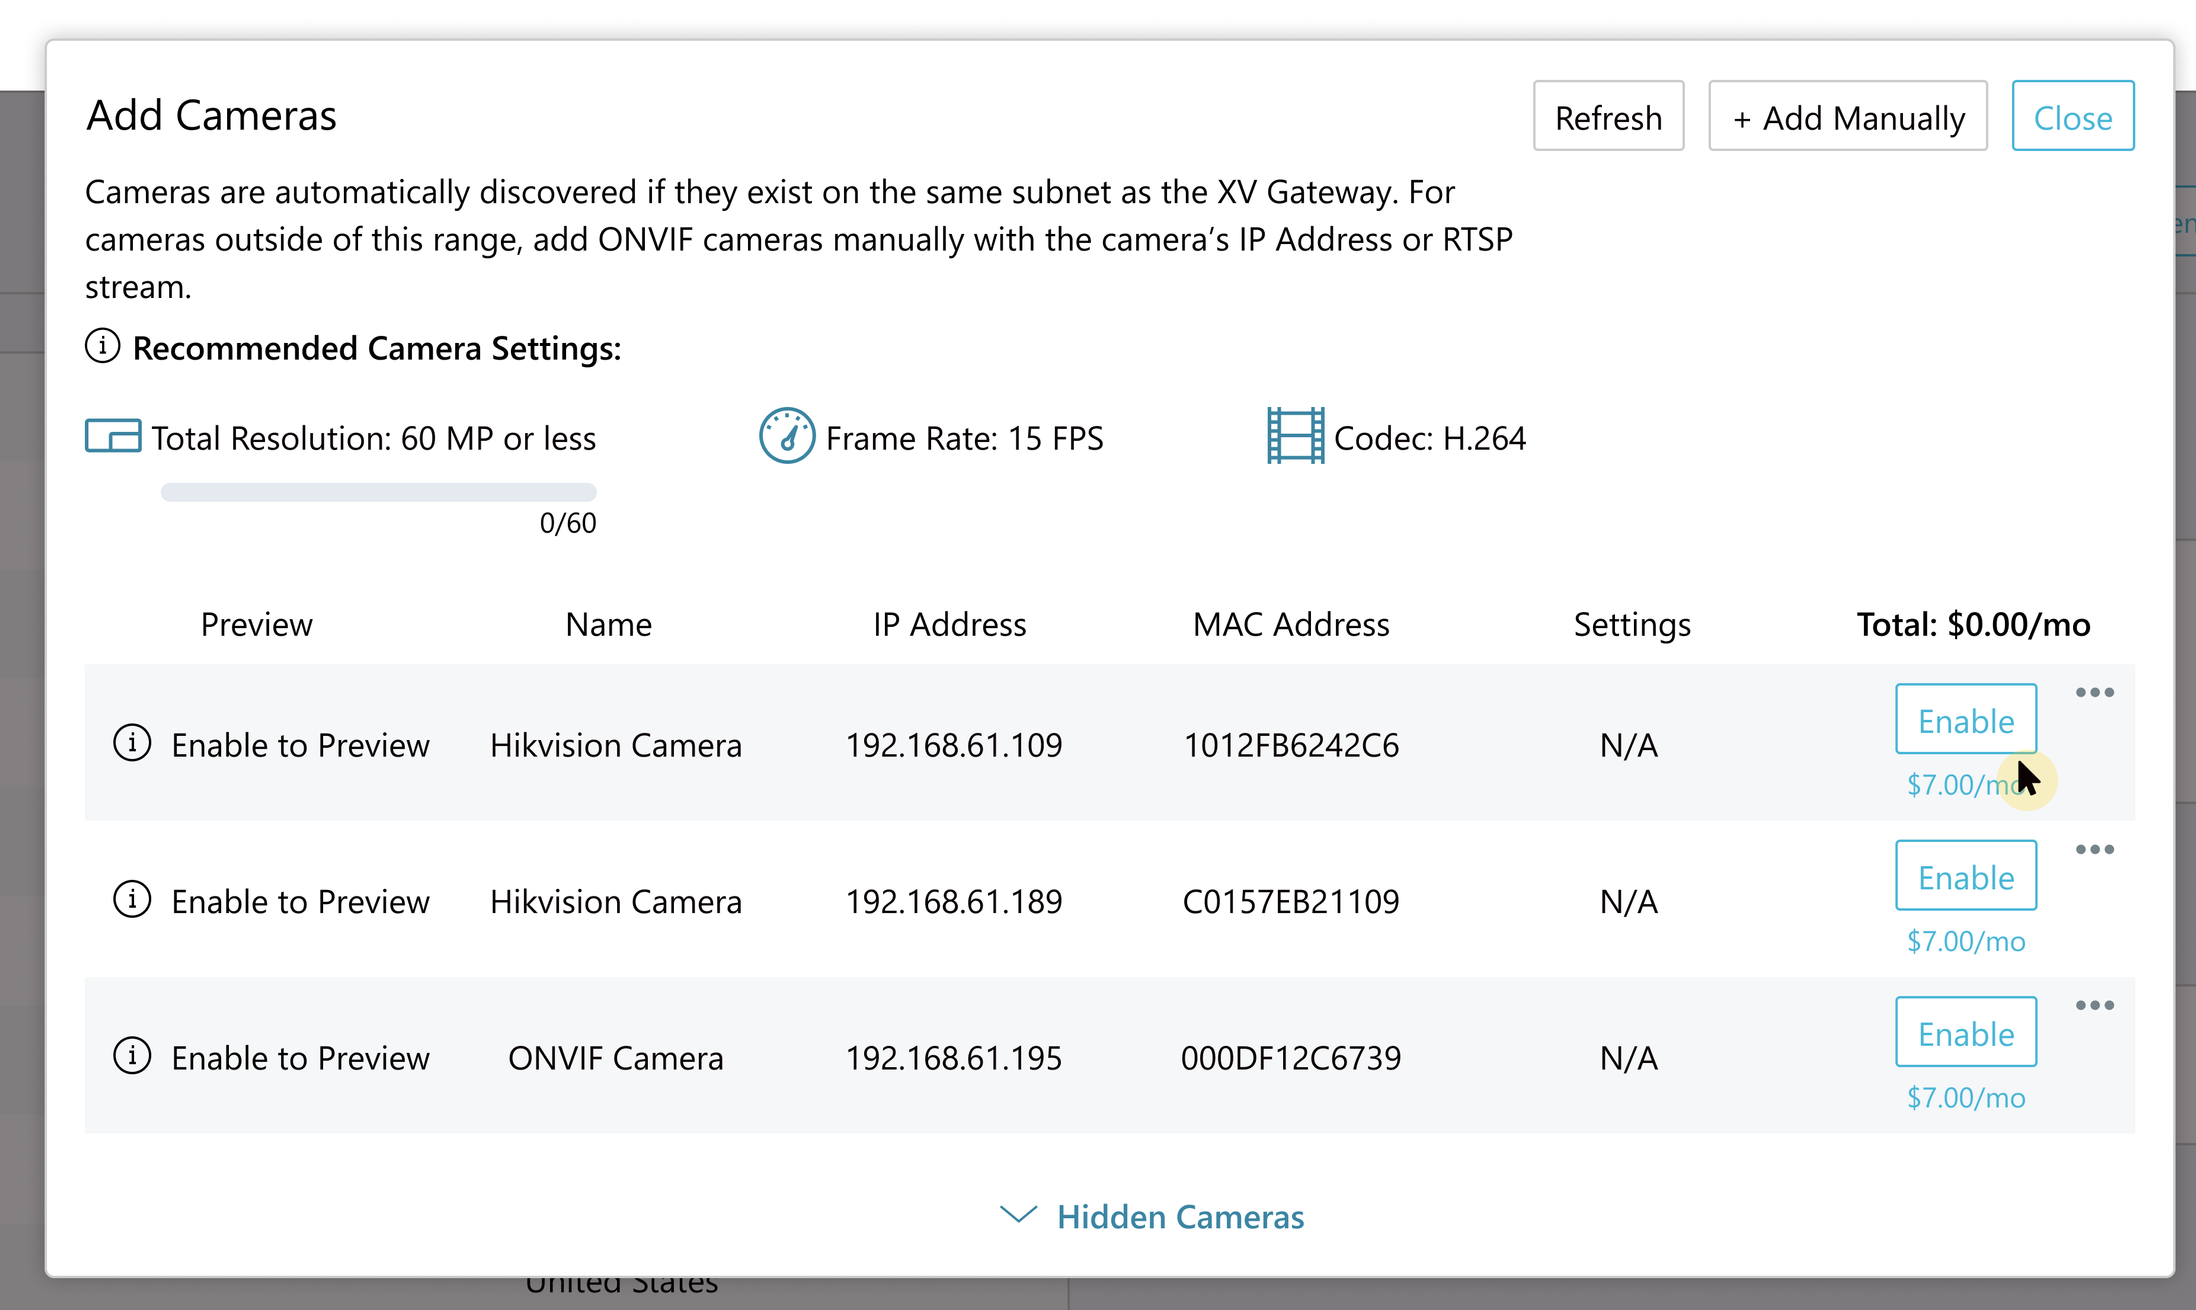
Enable Camera
The camera view displays a preview of the field of view. Click Close.
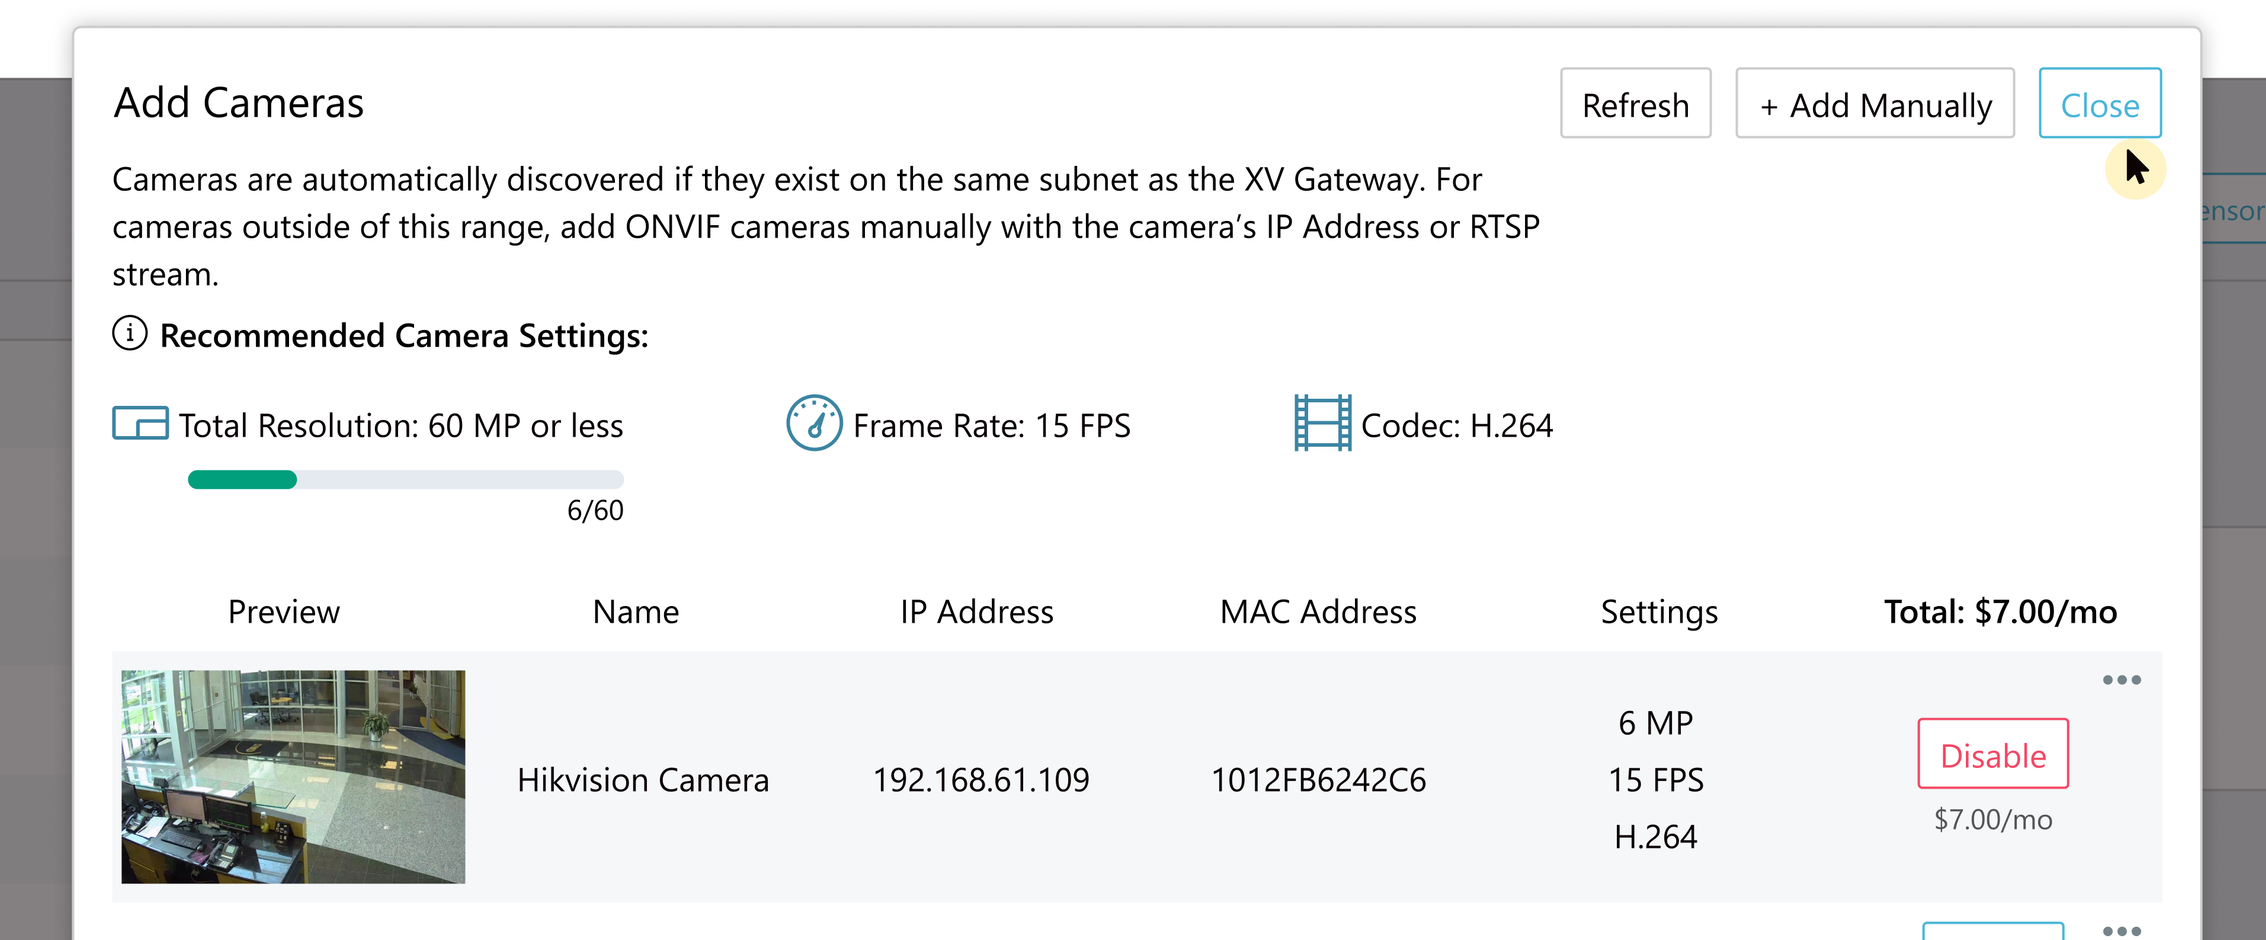
Close Enabled Cameras
Manually Added Cameras
Cameras that are not connected to the same subnet as the XV Gateway need to be manually added. To manually add a camera, click + Add Manually.
Select Add Manually
Select ONVIF or RSTP Stream from the drop-down menu and enter the corresponding information. Then, click Add.

Select Manual Connection Type and Add Camera
Once you have added the camera to the XV Gateway, click Close.
Close the Add Cameras Window
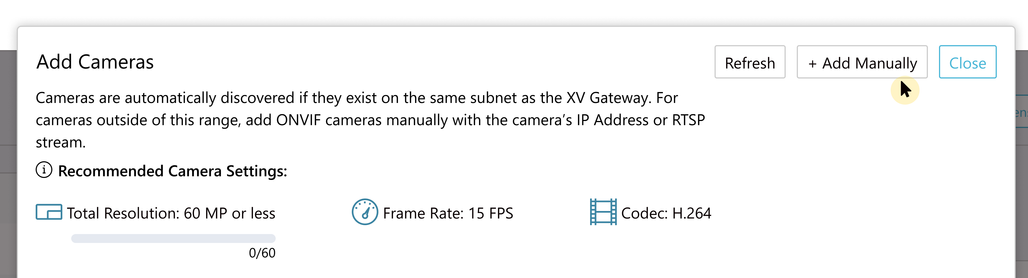
For optimal performance, DMP recommends that the total resolution of the added cameras not exceed the XV Gateway model limit (ex. XV-24 should not exceed 24 MP). All cameras should have a frame rate of 15 FPS or less and a codec:H.264. Performance may vary based on number of cameras, framerate, codec, and motion detection.
Edit a Camera
Select the camera from the XV Gateway with AlarmVision® section.
Select Camera
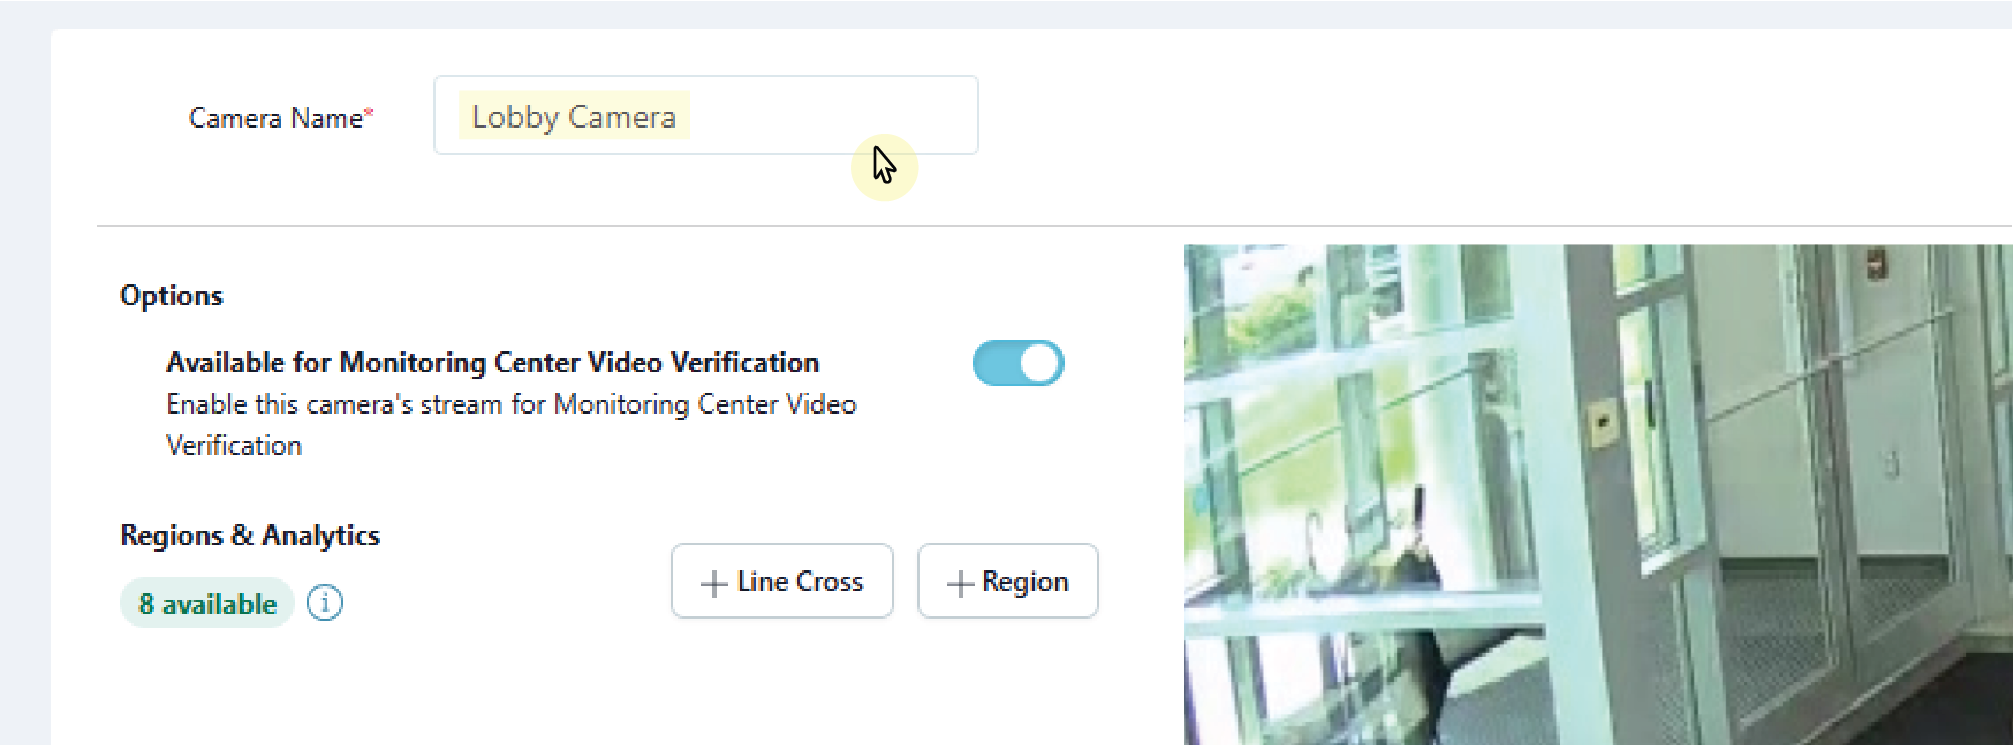
Enter a name for the camera.
Enter a Name
Select Camera Details in the top right corner to view the following camera information:
Camera Status
Camera Name
MAC Address
IP Address
Resolution
Username
Password
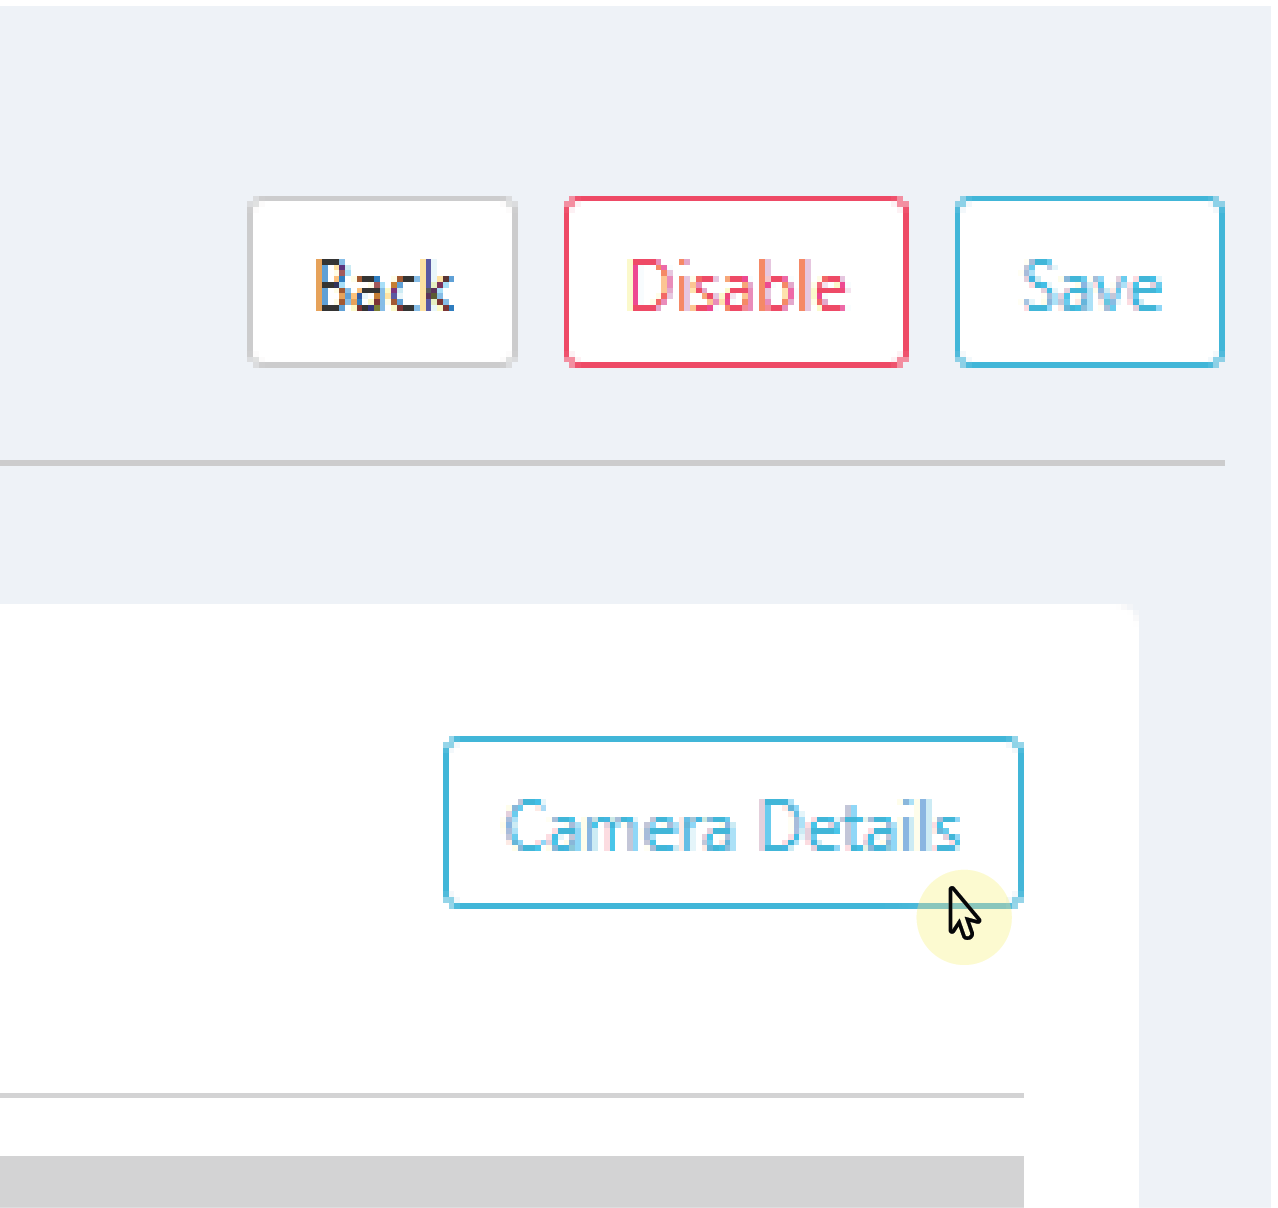
Select Camera Details

Camera Details Pop-up
In Options, enable camera feed for Monitoring Center Video Verification (if already enabled for the system).
Note: To enable Monitoring Center Video Verification for your system, go to Customers and select the System Name. In System Information, select Edit at the top of the screen. Scroll down to Video, and select the checkbox next to Monitoring Center Video Verification to enable this feature. Select Save at the top of the screen.
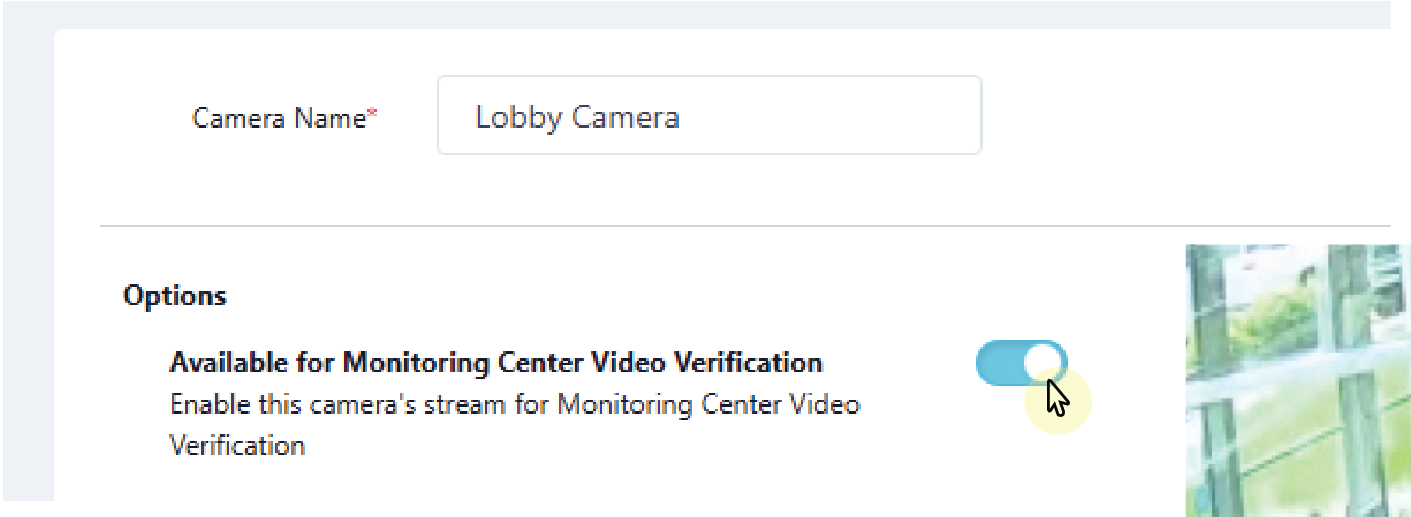
Enable Monitoring Center Video Verification
Select Save in the top right corner to apply any edits to the camera.
Note: Clicking Save exits the Edit Camera page.
Refer to Configure Detection Regions below to configure the camera before exiting the page.
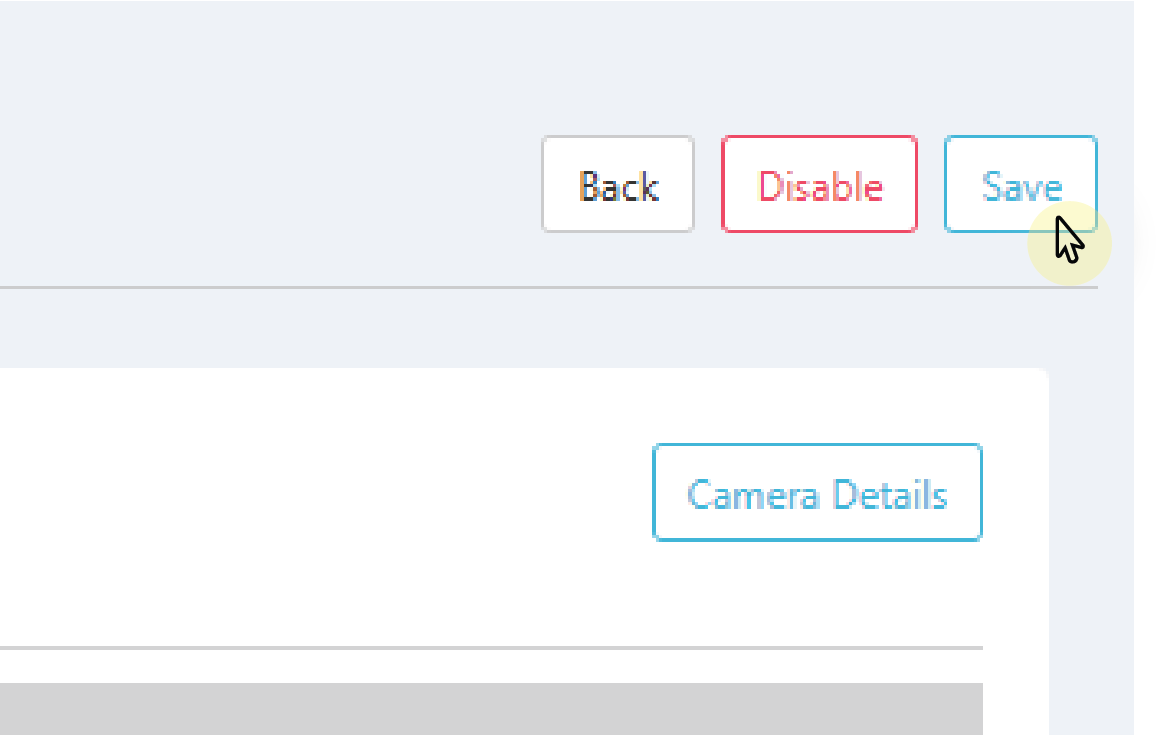
Select Save
Regions & Analytics Settings
If your camera has Regions & Analytics settings, you can add up to four regions and four lines. Regions and lines allow your camera to detect motion. If your camera does not have at least one region or line set up, it will not detect motion. You can also add analytics to your camera.
Regions are sections of an area where cameras detect motion. Motion that occurs outside a region is not detected. For example, a region covering the doorway to a room only detects motion in the doorway.
Lines are sections of a room where motion has to cross for the camera to detect motion. For example, a line at the doorway detects motion if someone crosses the line at the doorway.
Analytics allow your camera to detect people, detect animals, and detect vehicles. When analytics are enabled, your camera records a 30-second clip on motion. The clip is stored in Events with information about what was detected, when, and where.
Create a Region
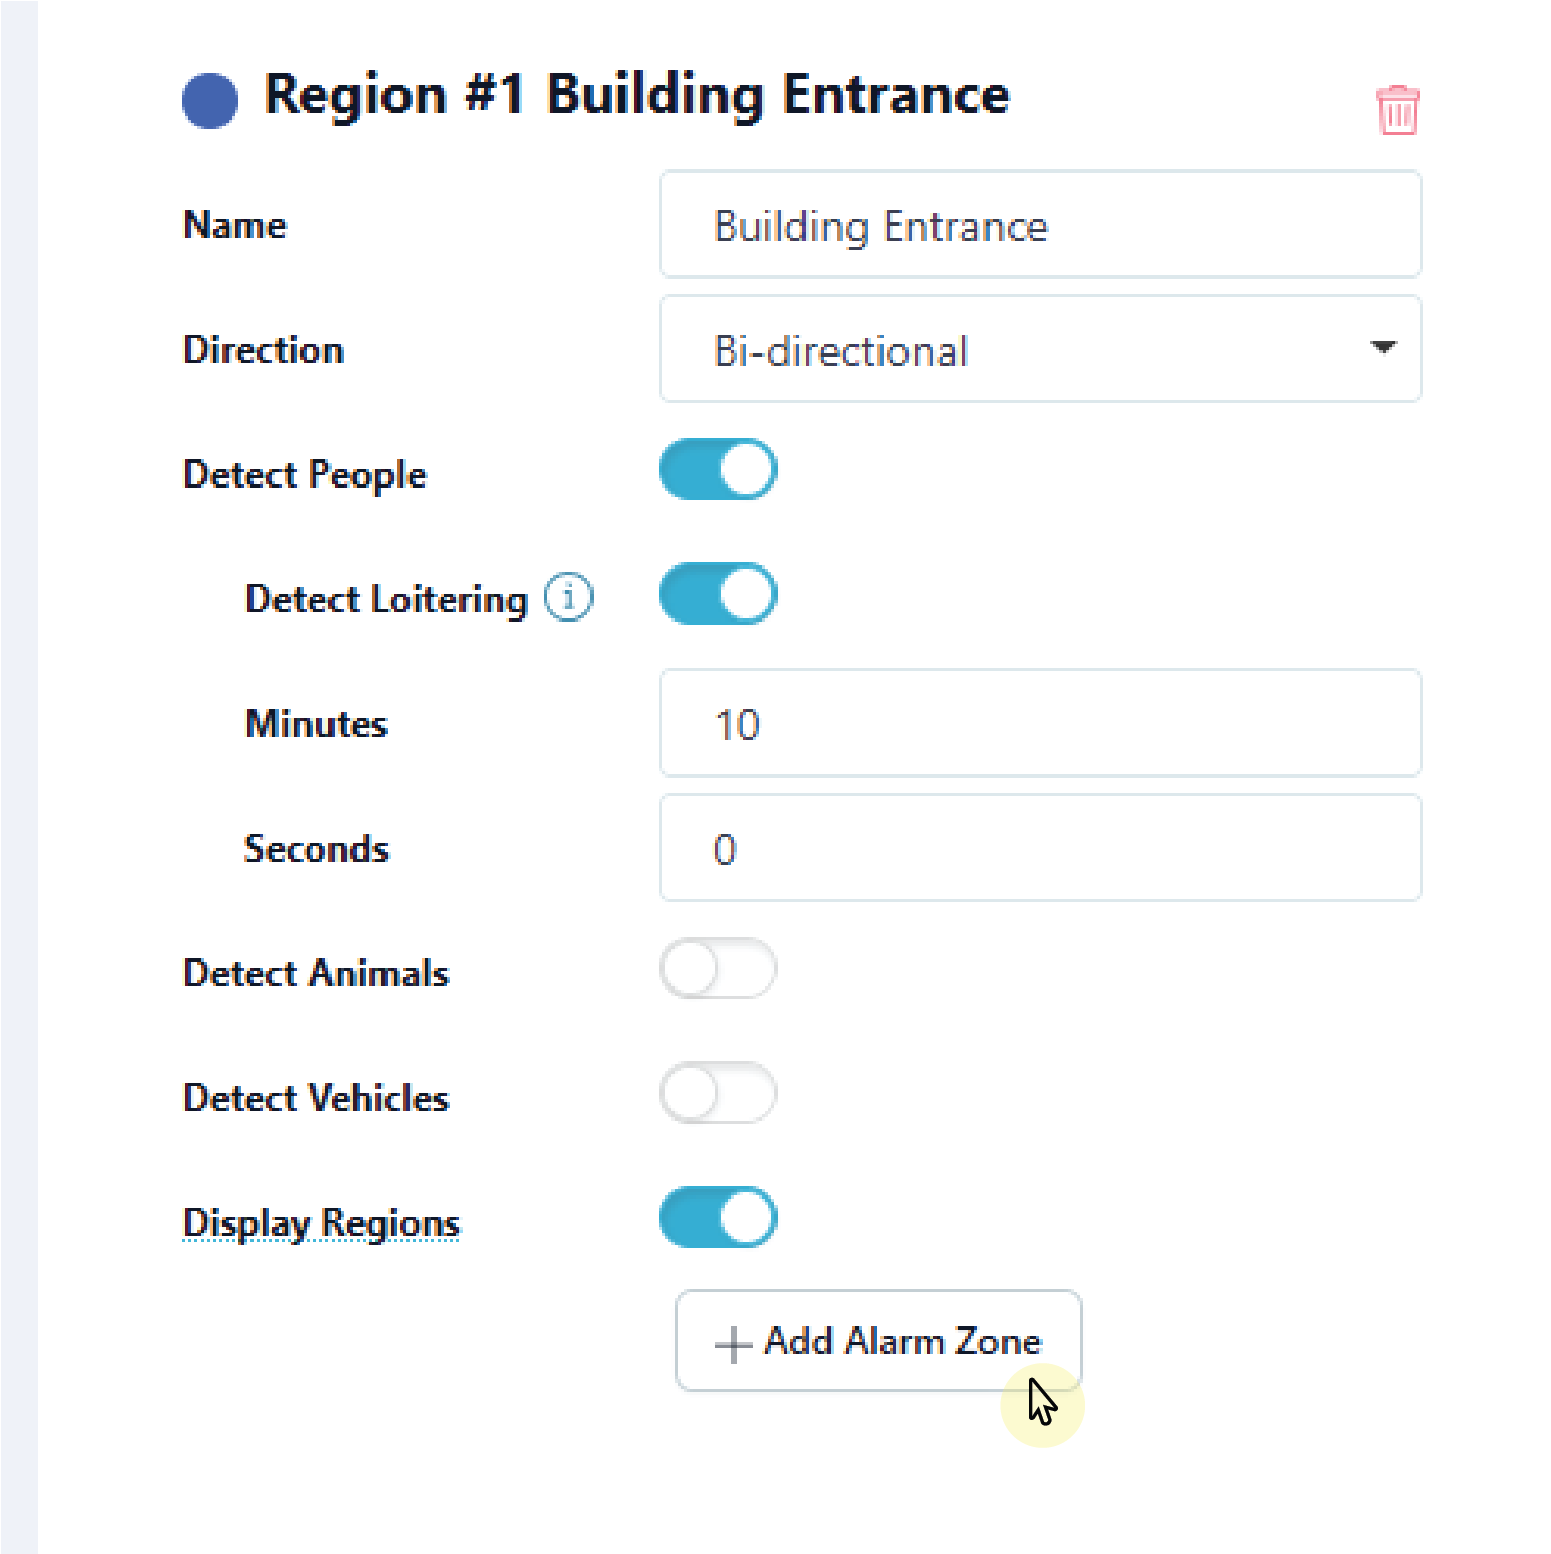
On the Edit Camera page, scroll down to Regions & Analytics and click + Region. A box appears in the middle of the camera view screen.
Click and drag the box on the camera’s field of view to define the desired detection region. The white circles on the corners can be used to manipulate the region by clicking and dragging them. You may also select anywhere on a line and a white circle appears that allows the manipulation of the detection region.
Give the region a Name.
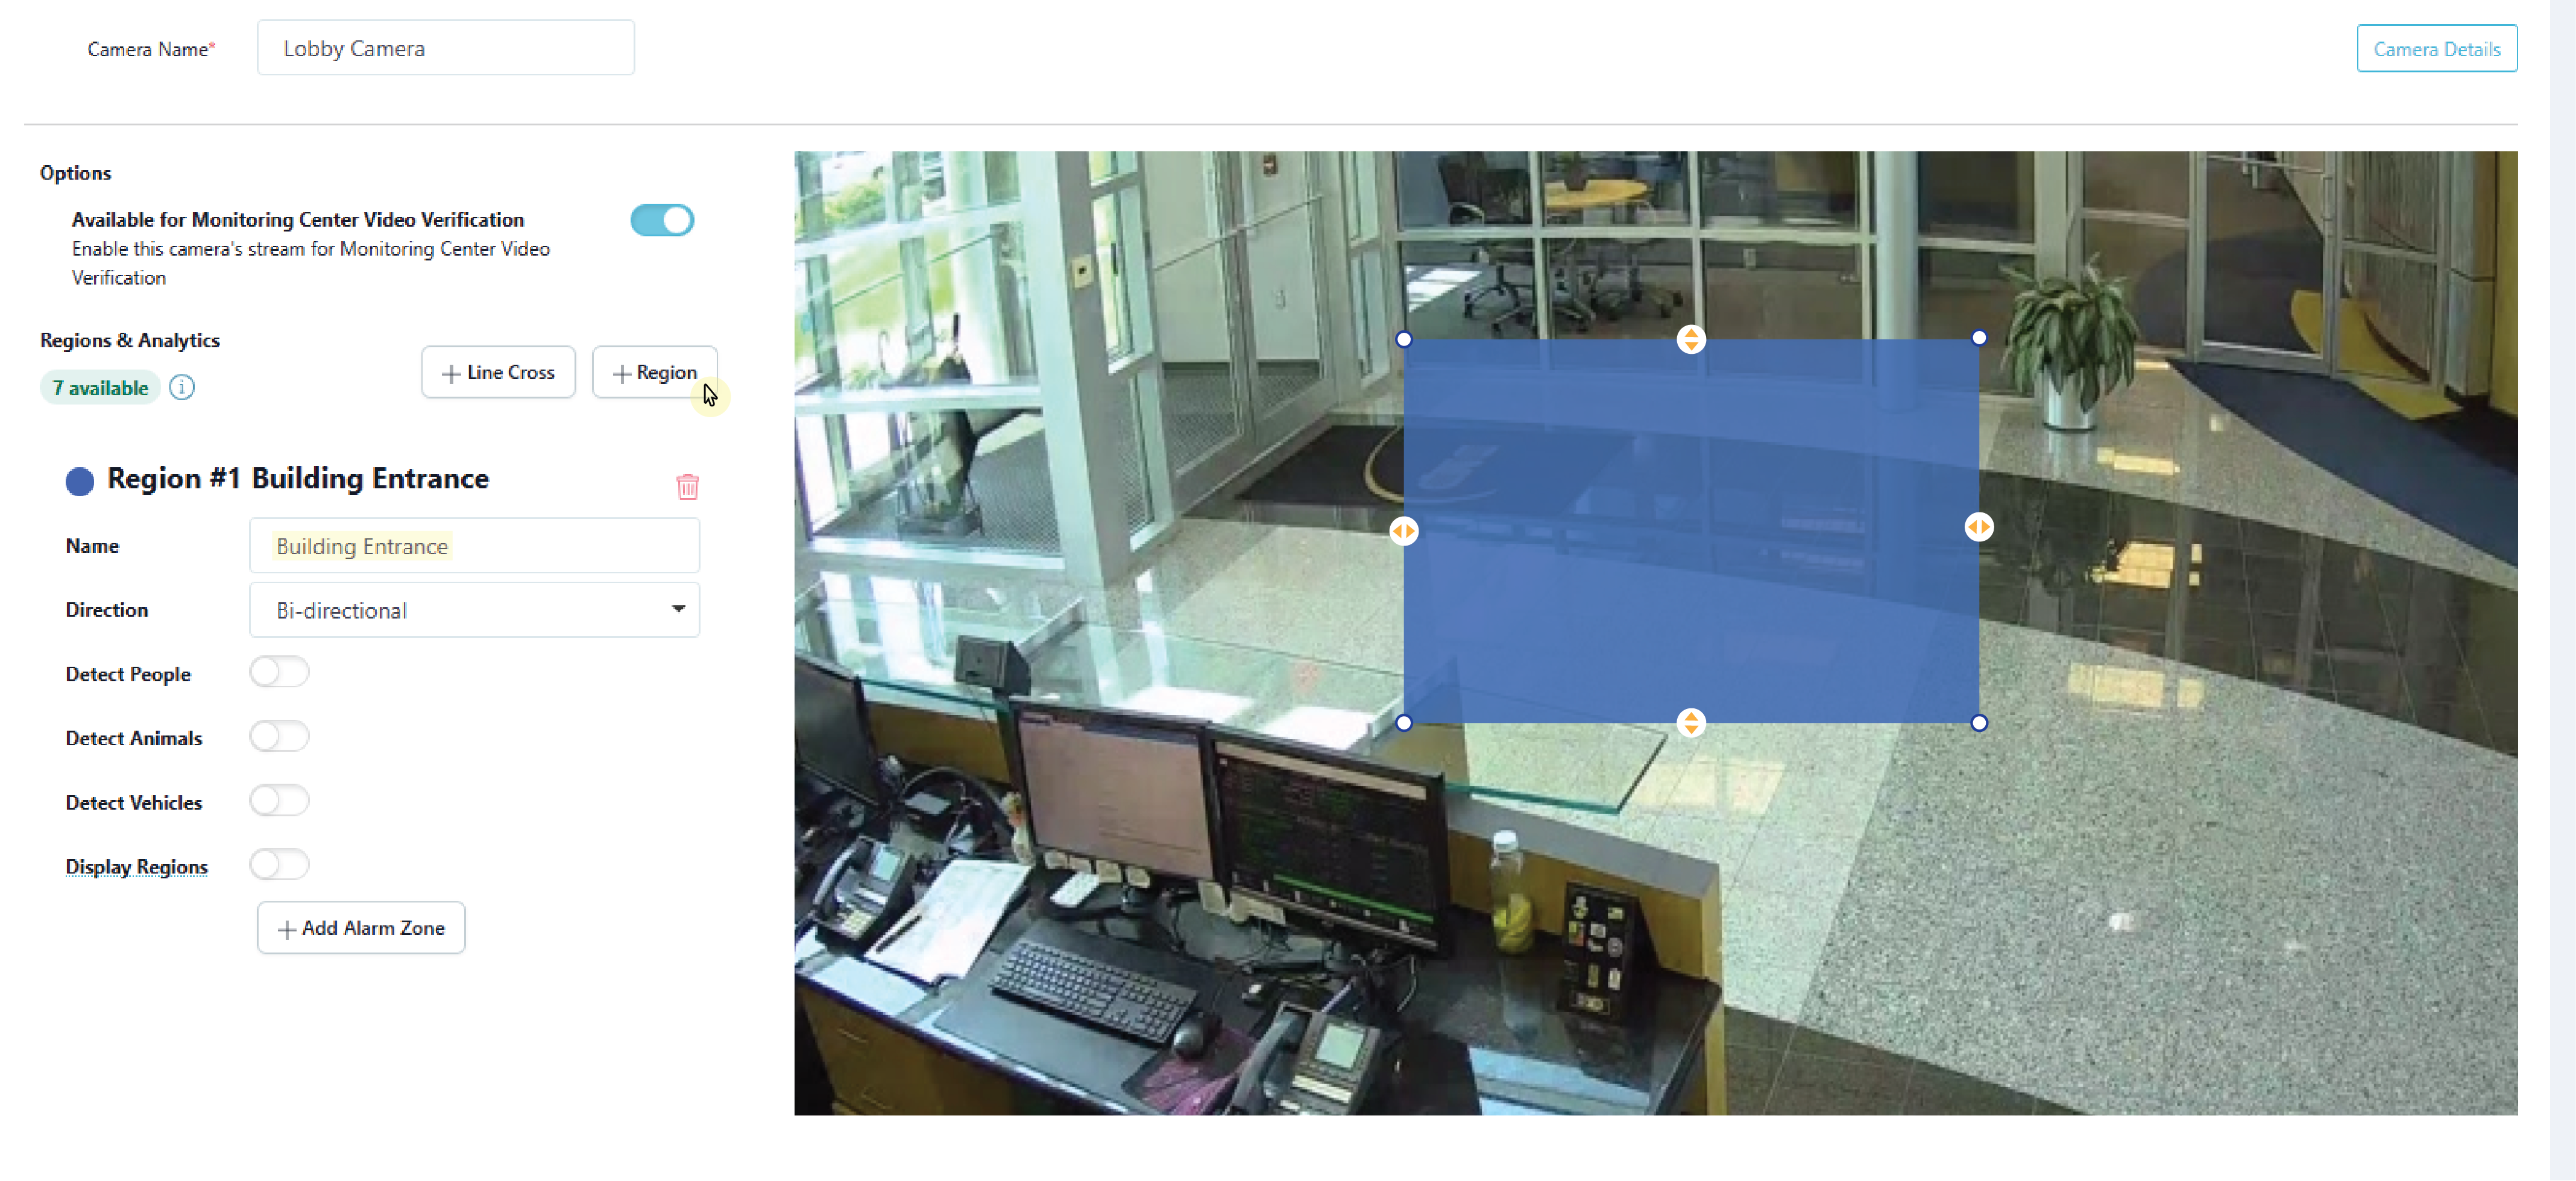
Create a Region
In the drop-down menu, select one of the following directions you want to monitor if a person, animal, or vehicle moves in a direction that is a part of a programmed region:
Enter—Motion has to cross into the detected region, following the arrows pointing inward.
Exit—Motion has to cross out of the detected region, following the arrows pointing outward.
Bi-Directional—Motion can cross the box in any direction.
.png?inst-v=f8eb00df-9986-4c22-ae50-47e65575f989)
Select a Direction
Select whether you want the region to detect People, Animals, Vehicles, or any combination of the three.
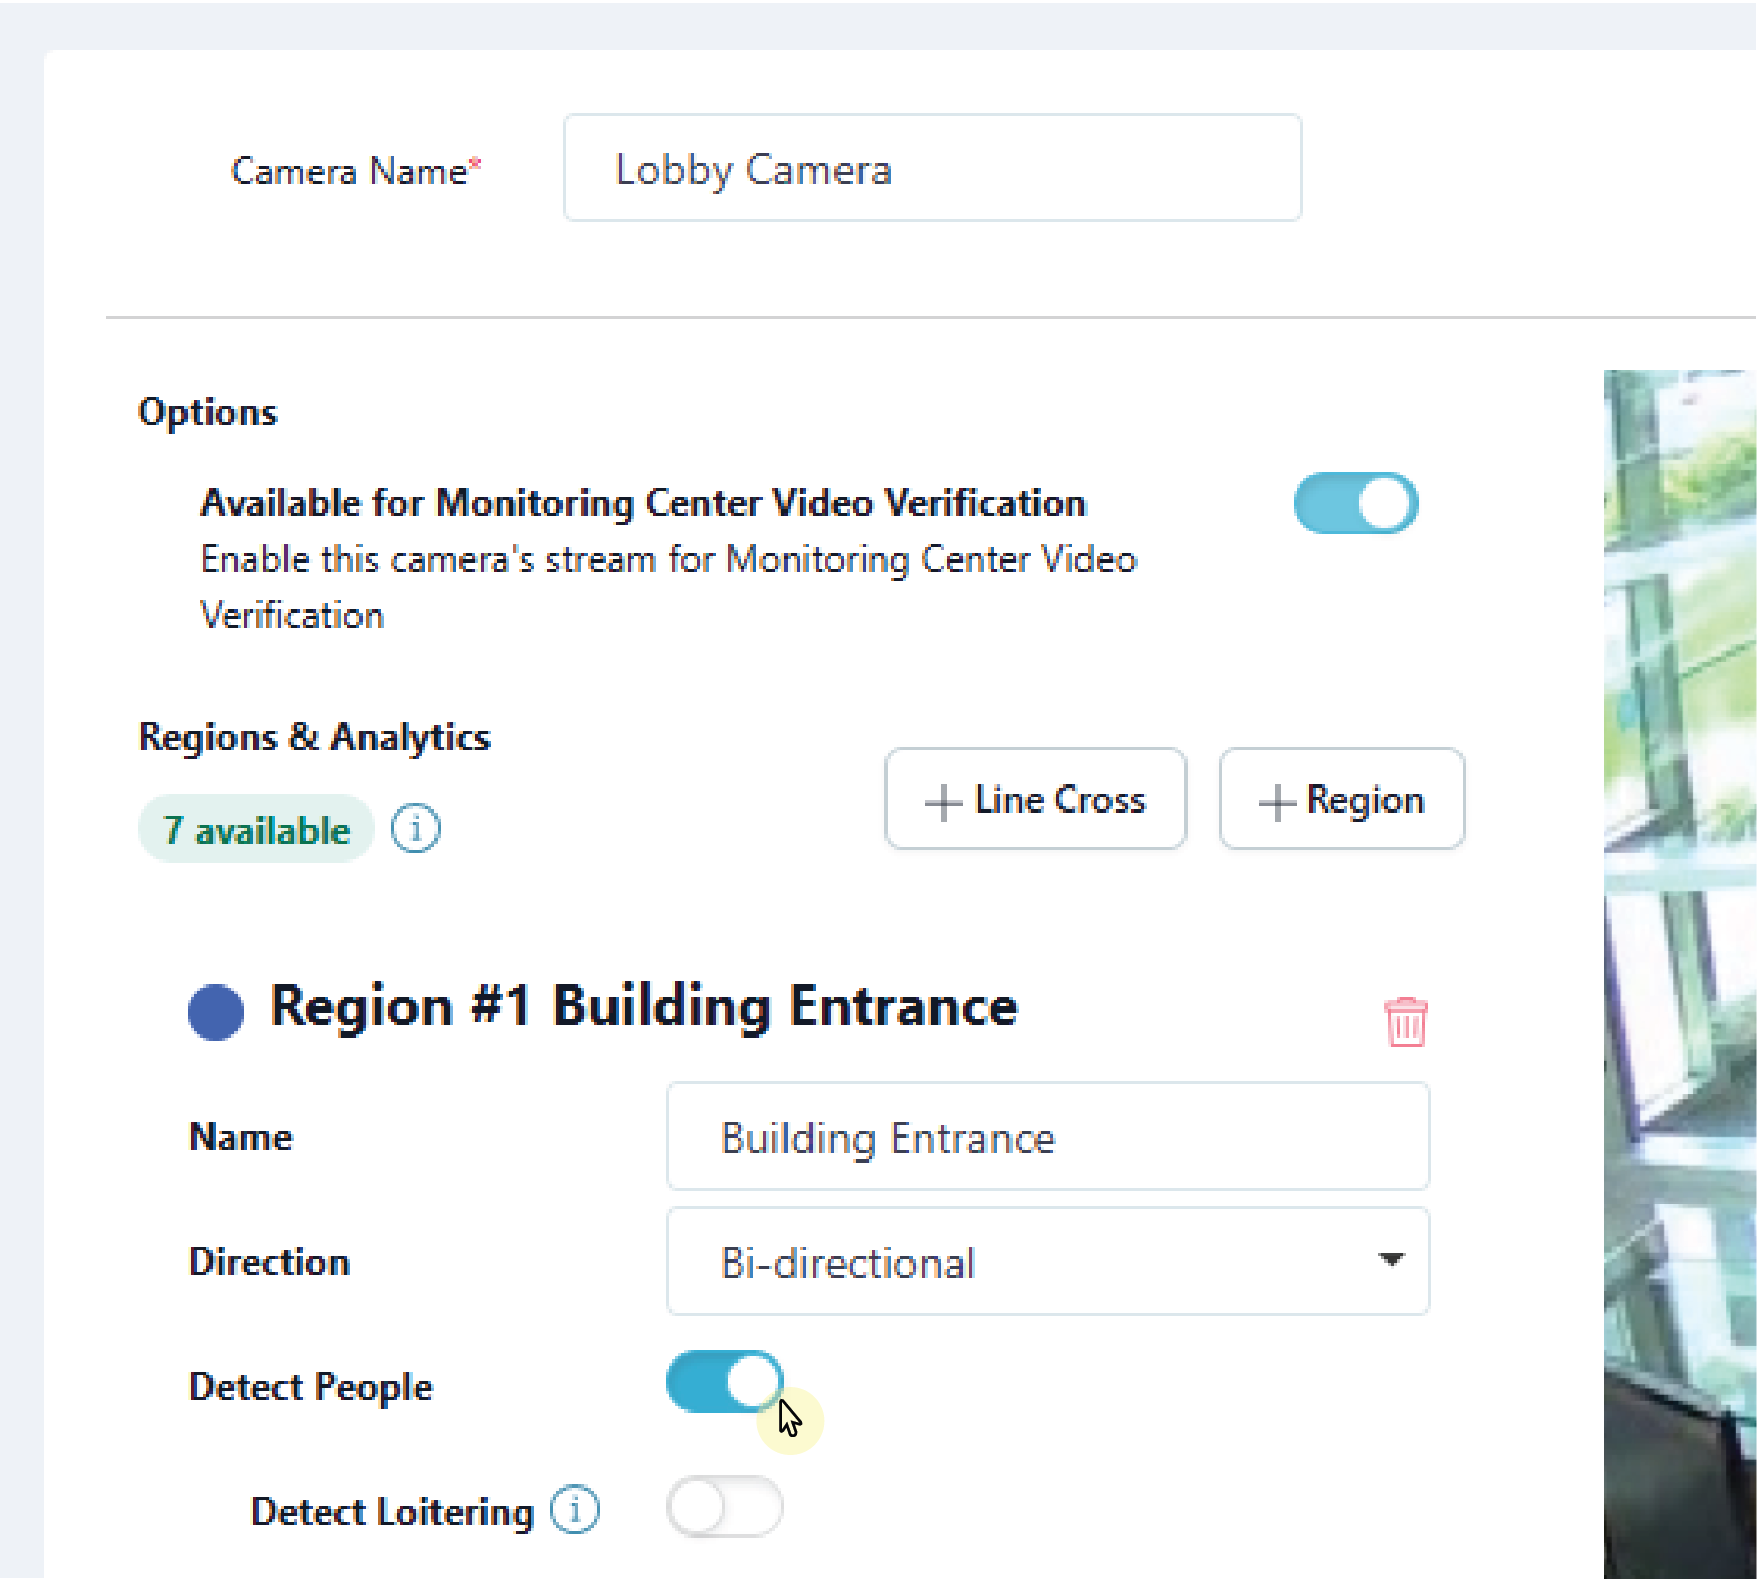
Detect People, Animals, or Vehicles
Select whether you want the region to detect Loitering for people or vehicles and enter a value into the supported time fields to dictate the amount of time required before the loitering alert is triggered.
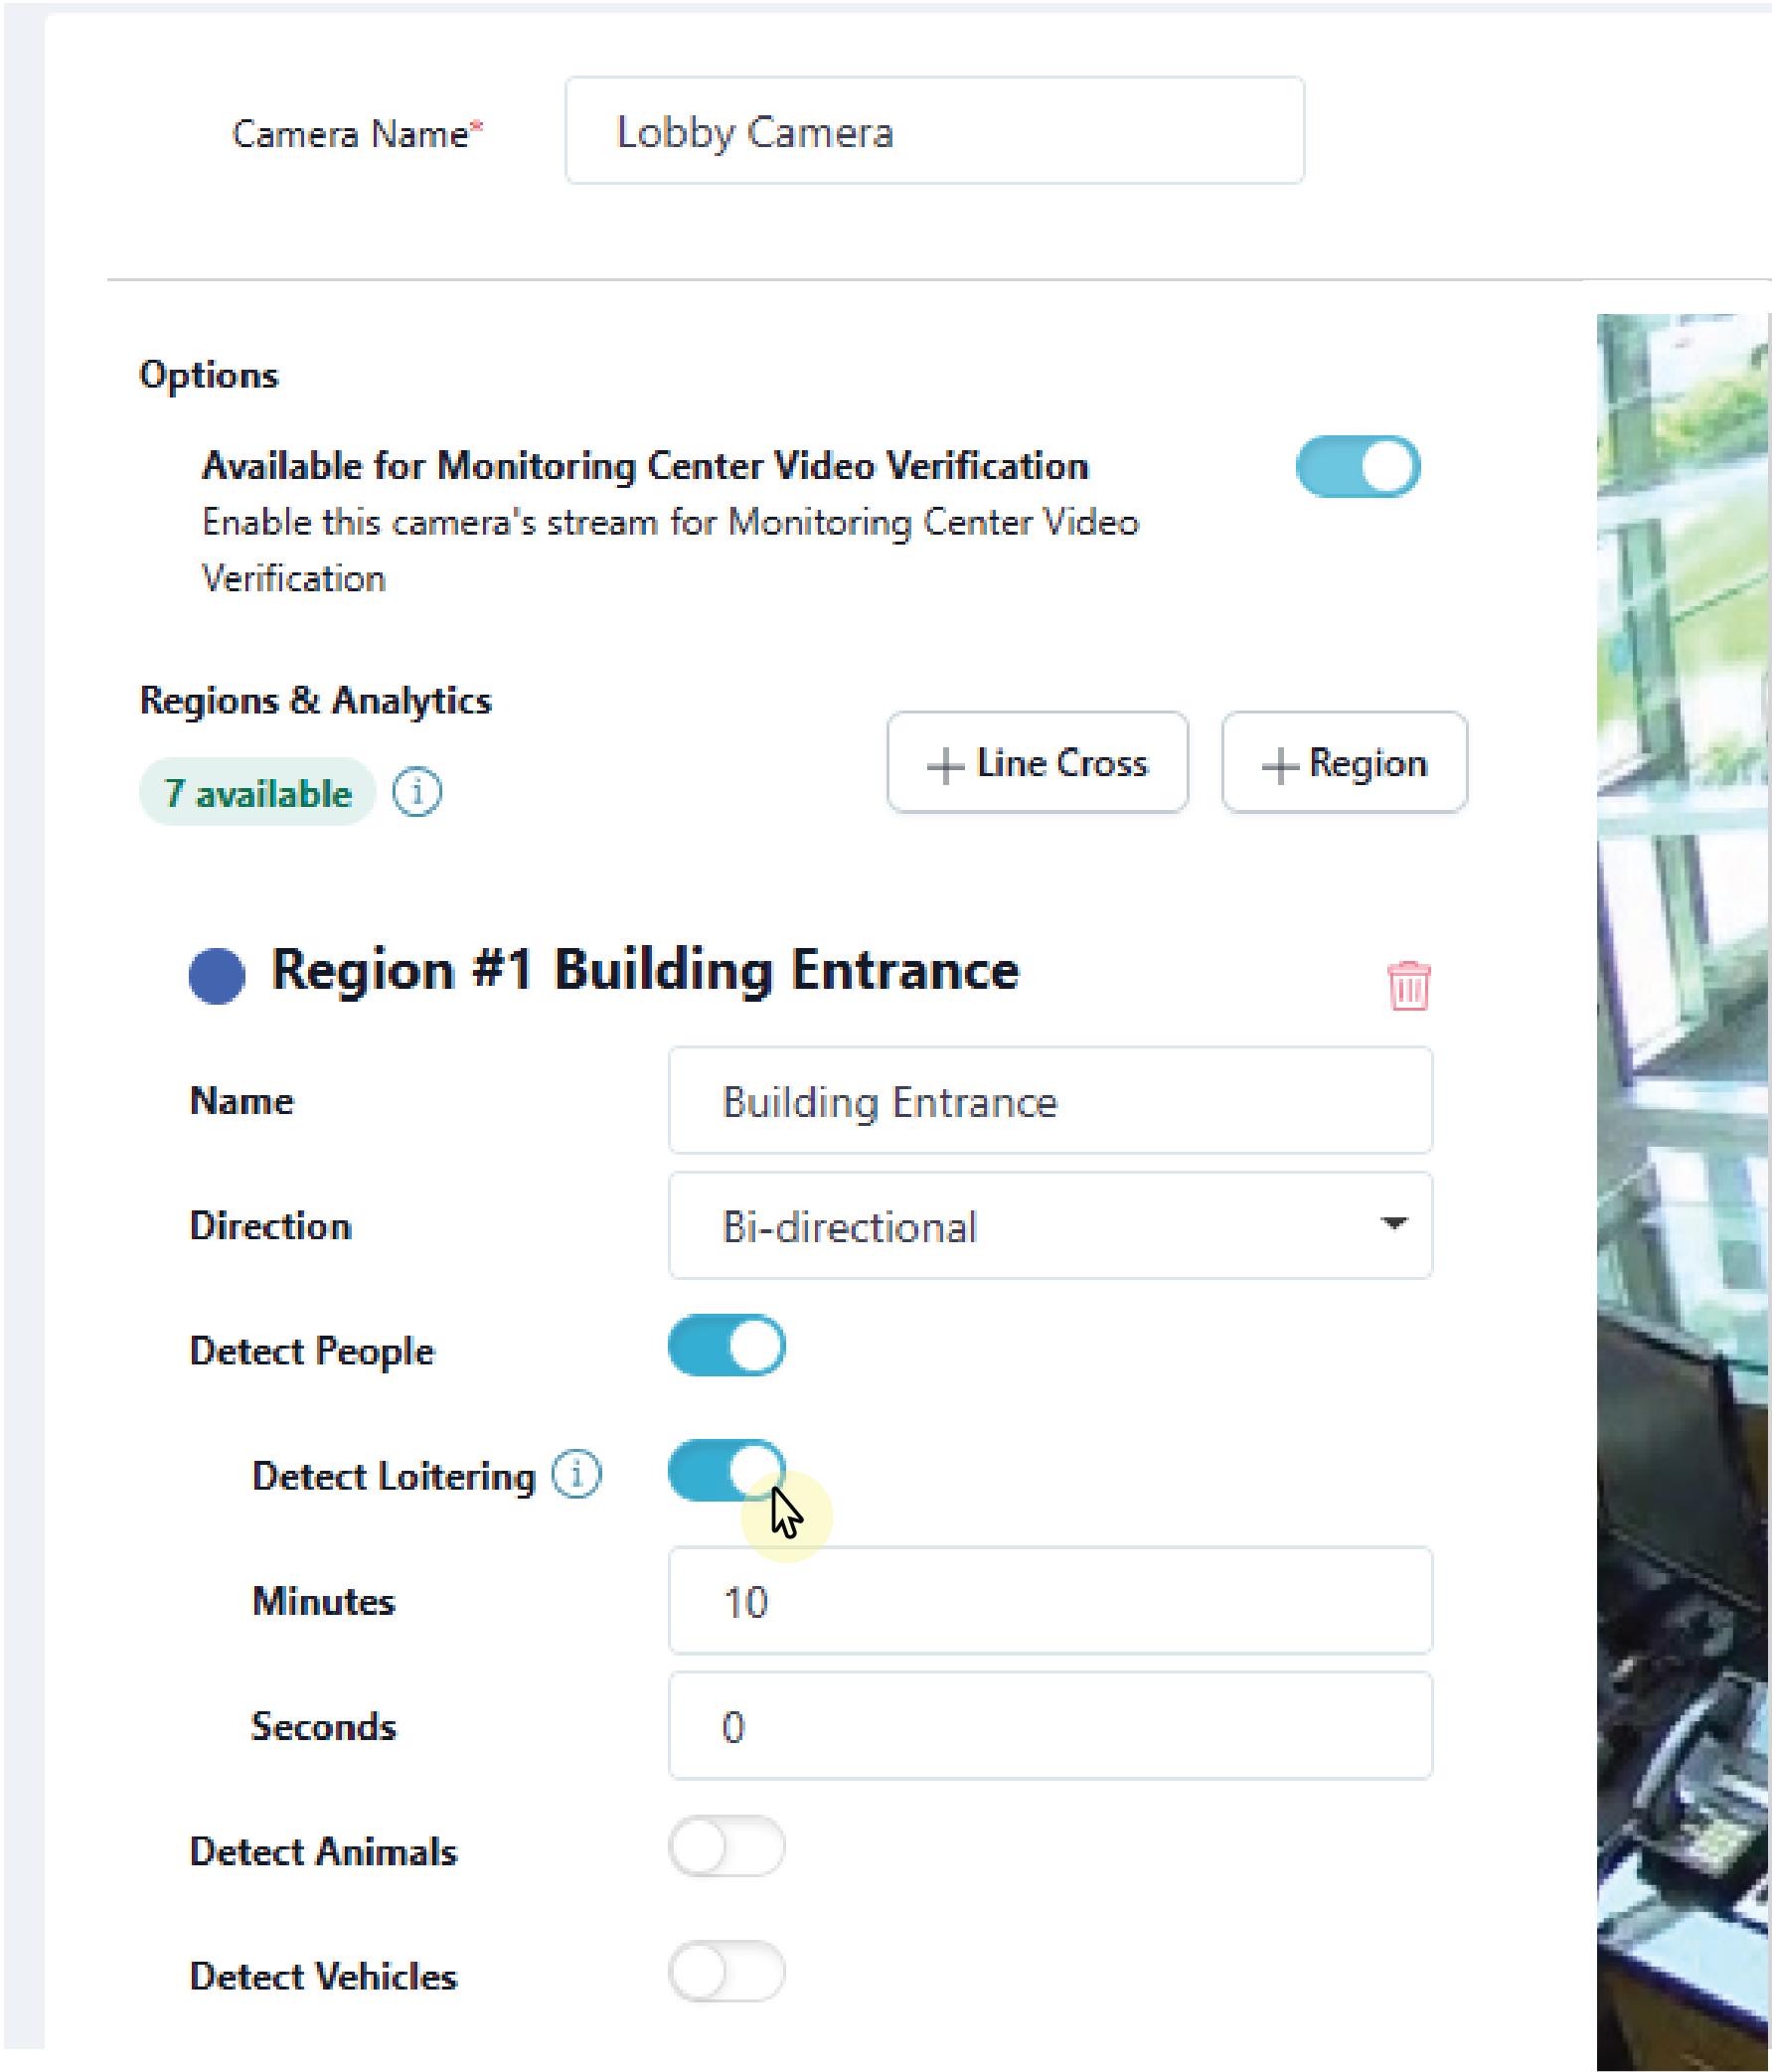
Select Loitering
Select Display Regions if you want the configured detection regions to show up on event previews in Virtual Keypad.
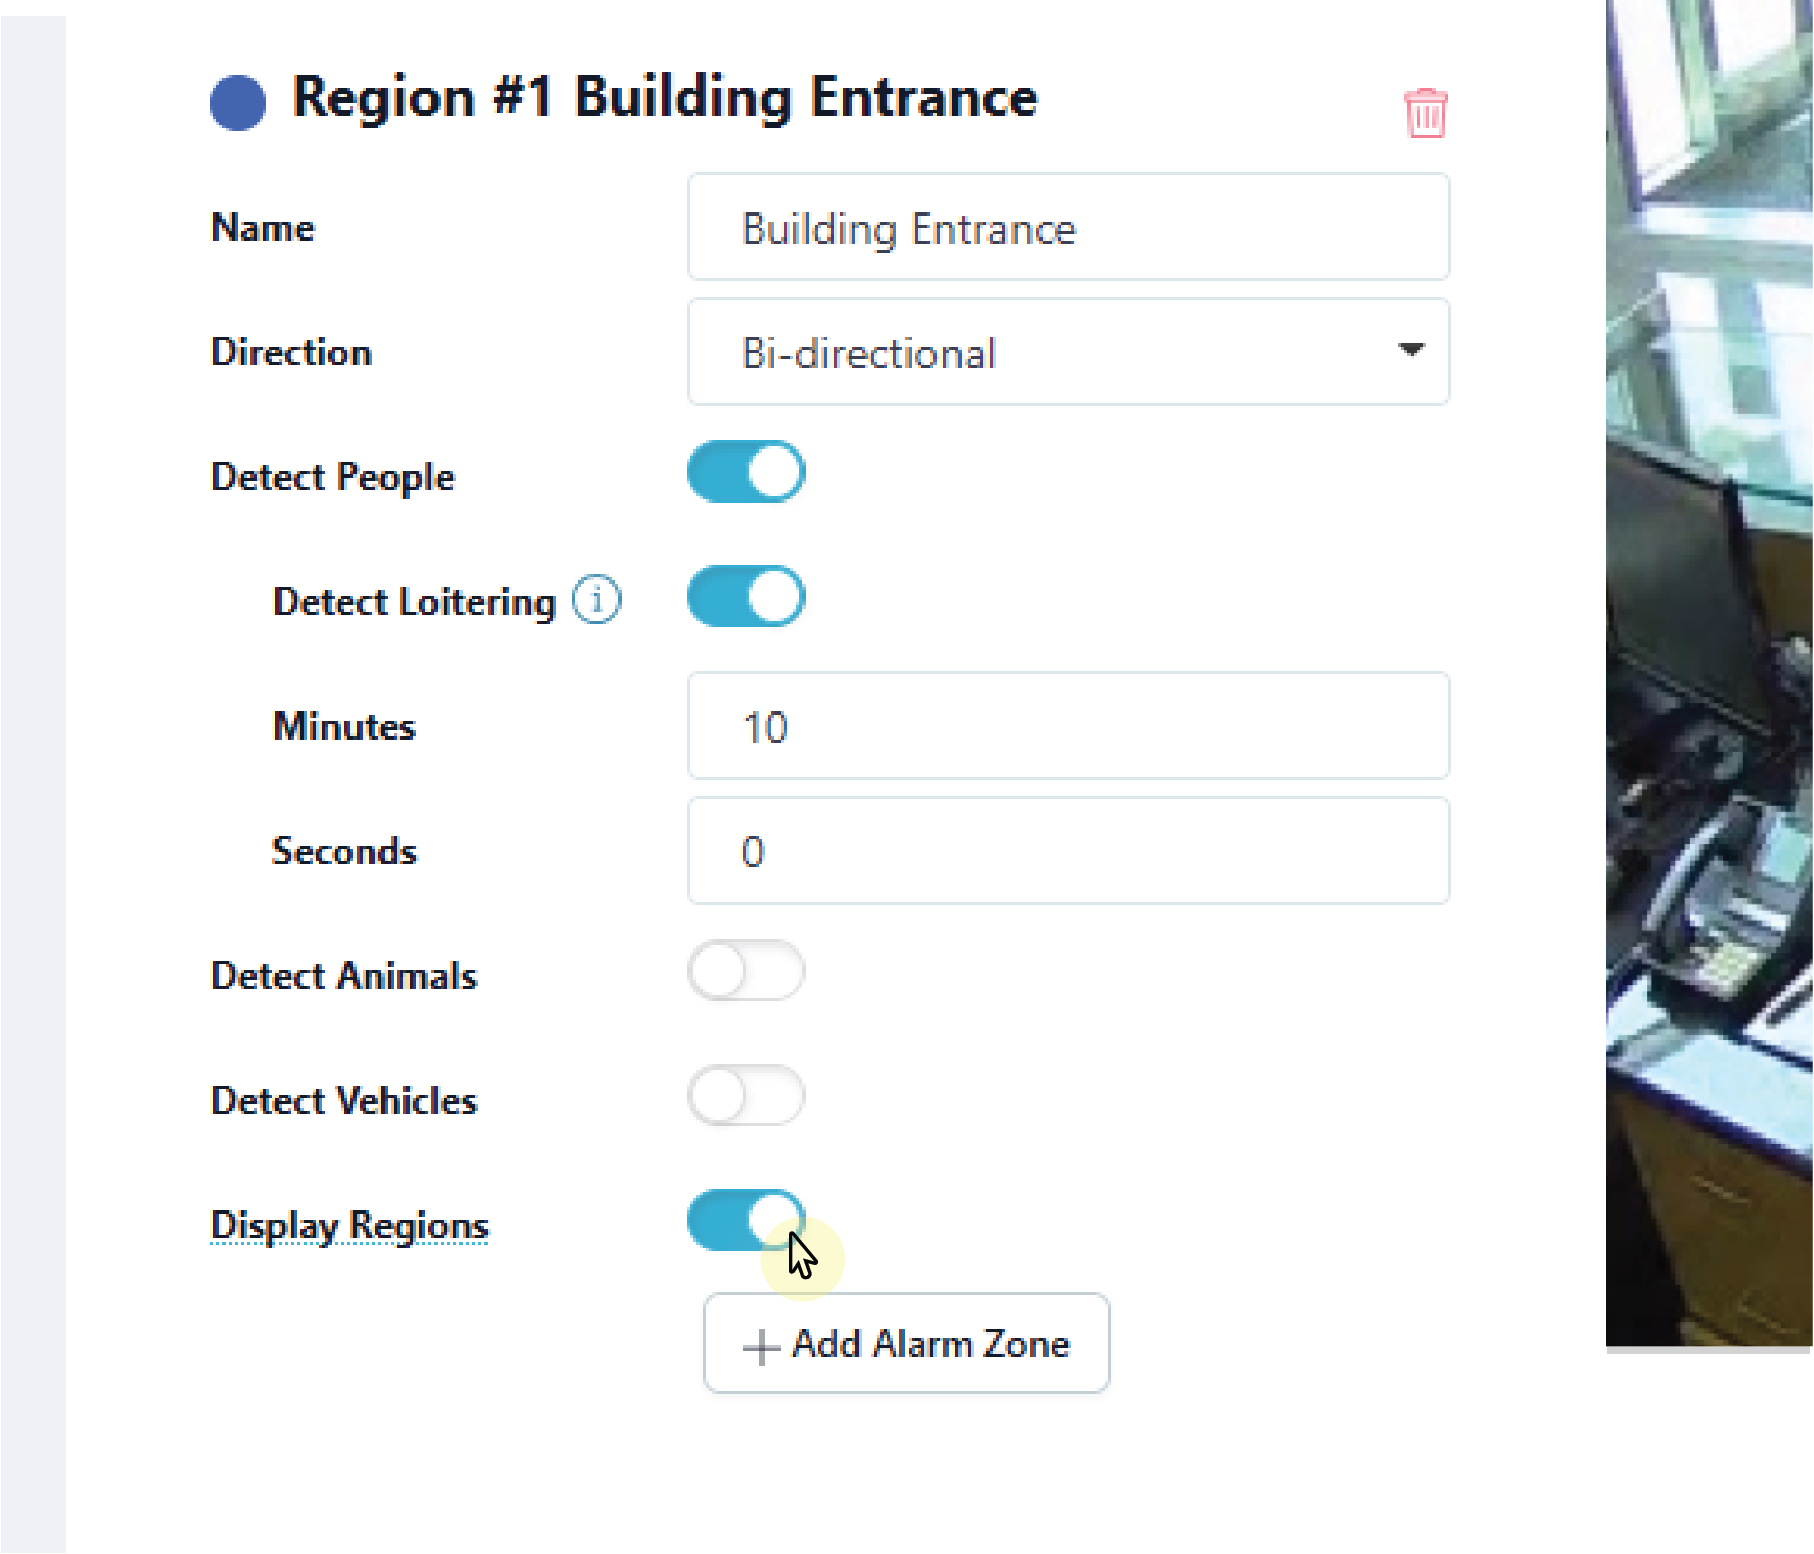
Enable Display Regions
To add additional regions, repeat steps 1-6. Click Save to apply changes and exit the Edit Camera page. This saves the detection regions and any camera adjustments made previously.
Select Save
Create a Line
In Regions & Analytics, click + Line Cross. A line appears in the middle of the camera view screen. Click and drag the line on the camera’s field of view to define the desired detection line. Then, give the line a name.
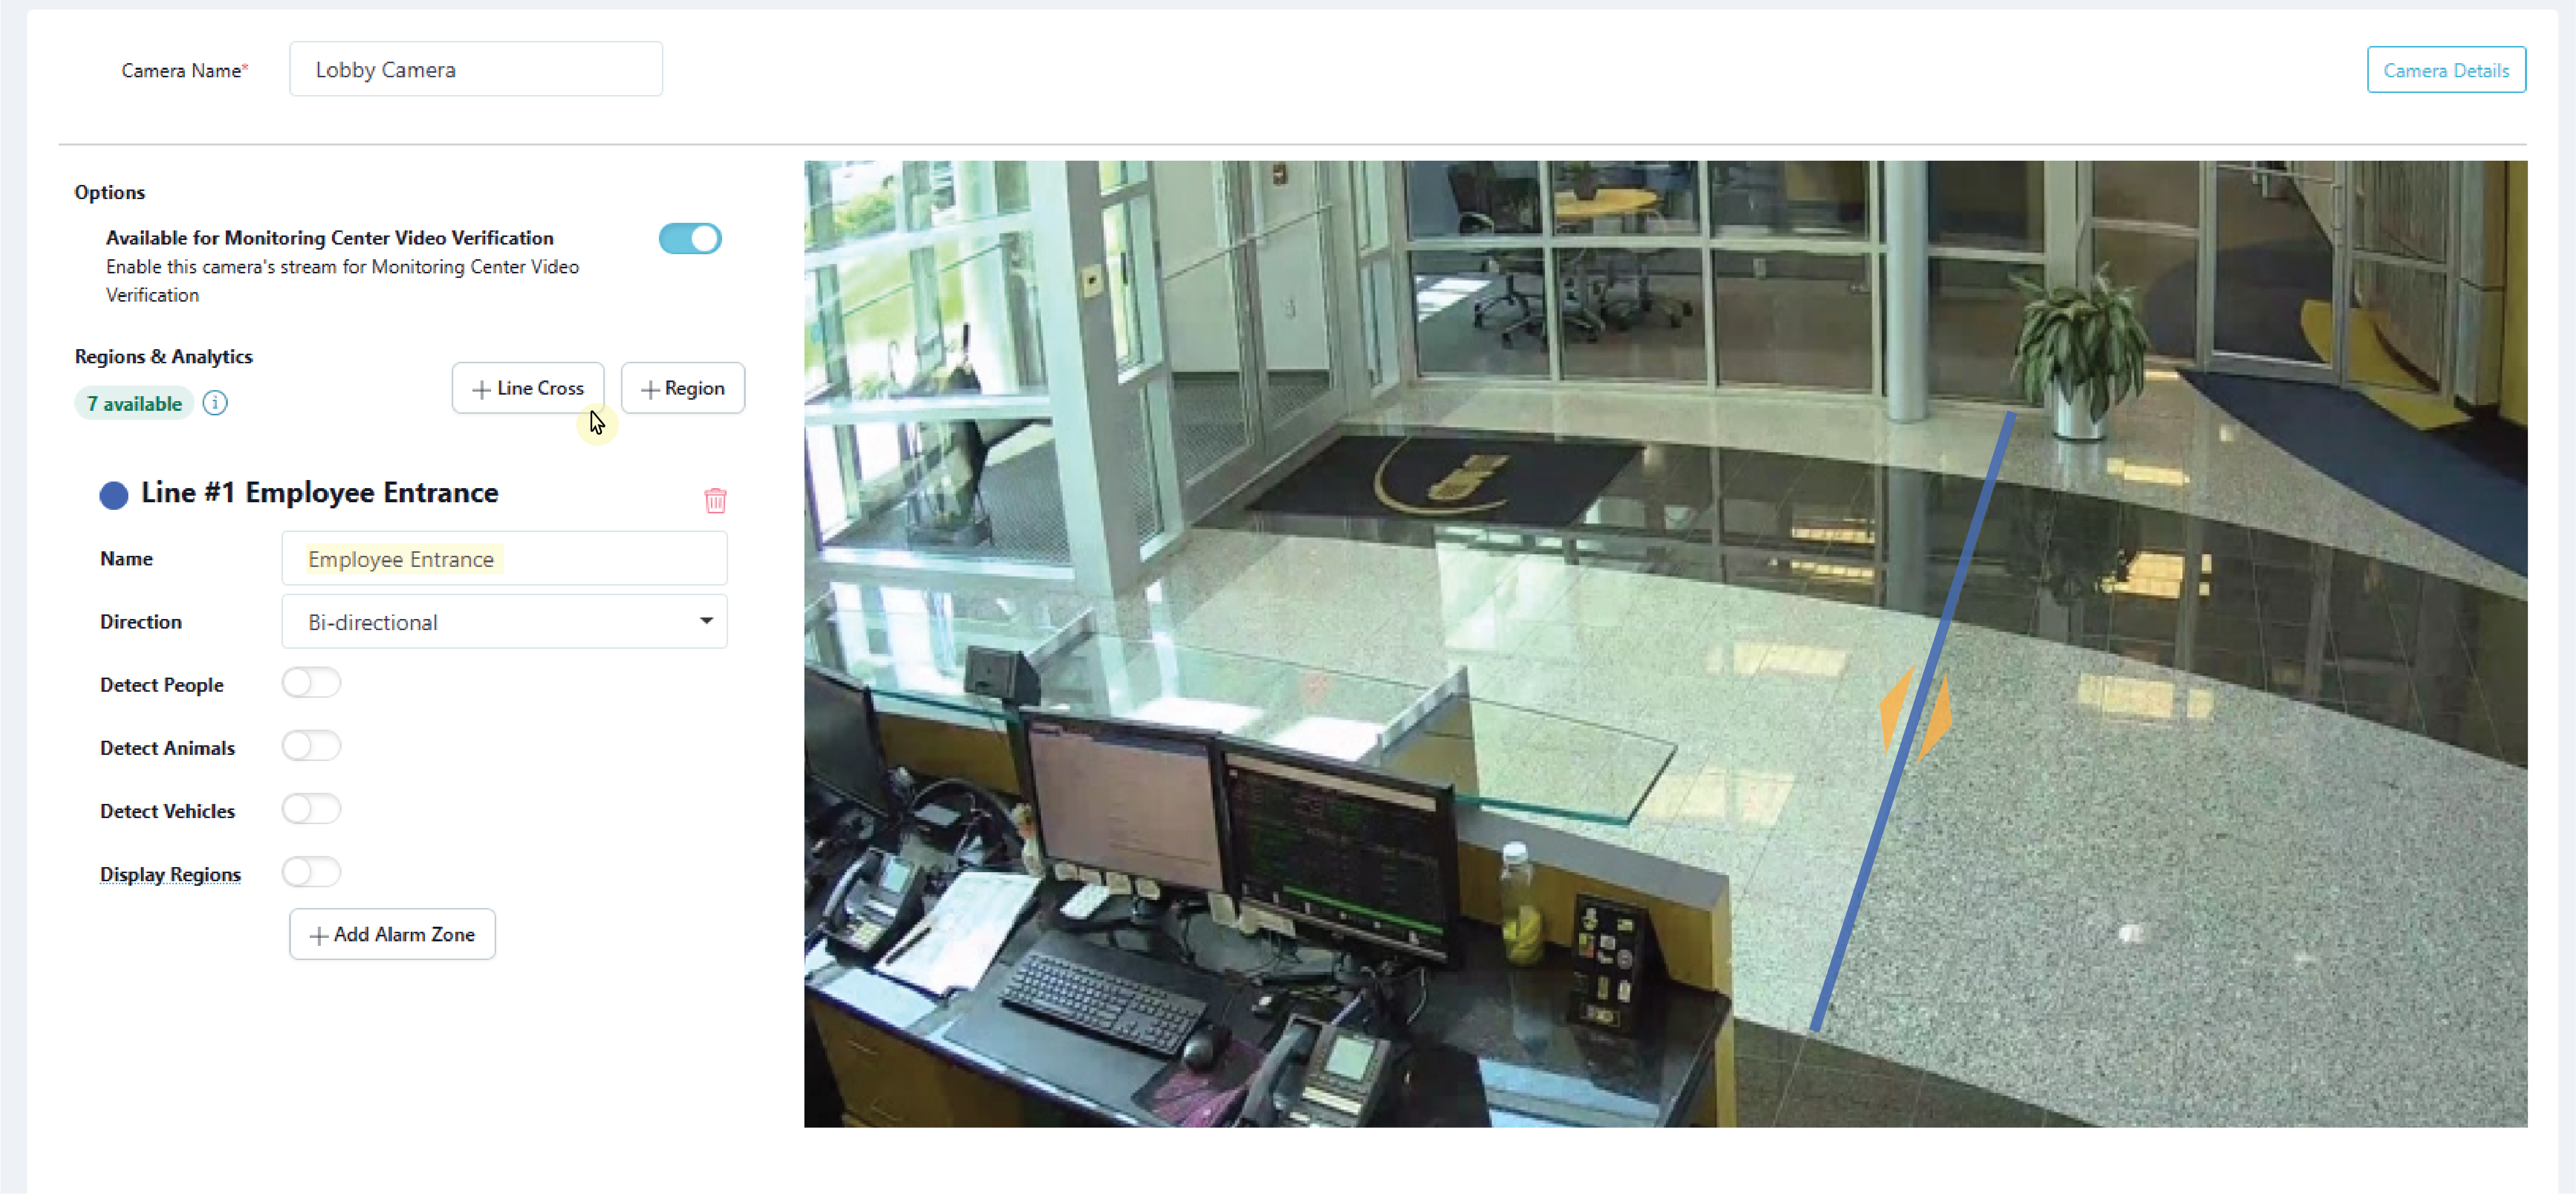
Create a Line
In the drop-down menu, select one of the following directions you want to monitor if a person, animal, or vehicle moves in a direction that is a part of a programmed region:
Enter—Motion has to cross the line in the direction of the arrow.
Exit—Motion has to cross the line in the direction of the arrow.
Bi-directional—Motion can cross the line in either direction.
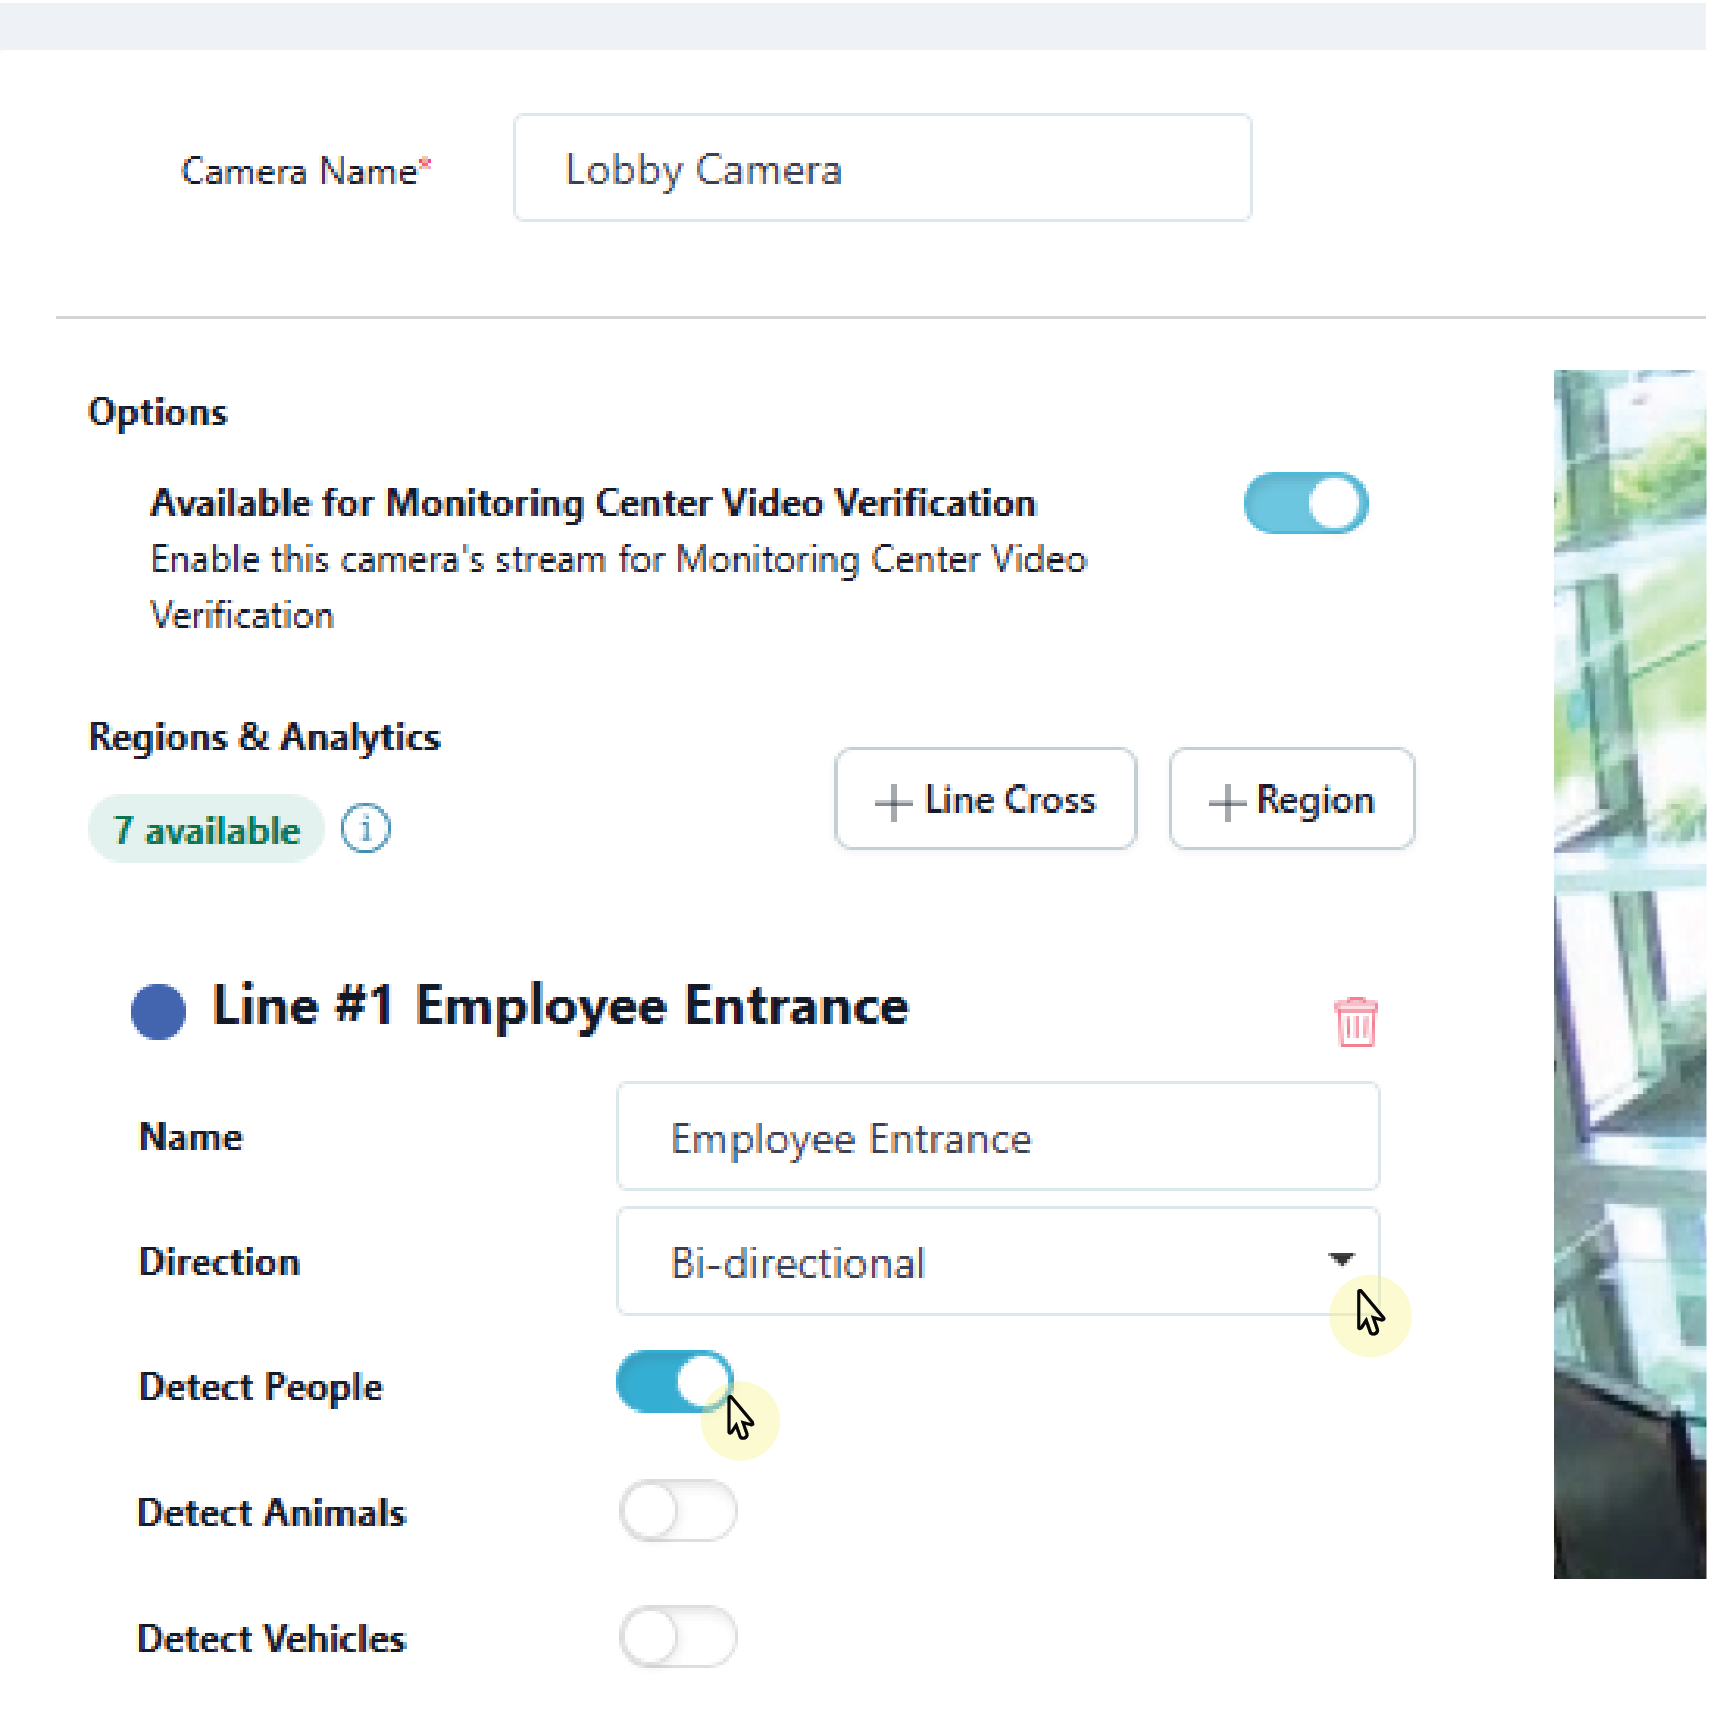
Select a Direction and People, Animals, or Vehicles
Click Display Regions if you want the configured detection lines to show up on event previews in Virtual Keypad.
.png?inst-v=f8eb00df-9986-4c22-ae50-47e65575f989)
Enable Display Regions
To add additional line crosses, repeat steps 1-3. Click Save to apply changes and exit the Edit Camera page. This saves the line crosses and any camera adjustments made previously.
Select Save
To configure end user settings, refer to Virtual Keypad Setup for more information.
Create a Camera Alarm Zone for Regions and Lines
To tie a detection region or line to a panel zone, click + Add Alarm Zone. This expands into customizable zone options.
Note: If any camera detection region or line is tied to a panel zone, then all detections for that camera only record when the zone is active.
Add an Alarm Zone
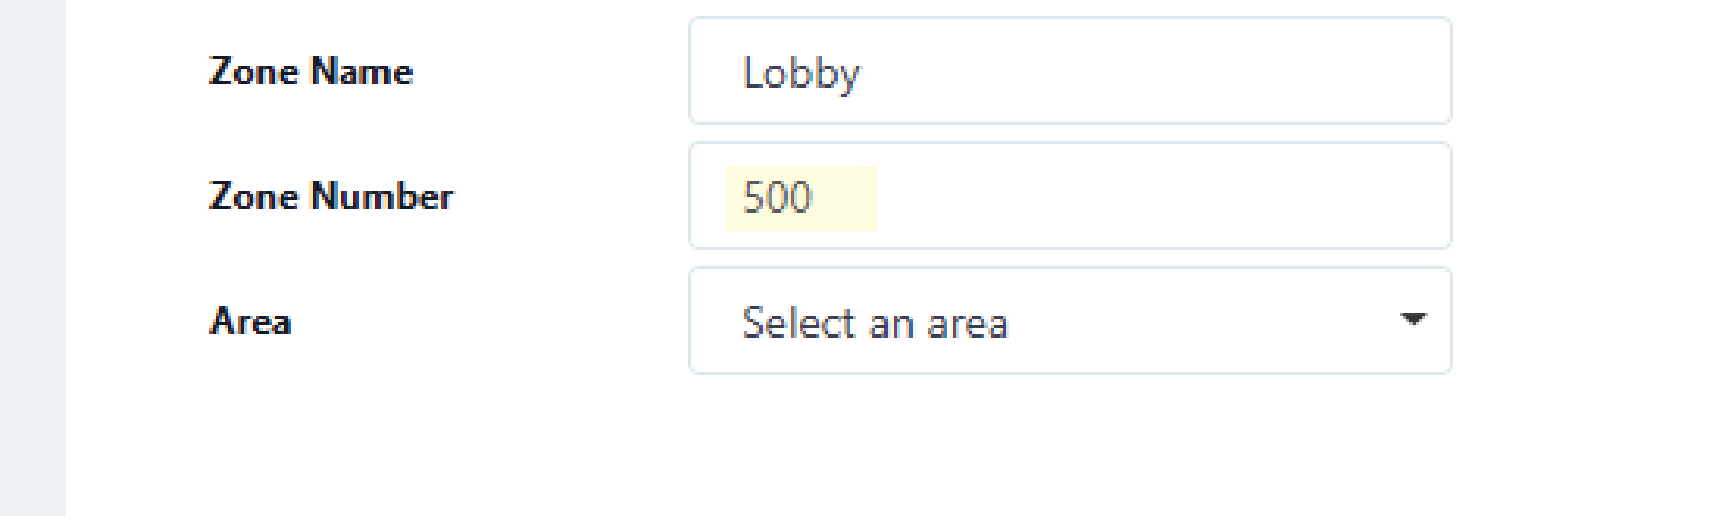
Give the zone a Name.

Assign a Name to the Zone
The zone number automatically populates with the next available zone number in panel. You may assign a different zone number, if desired. Usable zones are 500-999 for XR Series Control Panels and 500-599 for XT75 Control Panels.
Note: Zones cannot be assigned to an AX-Bus.
Assign a Number to the Zone
Assign the zone to an Area by selecting the drop-down menu.

Assign the Zone to an Area
To add additional detection regions, repeat steps 1-4. Click Save to apply changes and exit the Edit Camera page. This saves the detection regions and any zones tied to them, as well as any camera adjustments made previously.
Note: All zones are programmed as a Night Zone by default. To edit zone programming, refer to Edit a Zone below.
Select Save
Additional Information
Edit a Zone
To edit a zone, go to Customers and select the System Name.
Navigate to Programming for the selected system.
Navigate to Zone Information and locate the zone that needs to be edited.
Select the drop-down menu next to Zone Type. This displays the zone types that can be assigned.

Select a Zone Type
Select the drop-down menu next to Zone Actions. This displays the outputs that can be assigned.
Select Zone Action
When done editing, click Send All Changes in the top right corner of the screen to save the changes and send them to the panel.
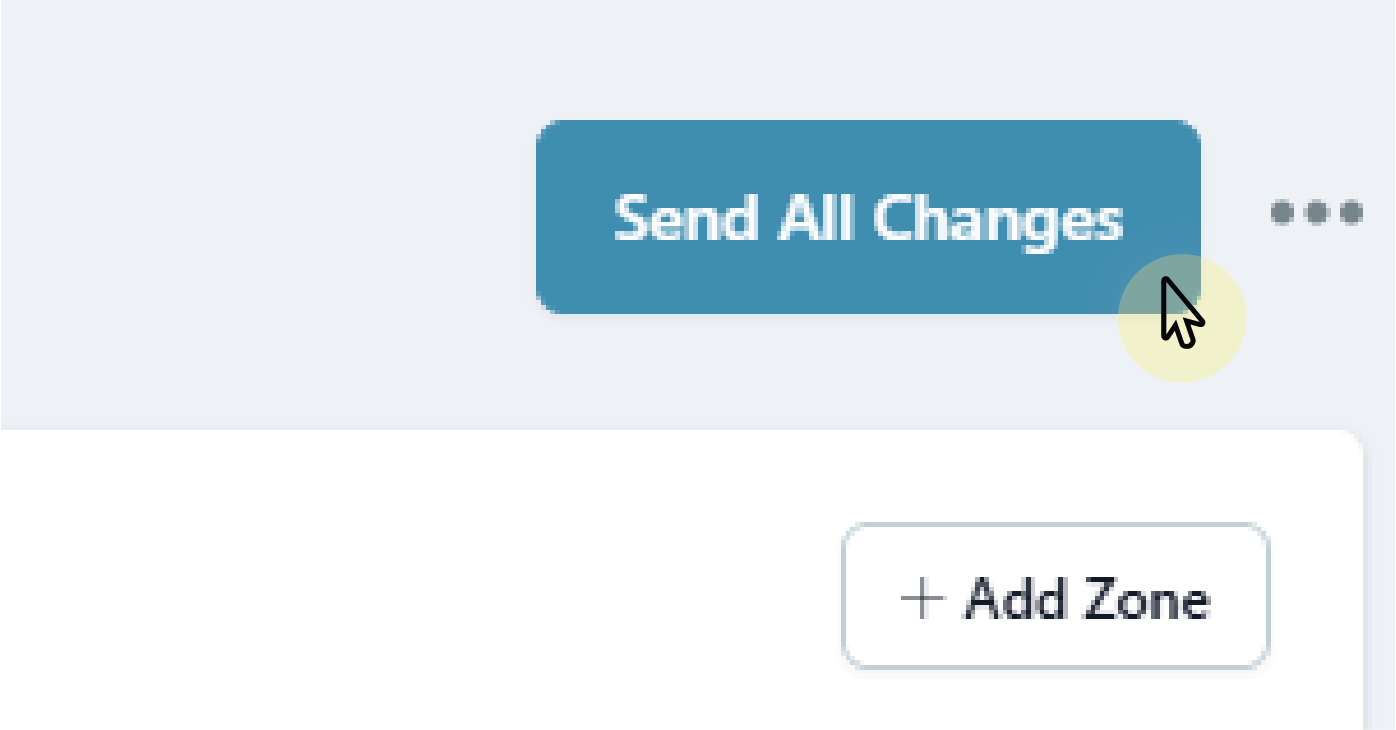
Send All Changes
Delete a Detection Region, Line, and Zone
To delete a detection region or line and a zone tied to it, navigate to System Information for the selected system.
Select the camera that is tied to the detection region or line.
Select a Camera to Delete a Detection Region or Line
Click the Trash Can icon next to the name of the detection region or line.

Delete a Region or Line
Click Save. This deletes the detection region or line and any zone tied to it.
Note: Zones should NOT be deleted from Zone Information. If you attempt to delete a zone this way, a message appears explaining that the panel’s detection region will not properly communicate with the panel.
Select Save
Disable a Camera
To disable a camera, navigate to System Information for the selected system.
Select the camera you want to disable.
Click Disable in the top right corner to remove the camera from the XV Gateway.
Note: Disabling the camera deletes all detection regions, lines, and zones tied to the camera.
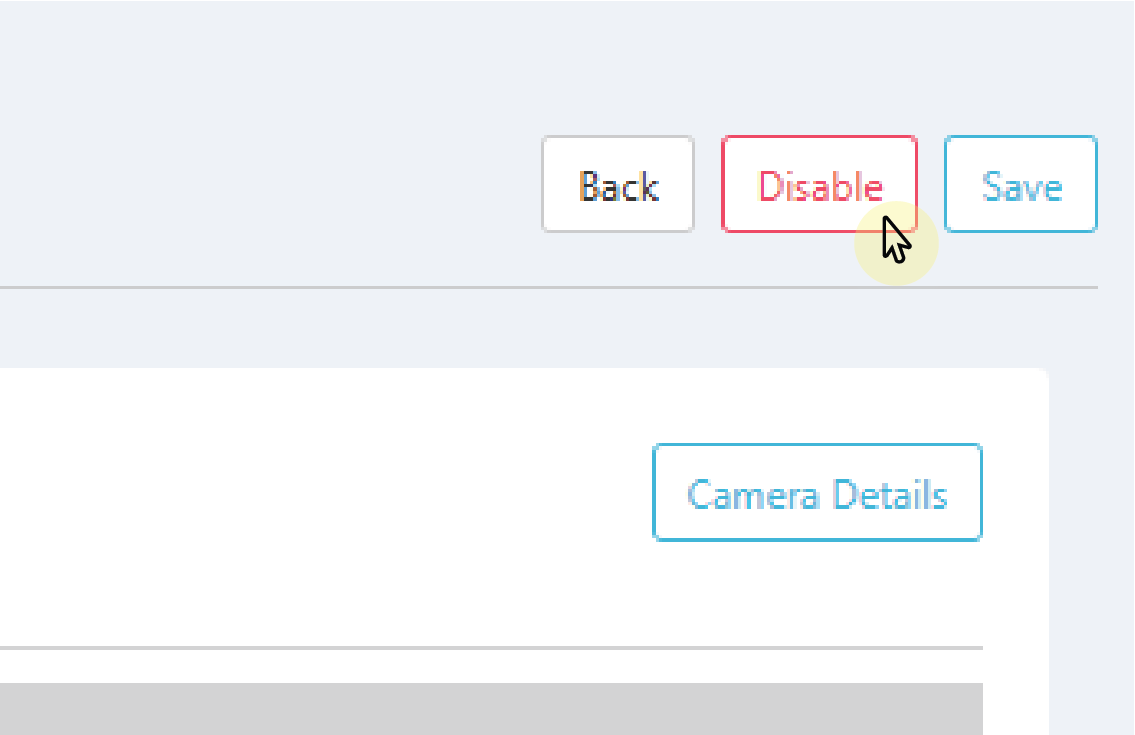
Disable Camera
Click Save. The camera are removed from the XV Gateway with AlarmVision® section.
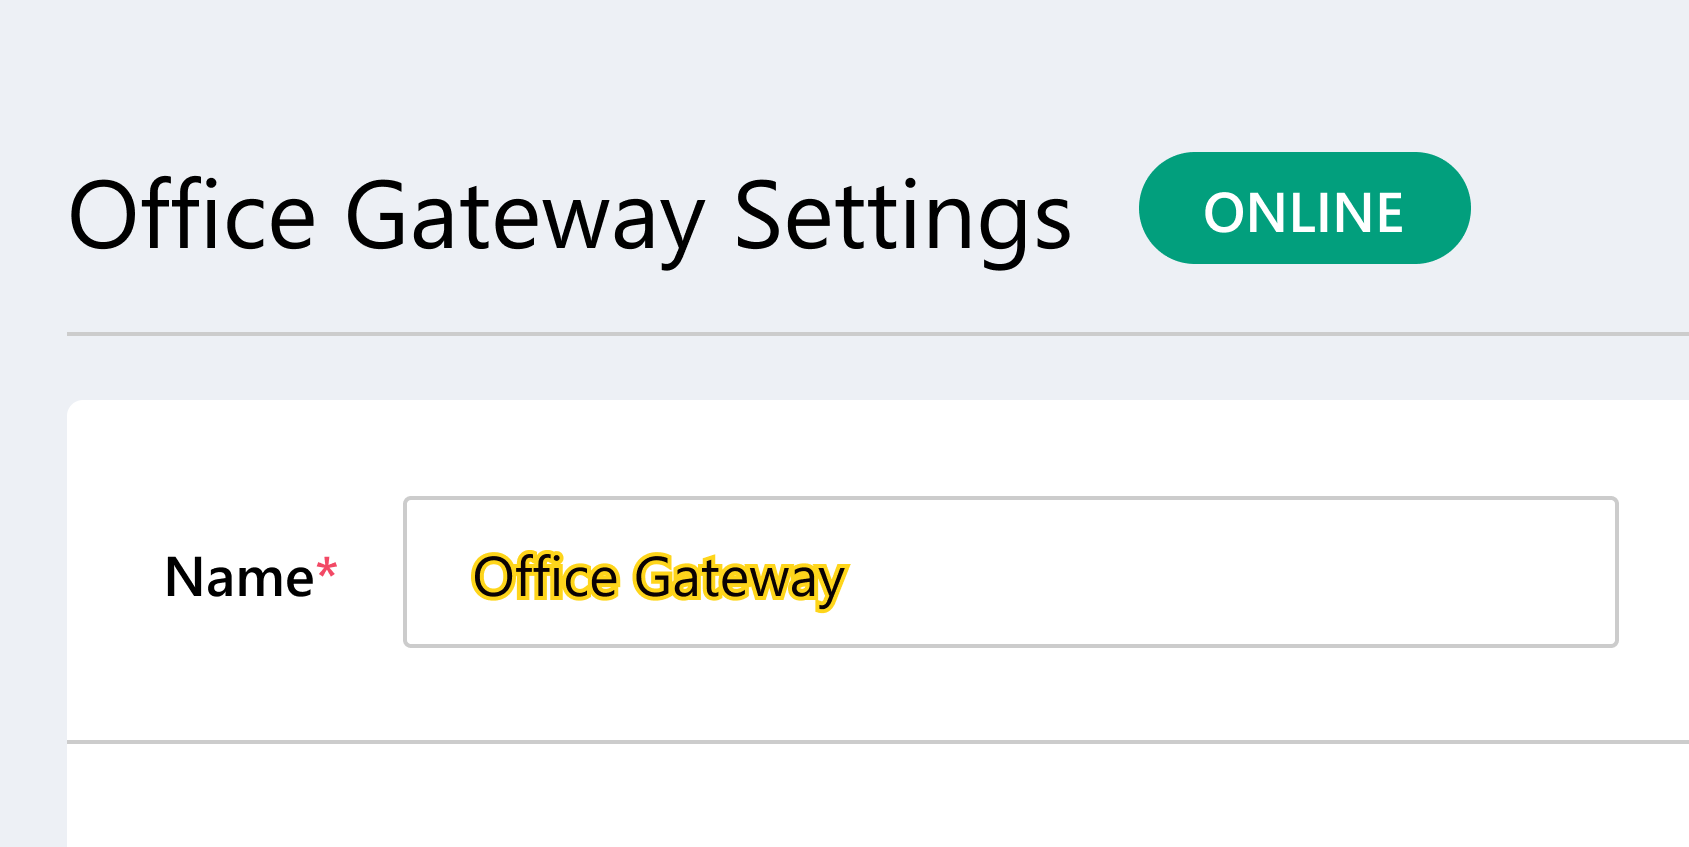
XV Gateway Settings
Before proceeding, navigate to XV Gateway Settings. On the System Information page, select the gateway you would like to edit.
Select the XV Gateway
Edit XV Gateway Name
To edit the XV Gateway name, type in the box next to Name.
Edit the XV Gateway Name
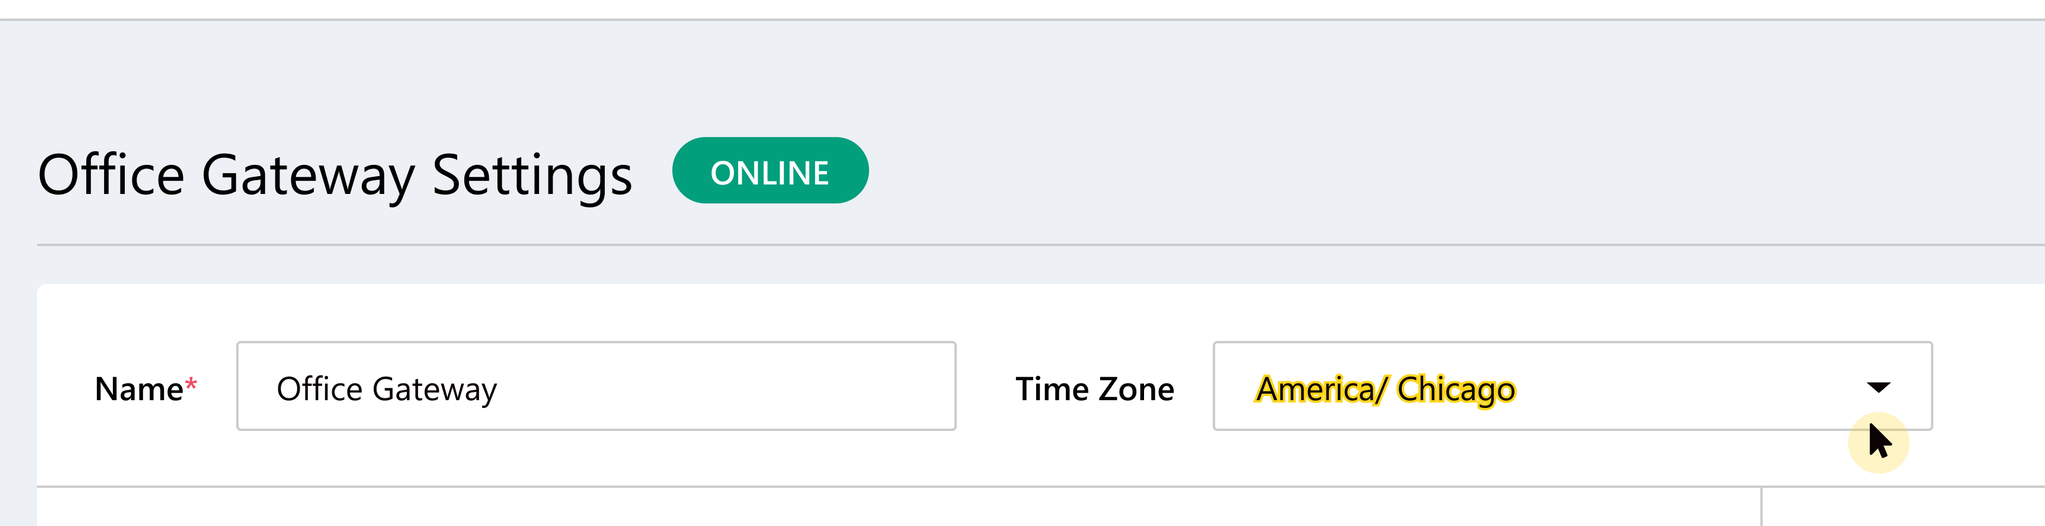
Edit XV Gateway Time Zone
To edit the XV Gateway time zone, use the drop-down to select the proper time zone.
Edit the XV Gateway Time Zone
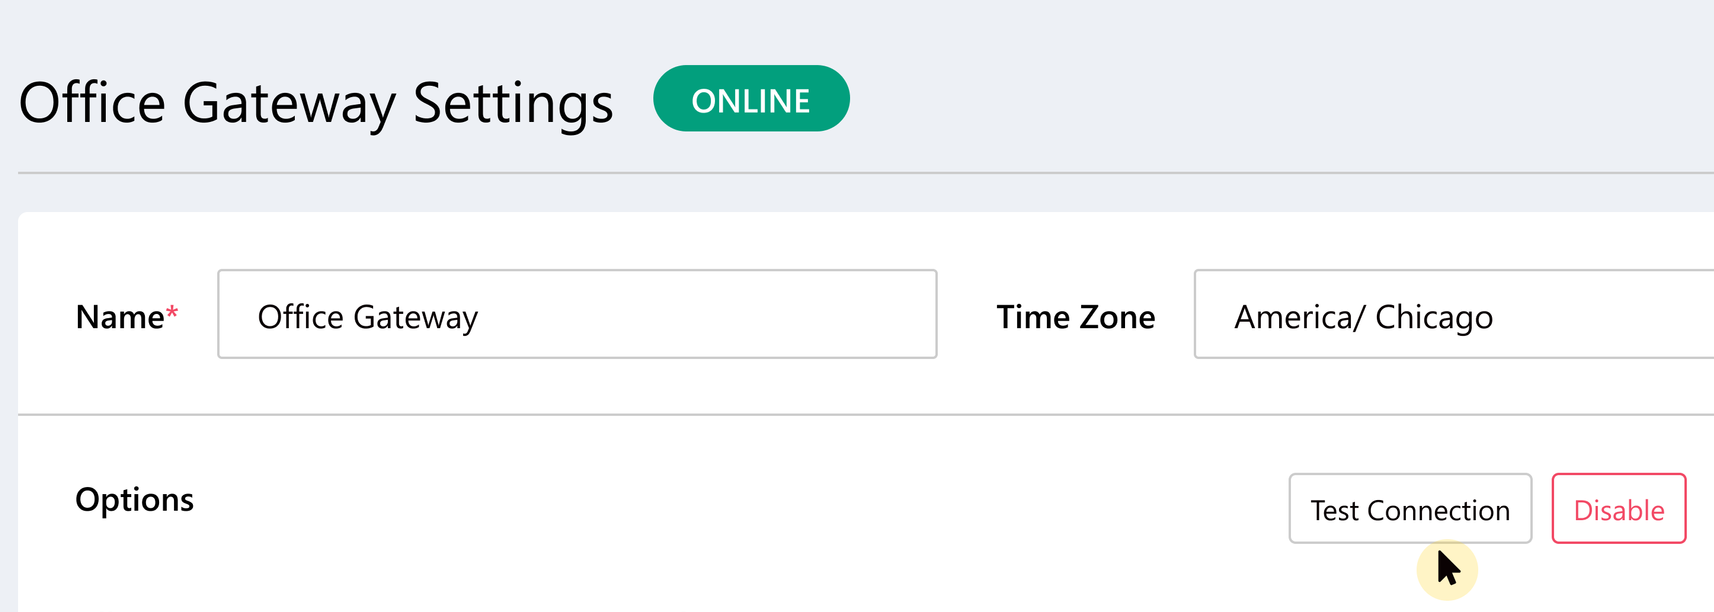
Test XV Gateway Connection
To test the connection of the XV Gateway to the panel, click Test Connection.
Test the XV Gateway Connection
A checklist displays with everything tested to ensure proper communication between the XV Gateway and the panel. If an issue with the XV Gateway and panel connection is discovered, Dealer Admin attempts to fix the issue. If the issue is unable to be resolved, an error message displays with troubleshooting suggestions

Test Connection Information
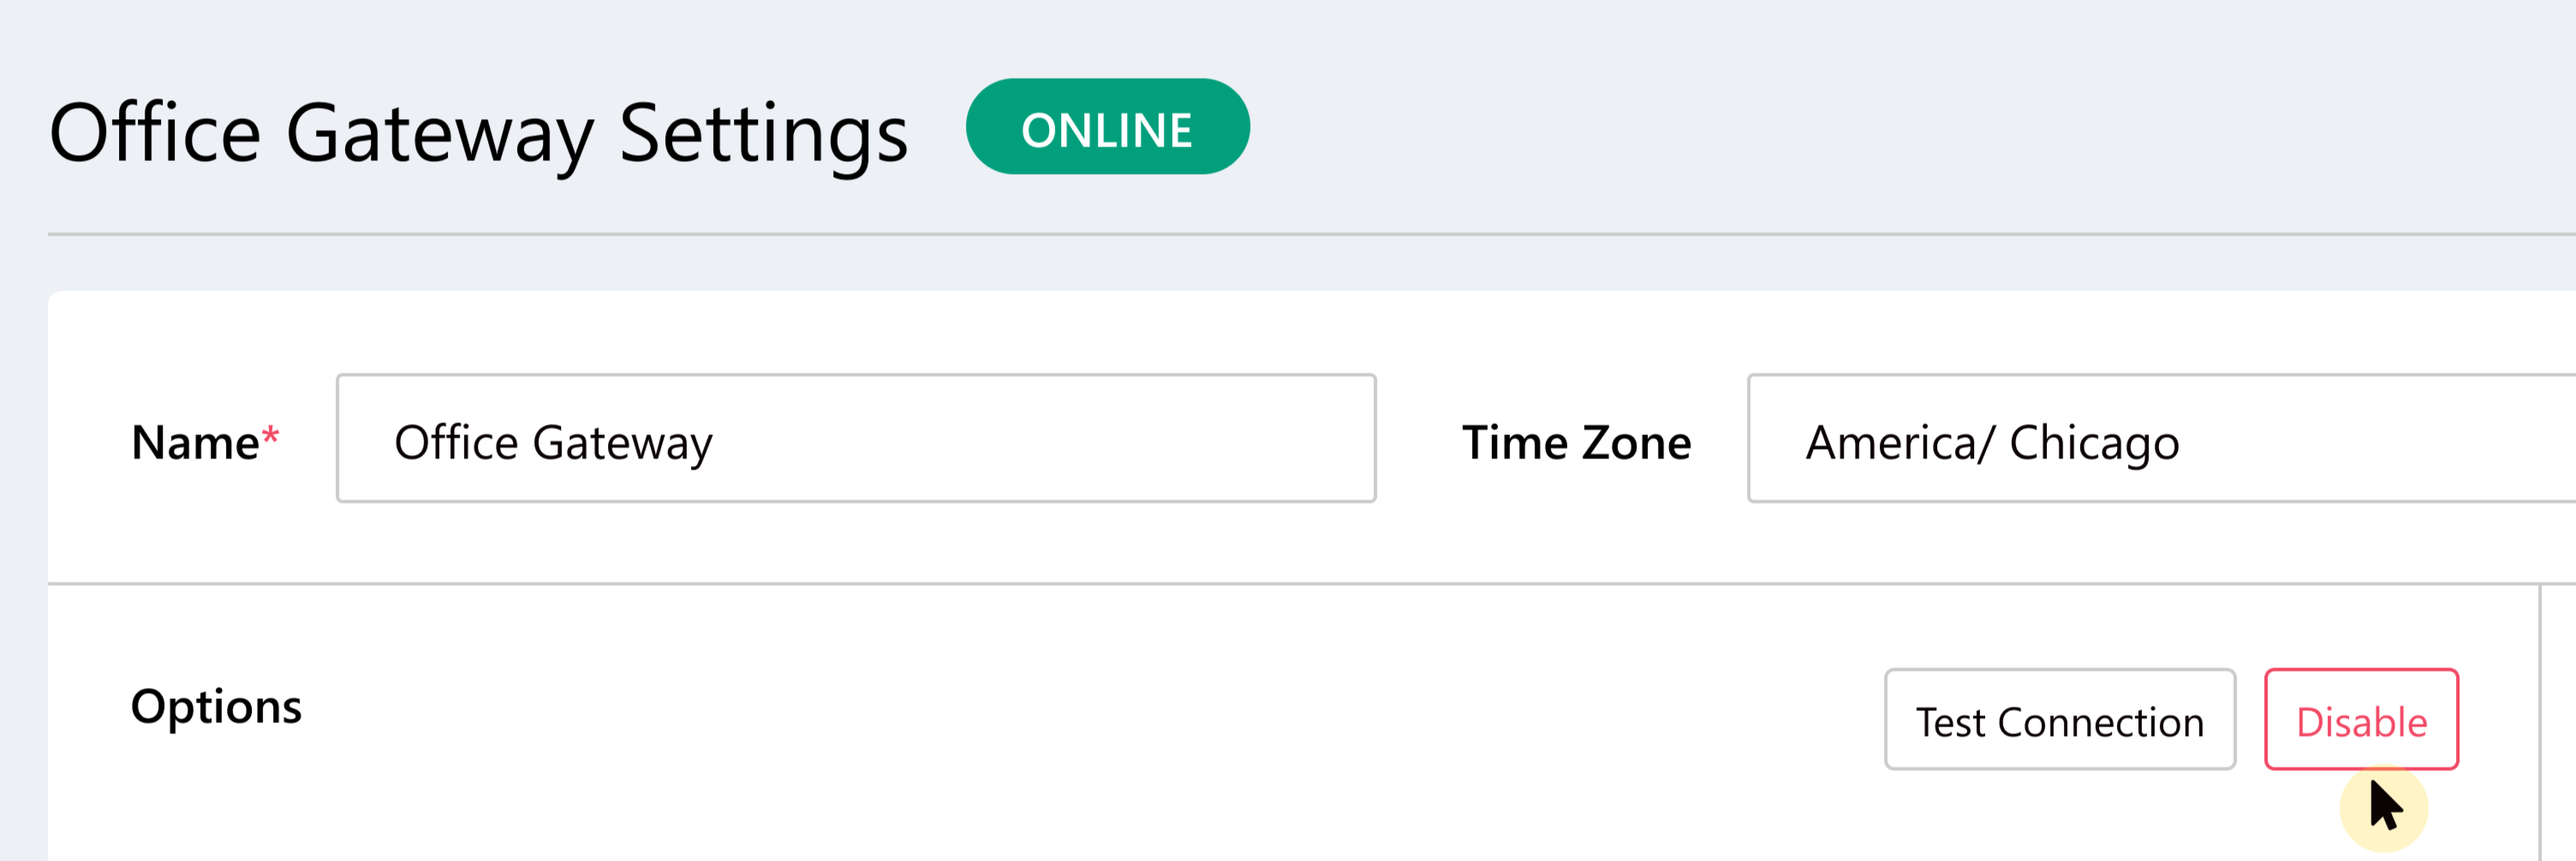
Disable XV Gateway
To disable the XV Gateway, click Disable.
Disable the XV Gateway
Restart XV Gateway
To restart the XV Gateway, click Restart.
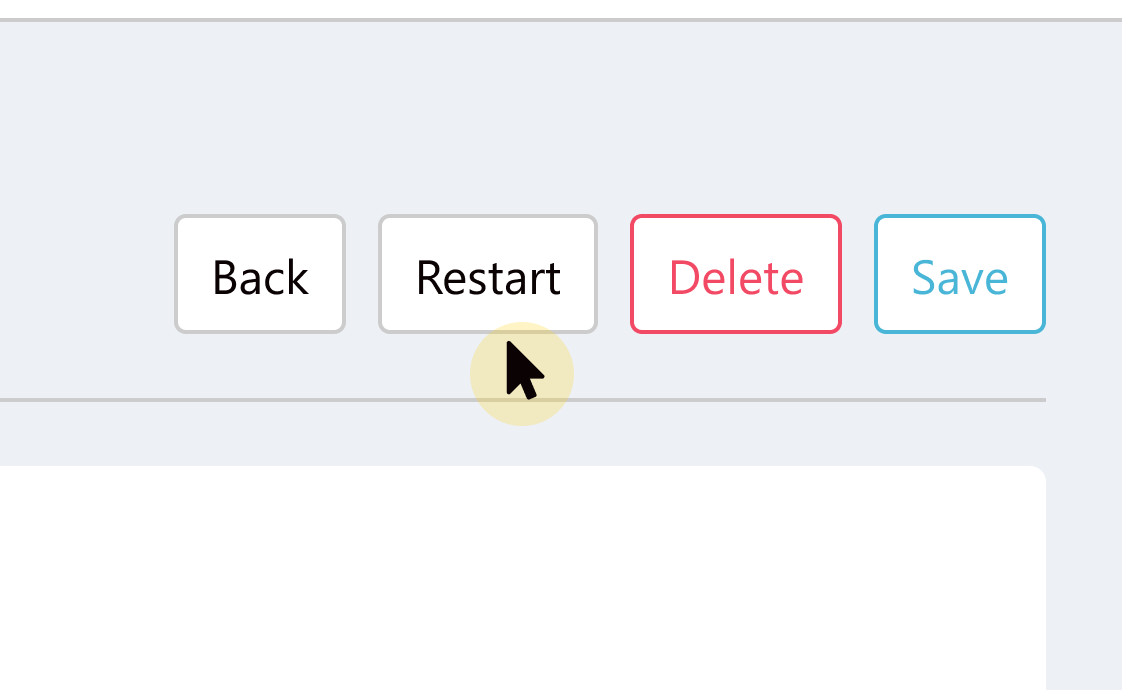
Restart the XV Gateway
Delete XV Gateway
To delete the XV Gateway from the system, click Delete.

Delete the XV Gateway
Add Camera Window Additional Settings
Before proceeding, navigate to the Add Cameras window. On the System Information page, click + Camera to XV Gateway.
Add Camera
In the Add Cameras window, click the ellipsis menu in the top right corner of each camera row to display the Hide Camera, Remove Camera, and Enter Password options.
Hide Camera
This option disables a camera and moves it to the Hidden Cameras list at the bottom of the window. To unhide a camera, select Unhide Camera or Enable. Enabling a hidden camera removes it from the Hidden Cameras list and adds it to the XV Gateway to begin streaming.
Remove Camera
If you made changes to your camera network, this option disables and removes the original auto-discovered camera from Dealer Admin. Any cameras on the same subnet as the XV Gateway are automatically discovered and added to the camera list.
Note: Removing a camera deletes all detection regions, lines, zones, and video actions tied to the camera.
Enter Password
If a user has changed the camera password, the XV Gateway requires the updated password to access the video stream. This option sends the camera password to the XV Gateway and restores video streaming.
Note: This does not change the camera’s password; it only re-sends the camera’s password to the XV Gateway to restore the video stream when the camera’s password is changed.
.png?inst-v=f8eb00df-9986-4c22-ae50-47e65575f989)
Add Cameras Window in Dealer Admin
Re-add a Delete Camera
If you want to re-add manually-added RSTP or ONVIF cameras that were deleted, click + Add Manually at the top of the window.
Ordering Information
XV Gateway Models
XV-24: 24 MP Video Analytics-Enabled Motion Detector
XV-60: 60 MP Video Analytics-Enabled Motion Detector
XV-96: 96 MP Video Analytics-Enabled Motion Detector
Certifications
NDAA Compliant
Specifications
Supports ONVIF and RTSP cameras
One TB internal storage
Up to 24, 60, or 96 MP Processing