If your camera has Regions & Analytics settings, you can add up to four regions and four lines. Regions and lines allow your camera to detect motion. If your camera does not have at least one region or line set up, it does not detect motion. You can also add analytics to your camera.
Regions are sections of an area where cameras detect motion. Motion that occurs outside a region is not detected. For example, a region covering the doorway to a room only detects motion in the doorway. You can also define a region that requires motion to cross it to be detected.
Lines are sections of a room where motion has to cross for the camera to detect motion. For example, a line at the doorway detects motion if someone crosses the line at the doorway.
Analytics allow your camera to detect people, detect animals, and detect vehicles. When analytics are enabled, your camera records a 30-second clip on motion. The clip is stored in Events with information about what was detected, when, and where.
Create a Region
-
Log in to Dealer Admin (dealer.securecomwireless.com).
-
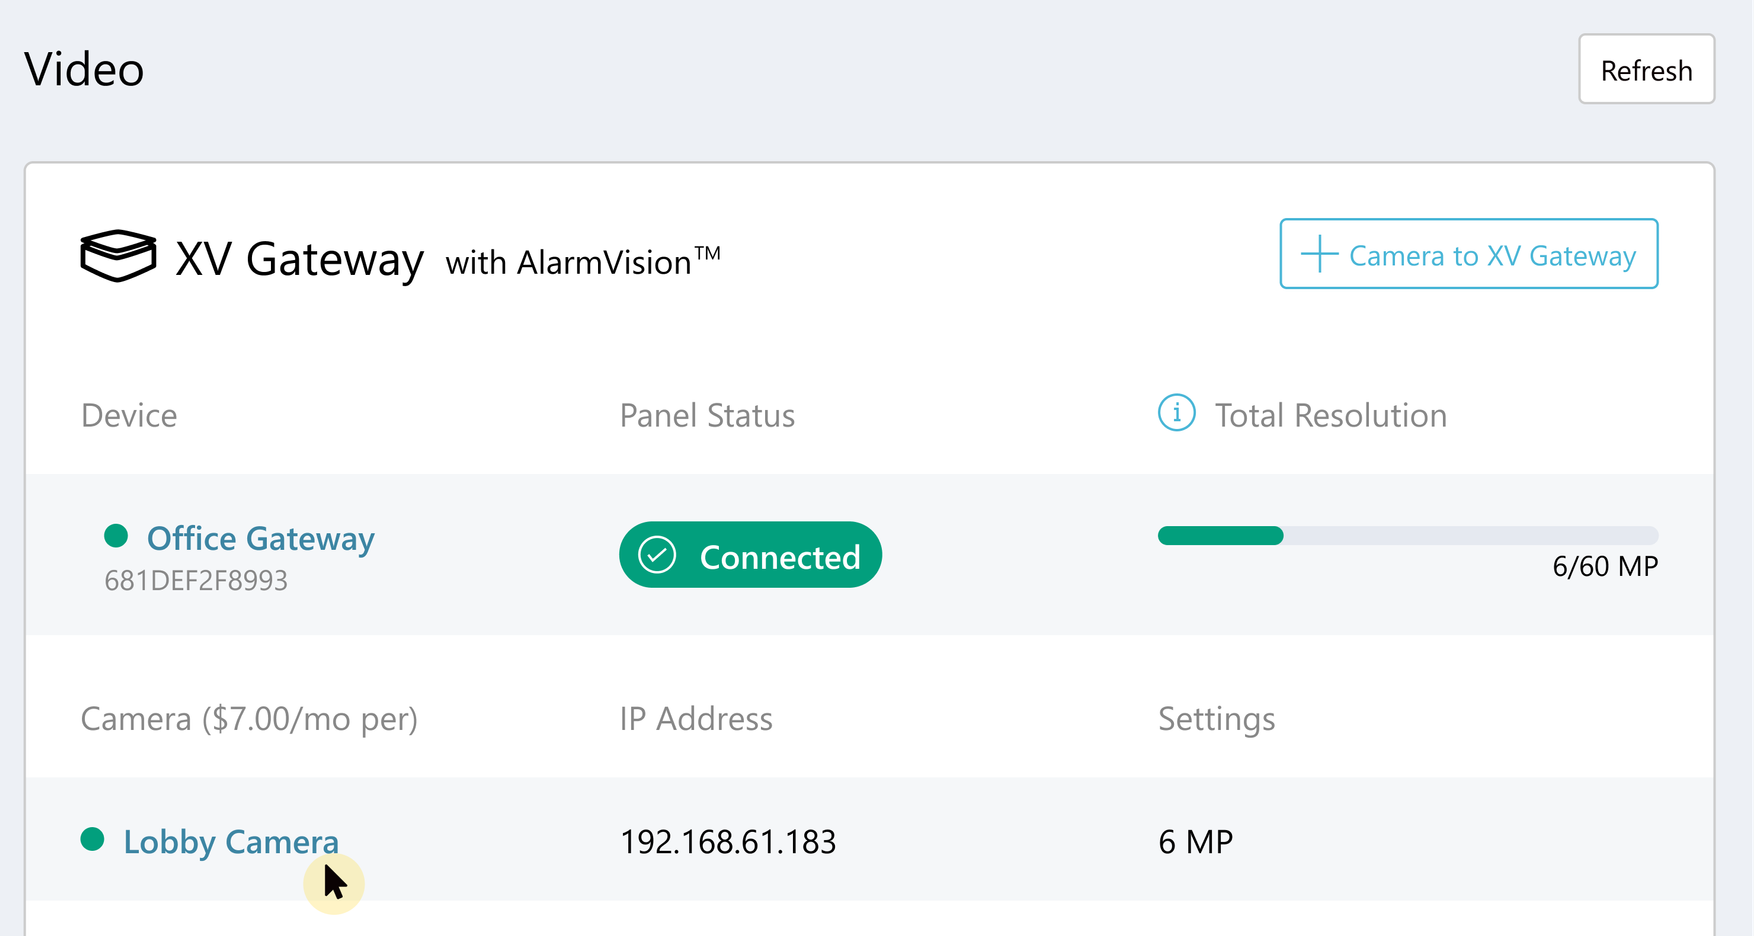
Go to Customers, then select the System Name that the XV Gateway and camera are connected to.
-
In Video, go to Cameras and select the camera name you want to create a region for.
-
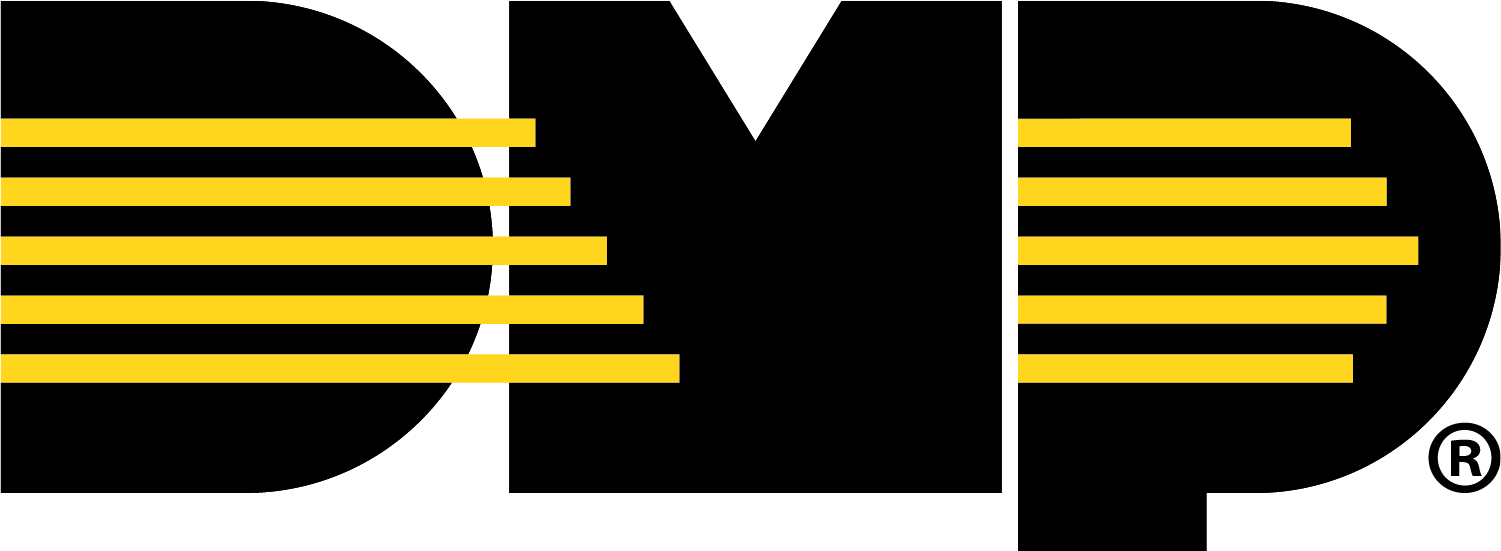
In the Edit Camera page, go to Regions & Analytics and select + Region. A box appears in the middle of the camera view screen.
-
Select the box, then drag it across the camera view to place it in the desired detection region. Select and drag the white circles on the corners of the box to manipulate the region.
-
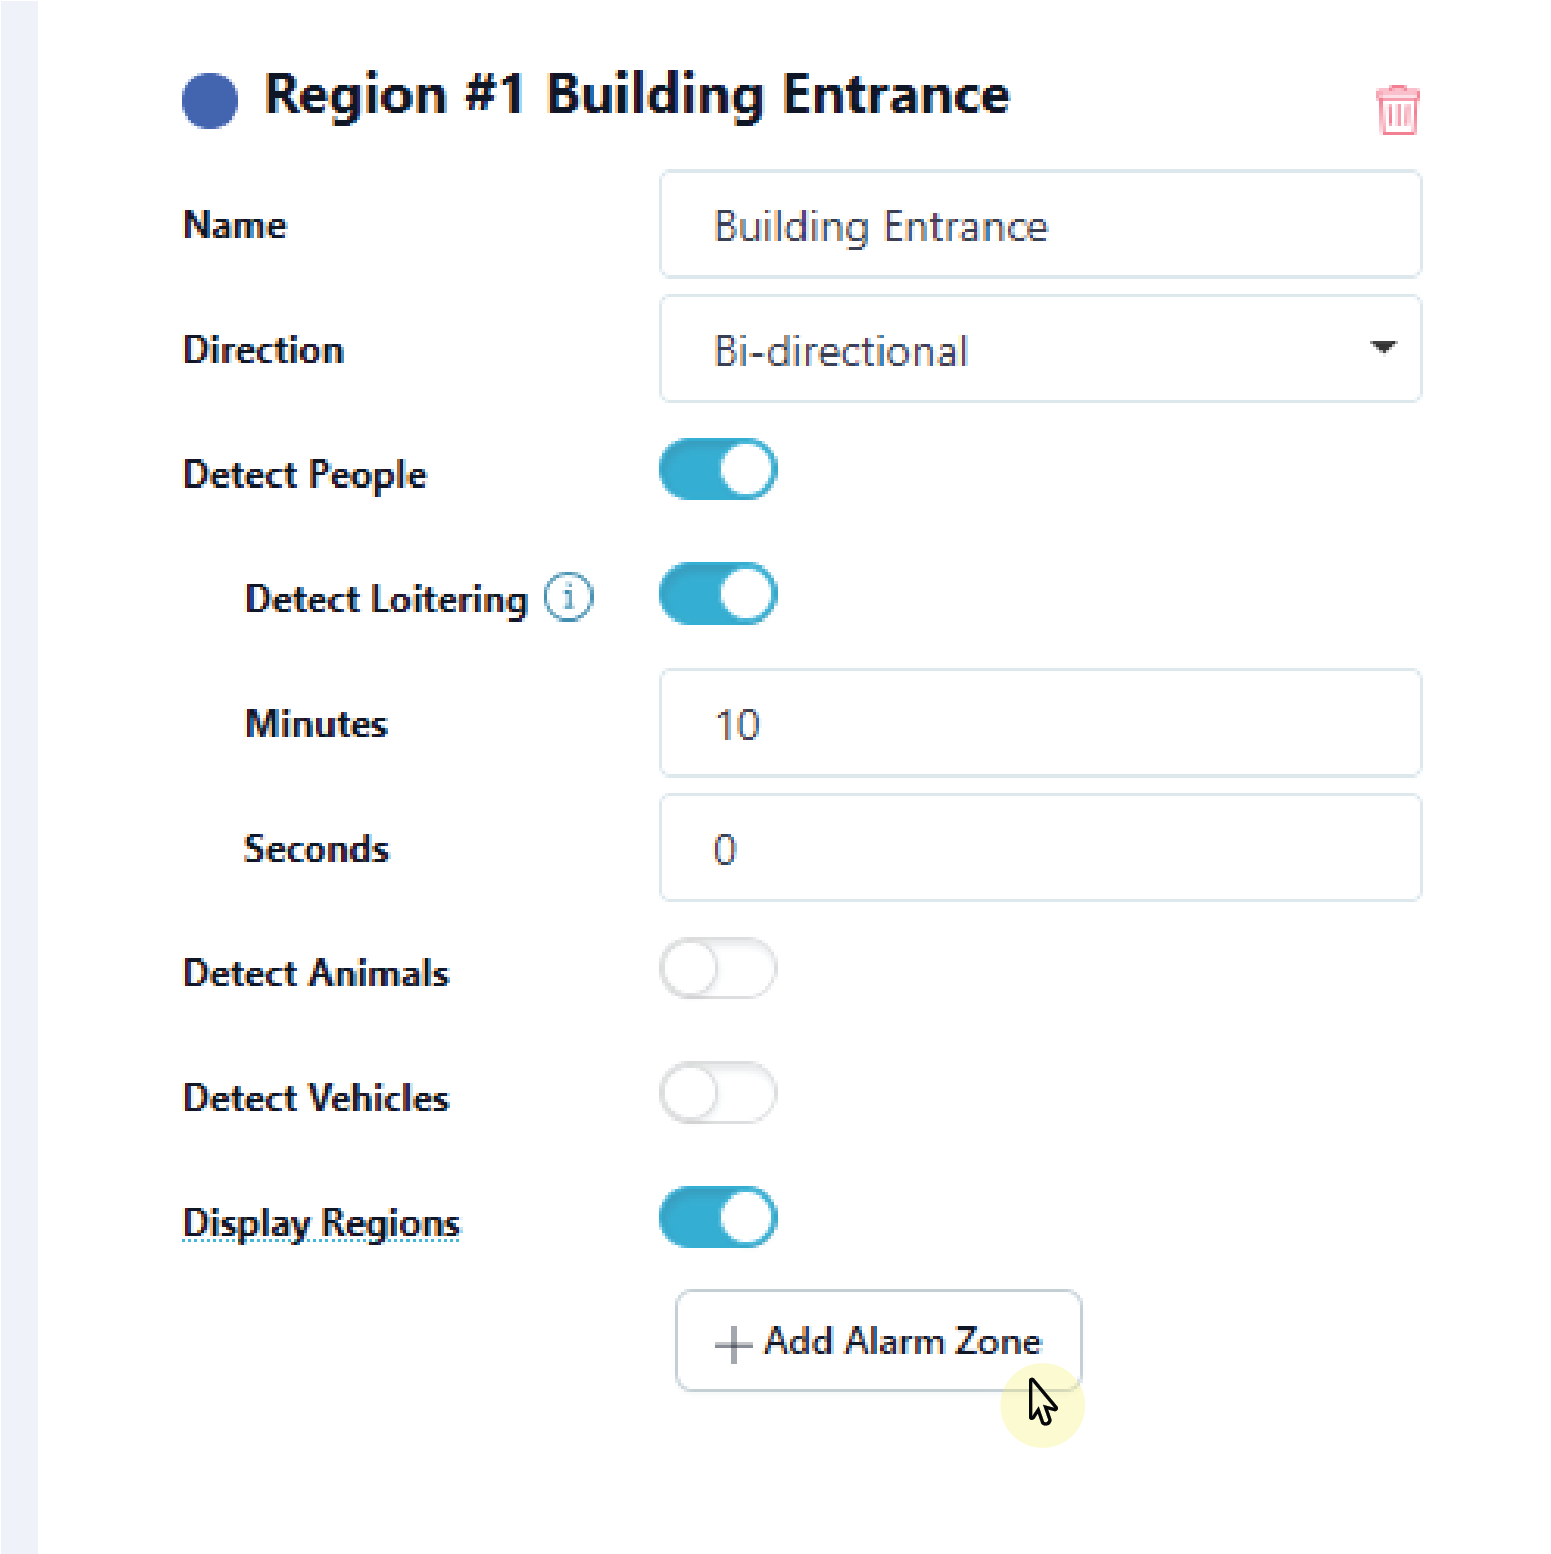
Give the region a Name.
-
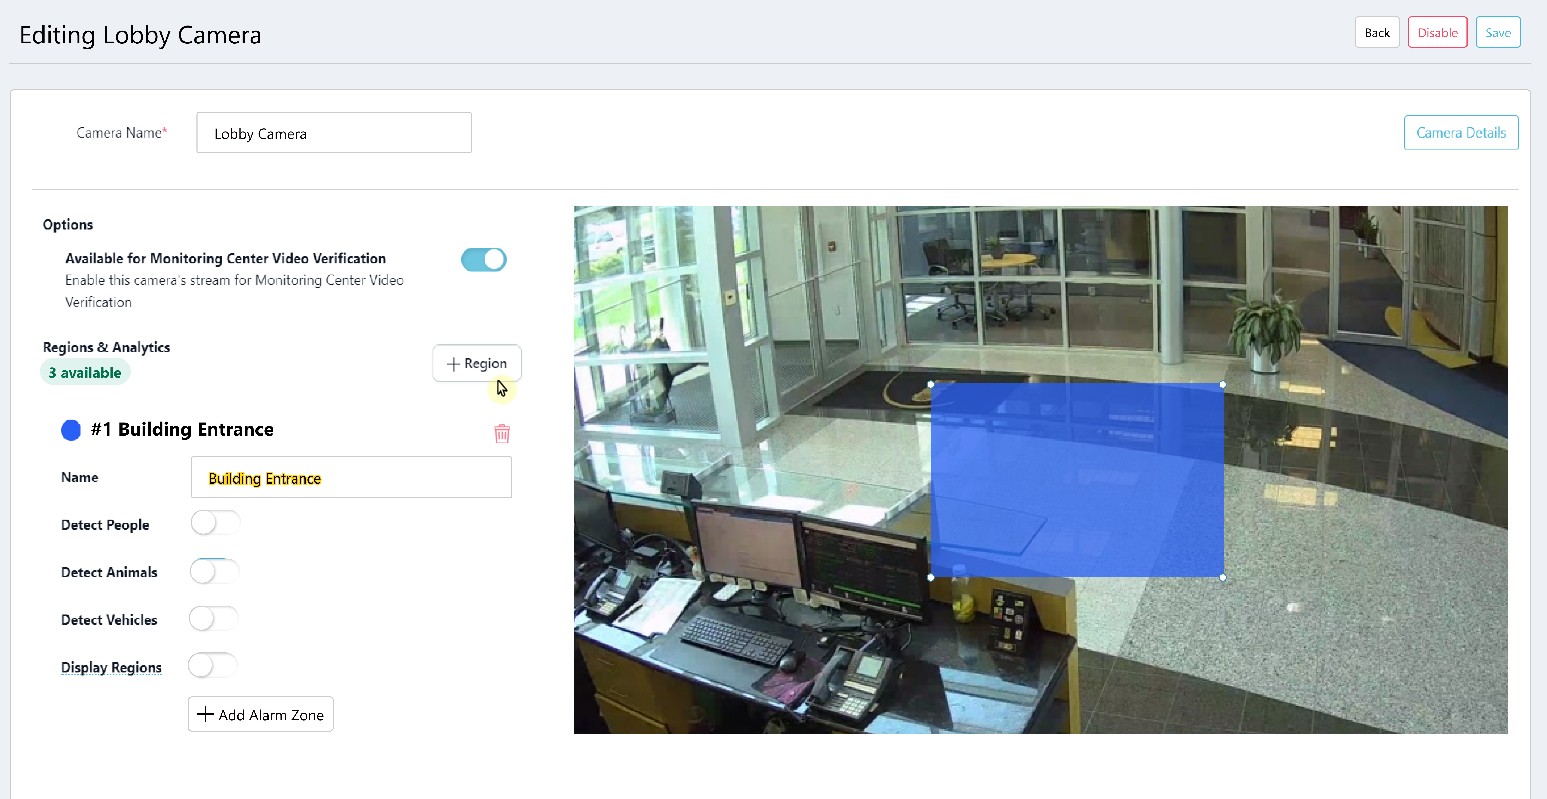
In the Direction drop-down menu, select one of the following directions if you want to monitor if a person, animal, or vehicle moves in a direction that is a part of a programmed region:
-
Enter—Motion has to cross into the detected region, following the arrows pointing inward.
-
Exit—Motion has to cross out of the detected region, following the arrows pointing outward.
-
Bi-Directional—Motion can cross the box in any direction.
-
.png?cb=70a9dc88b3cfa311fda4bcec82c3c76a)
-
Select whether you want the region to detect People, Animals, Vehicles, or any combination of the three.
-
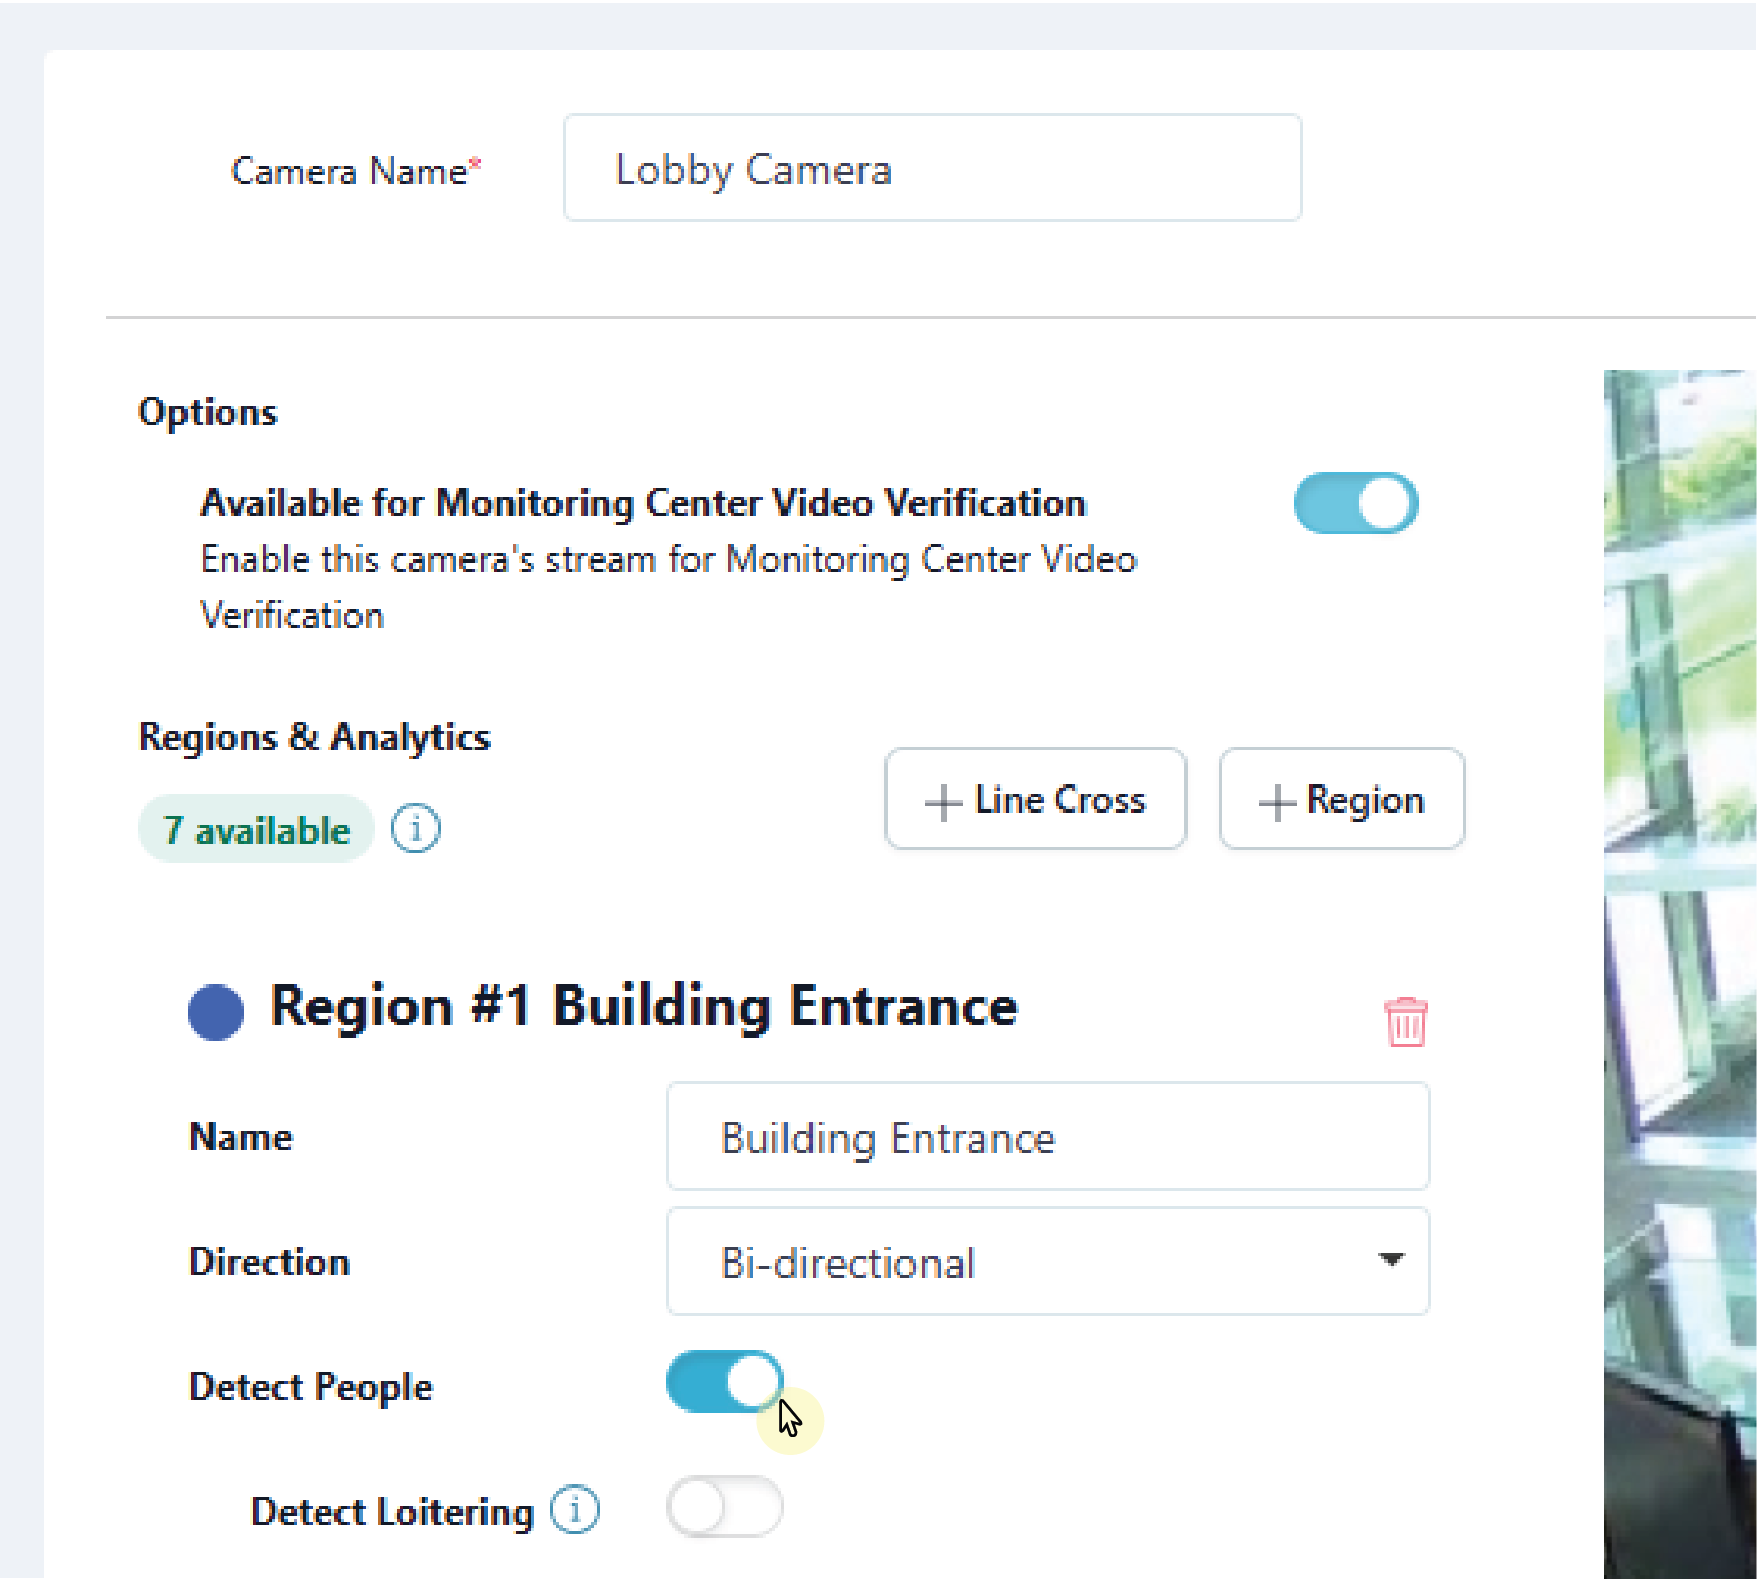
If you selected People or Vehicles, select whether you want the region to detect Loitering. Enter a number of minutes, seconds, or both to dictate the amount of time required before the loitering alert is triggered.
-
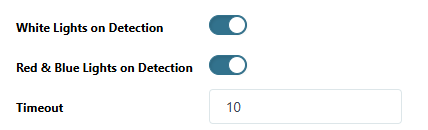
For VUE and VUE Plus cameras, select White Lights on Detection, Red & Blue Lights on Detection, or both options to enable the camera’s LEDs to trigger an event for a set duration.
-
In Timeout, enter the length of time the LEDs remain on after an analytic detection occurs.
Note: To use this feature, ensure you have a VUE or VUE Plus camera added to an XV Gateway, and the cameras are communicating with Dealer Admin.
-
Select Display Regions if you want the configured detection regions to show up on event previews in Virtual Keypad.

-
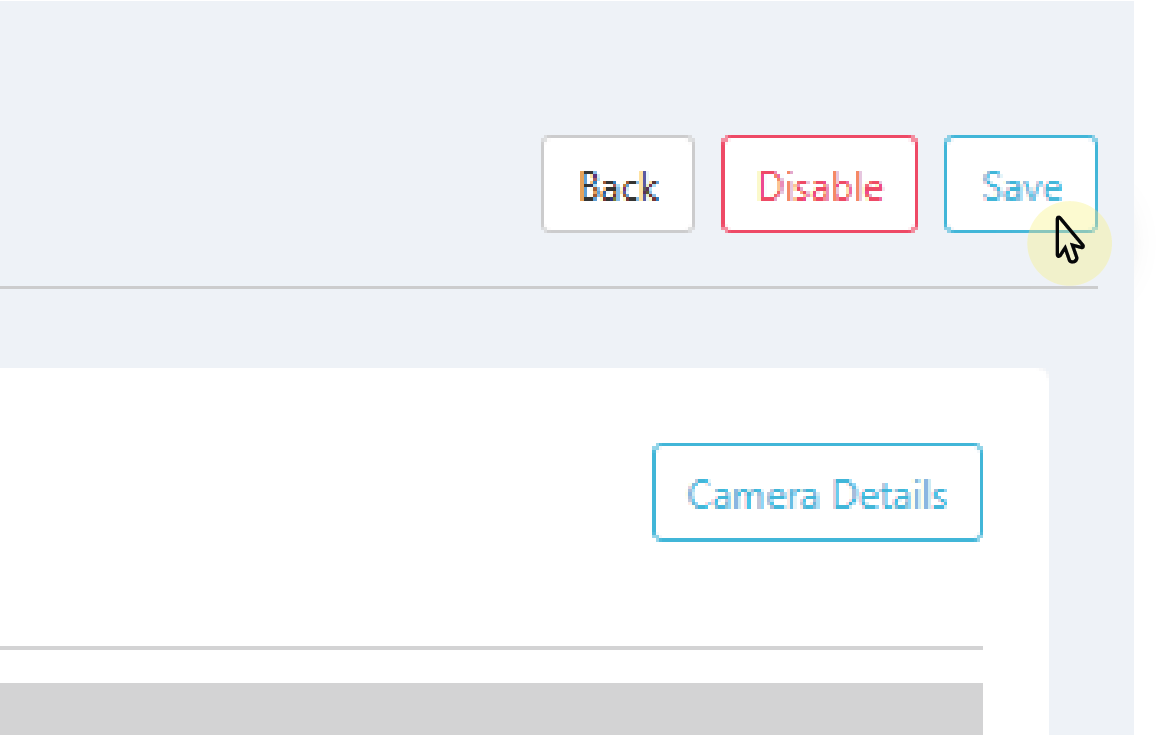
To add additional regions, repeat steps 1-10 or select Save to apply changes and exit the Edit Camera page. This saves the detection regions and any camera adjustments made previously. To create a camera alarm zone for added regions, refer to Create a Camera Alarm Zone for more information.
-
To configure end user settings, refer to Virtual Keypad Setup for more information.
Create a Line
-
Log in to Dealer Admin (dealer.securecomwireless.com).
-
Go to Customers, then select the System Name that the XV Gateway and camera are connected to.
-
In Video, go to Cameras and select the camera name you want to create a line for.
-
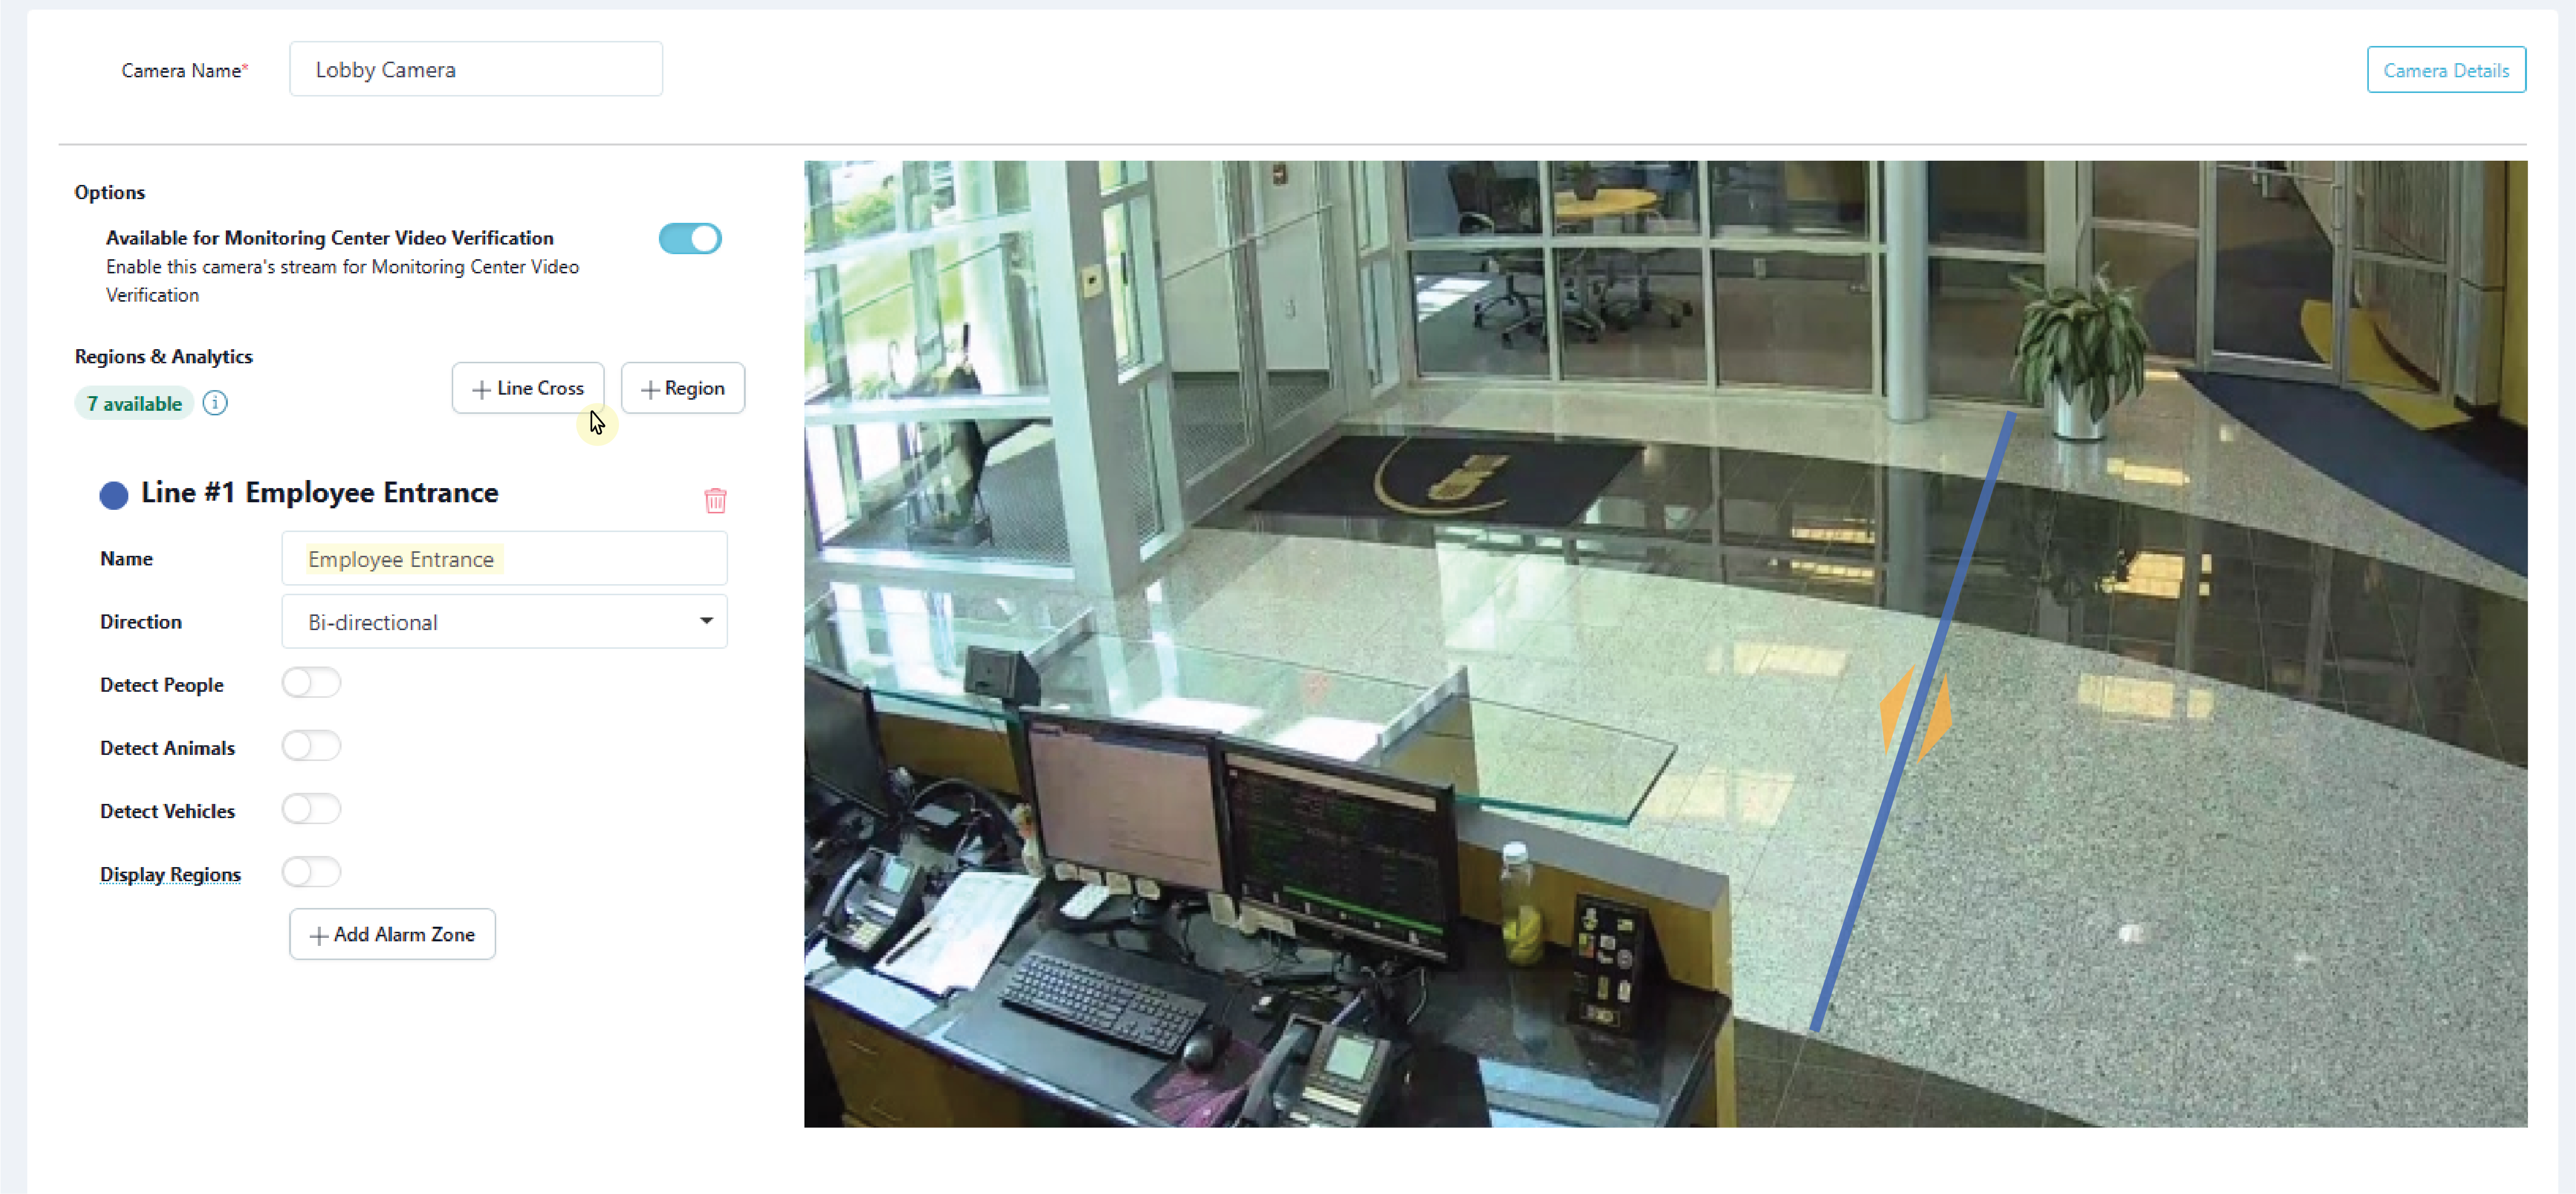
In the Edit Camera page, go to Regions & Analytics and select + Line Cross. A line appears in the middle of the camera view screen.
-
Select and drag the line on the camera’s field of view to define the desired detection line.
-
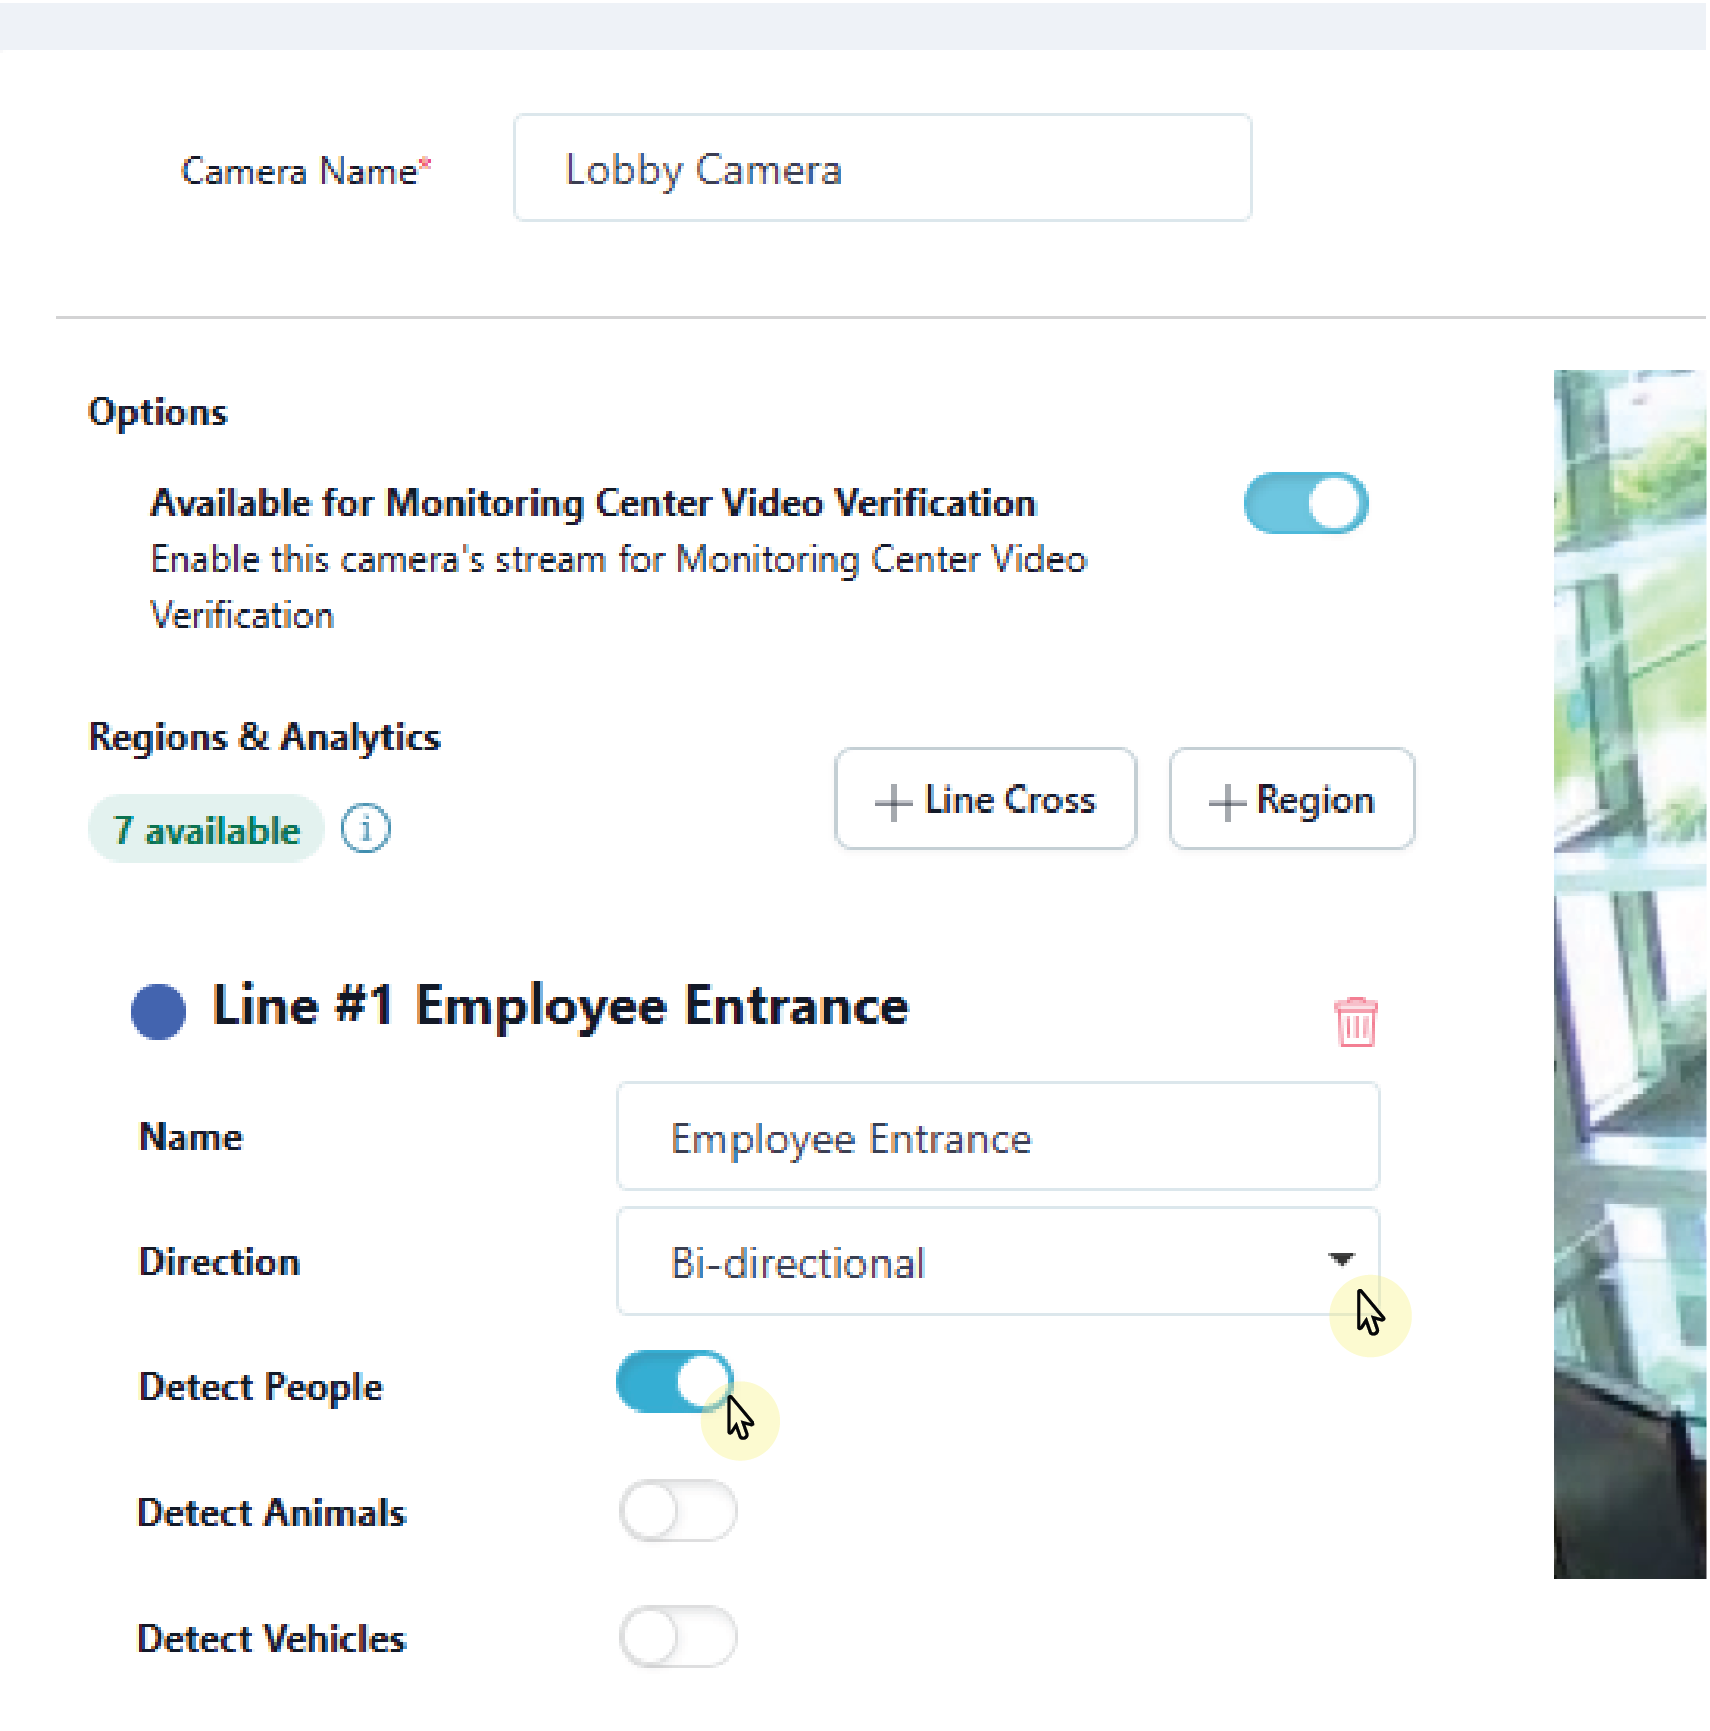
Give the line a Name.
-
In the drop-down menu, select one of the following directions to monitor if a person, animal, or vehicle moves in a direction that is a part of a programmed region:
-
Enter—Motion has to cross the line in the direction of the arrow.
-
Exit—Motion has to cross the line in the direction of the arrow.
-
Bi-directional—Motion can cross the line in either direction.
-
-
Select Display Regions if you want the configured detection lines to show up on event previews in Virtual Keypad.
.png?cb=ae7a6d6637ce823c6506ca3b5f4192e2)
-
To add additional line crosses, repeat steps 1-8. Select Save to apply changes and exit the Edit Camera page. This saves the line crosses and any camera adjustments made previously. To create a camera alarm zone for added regions, refer to Create a Camera Alarm Zone for more information.
-
To configure end user settings, refer to Virtual Keypad Setup for more information.
Delete a Detection Region or Line
-
Log in to Dealer Admin (dealer.securecomwireless.com).
-
Go to Customers, then select the System Name that the XV Gateway and camera are connected to.
-
In Video, go to Cameras and select the camera that is tied to the detection region or line.
-
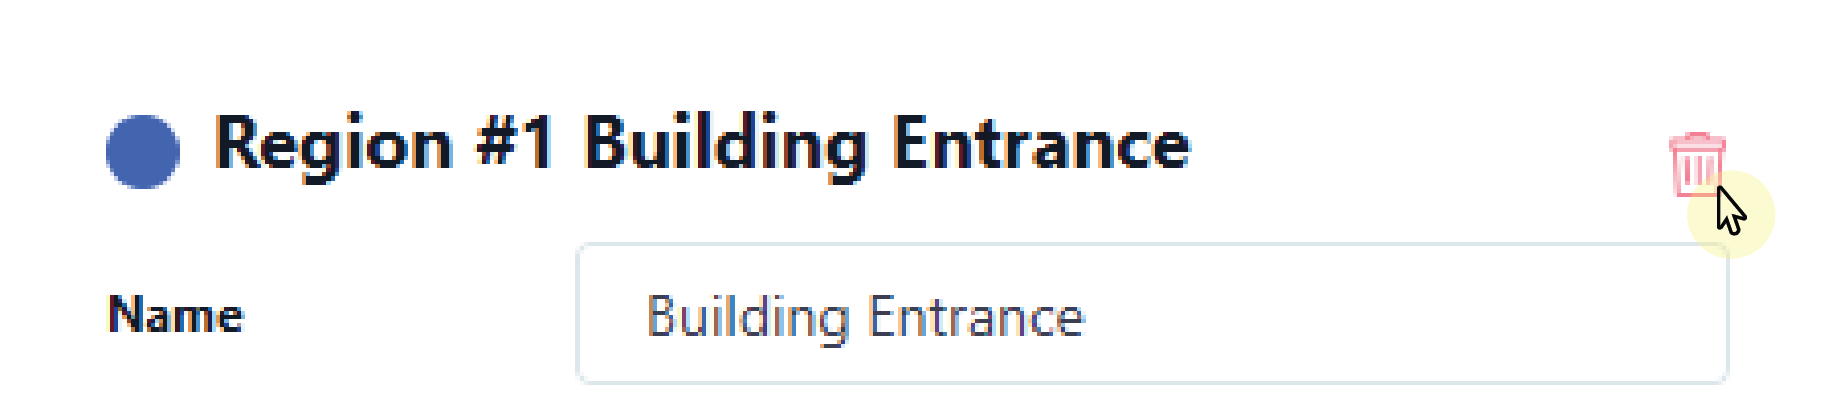
Select the Trash Can icon next to the name of the detection region or line.
-
Select Save. This deletes the detection region or line and any zone tied to it.

Create an AlarmVision Zone for Regions and Lines
Note: If you want to delete an AlarmVision zone tied to a region or line, do not delete the zone in Zone Information. If you attempt to delete a zone this way, a message appears that states the panel’s detection region will not properly communicate with the panel.
To delete an AlarmVision zone, delete the region or line tied to it. For more information, refer to Delete a Detection Region or Line.
-
Log in to Dealer Admin (dealer.securecomwireless.com).
-
Go to Customers, then select the System Name that is associated with the XV Gateway.
-
In Video, go to Cameras and select the camera name you want to create an alarm zone for.
-
In the Edit Camera page, go to Regions & Analytics and locate the detection line or region you want to create an AlarmVision zone for. If you have not created a Region or Line, refer to Add Regions & Analytics for more information.
-
Select + Add Alarm Zone.
Note: All zones are programmed as a Night Zone by default. To edit zone programming, refer to Edit Zones.
-
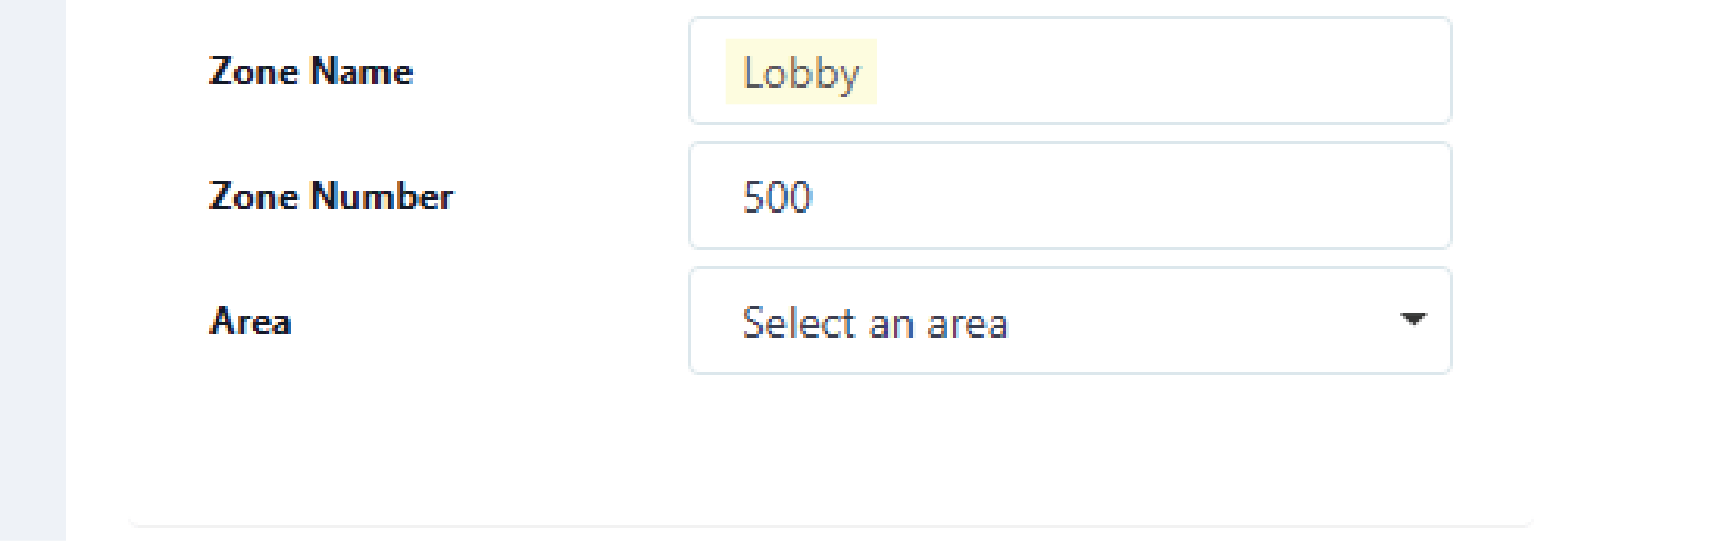
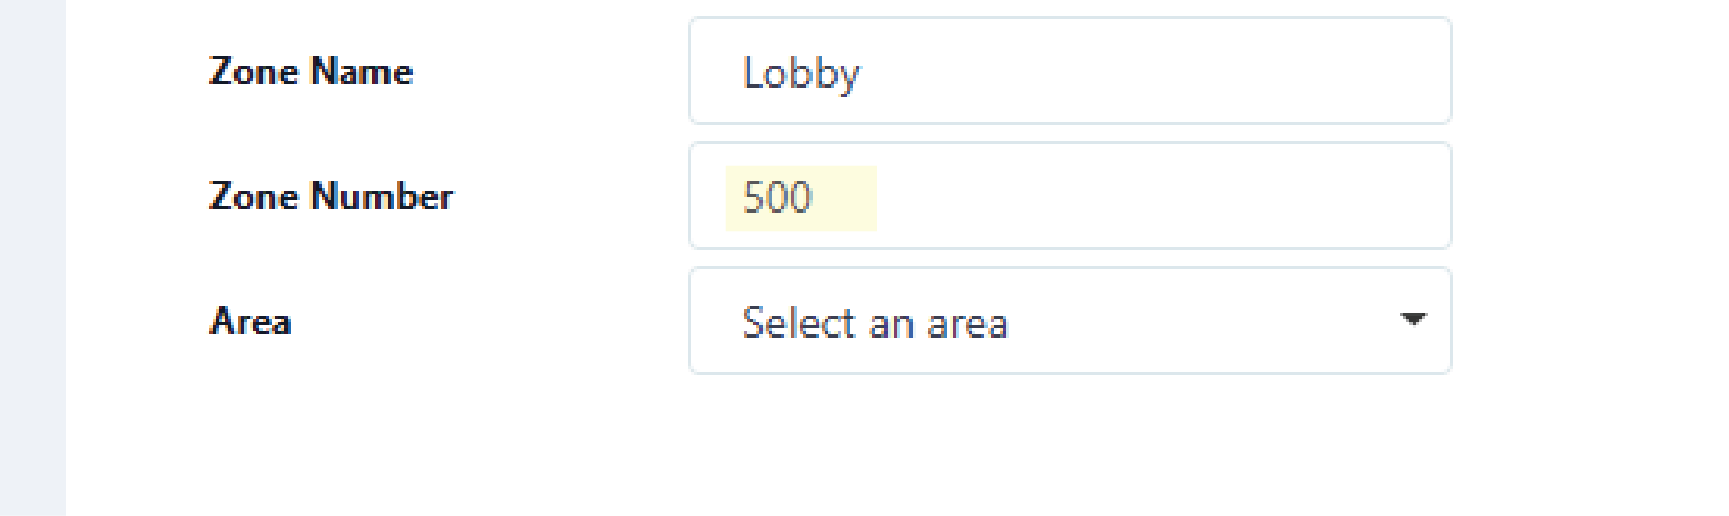
Give the zone a Name.
-
The zone number automatically populates with the next available zone number in panel. If desired, you can assign a different zone number. Usable zones are 500-999 for XR Series Control Panels and 500-599 for XT75 Control Panels.
Note: Zones cannot be assigned to an AX-Bus.
-
Assign the zone to an Area by selecting the drop-down menu.
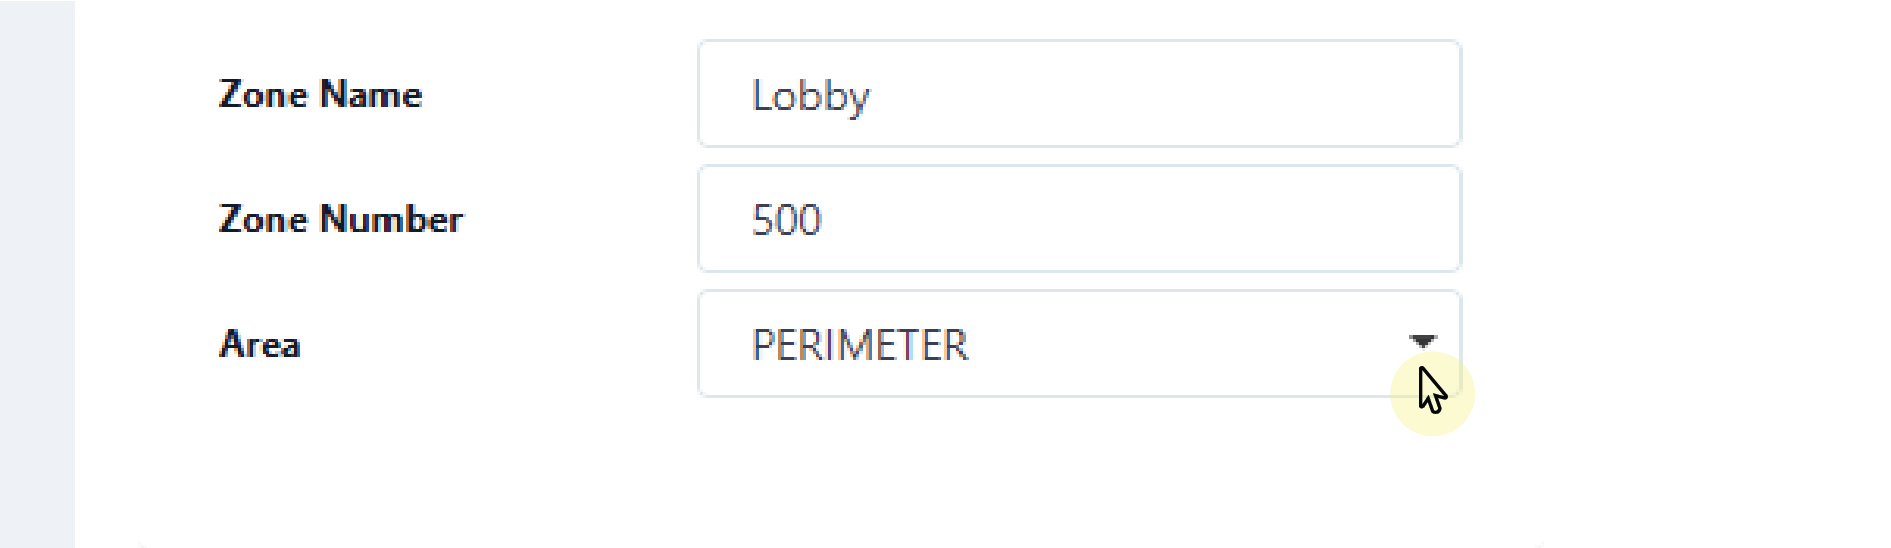
Note: If any camera detection region or line is tied to a panel zone, then all detections for that camera only record when the zone is armed and has been tripped.
-
To add additional AlarmVision zones, repeat steps 1-8. Select Save to apply changes and exit the Edit Camera page. This saves the detection regions, lines, and any zones tied to them, as well as any camera adjustments made previously.