
Note: Ensure Monitoring Center Verification is enabled before using 2-Way Audio. Refer to Enable Monitoring Center Verification for more information.
Installing and configuring an ONVIF compliant IP-based audio device with an XV Camera connected to an XV Gateway allows an operator to communicate live audio broadcast or pre-recorded audio messages to the area the audio devices are located in.
A pre-recorded audio message can be set to automatically play if a person, vehicle, or animal is detected in a specified region. Inbound audio can be received from the site if the configured camera or speaker supports a microphone.
The following pre-recorded audio messages can be communicated to the area the audio devices are located in:
-
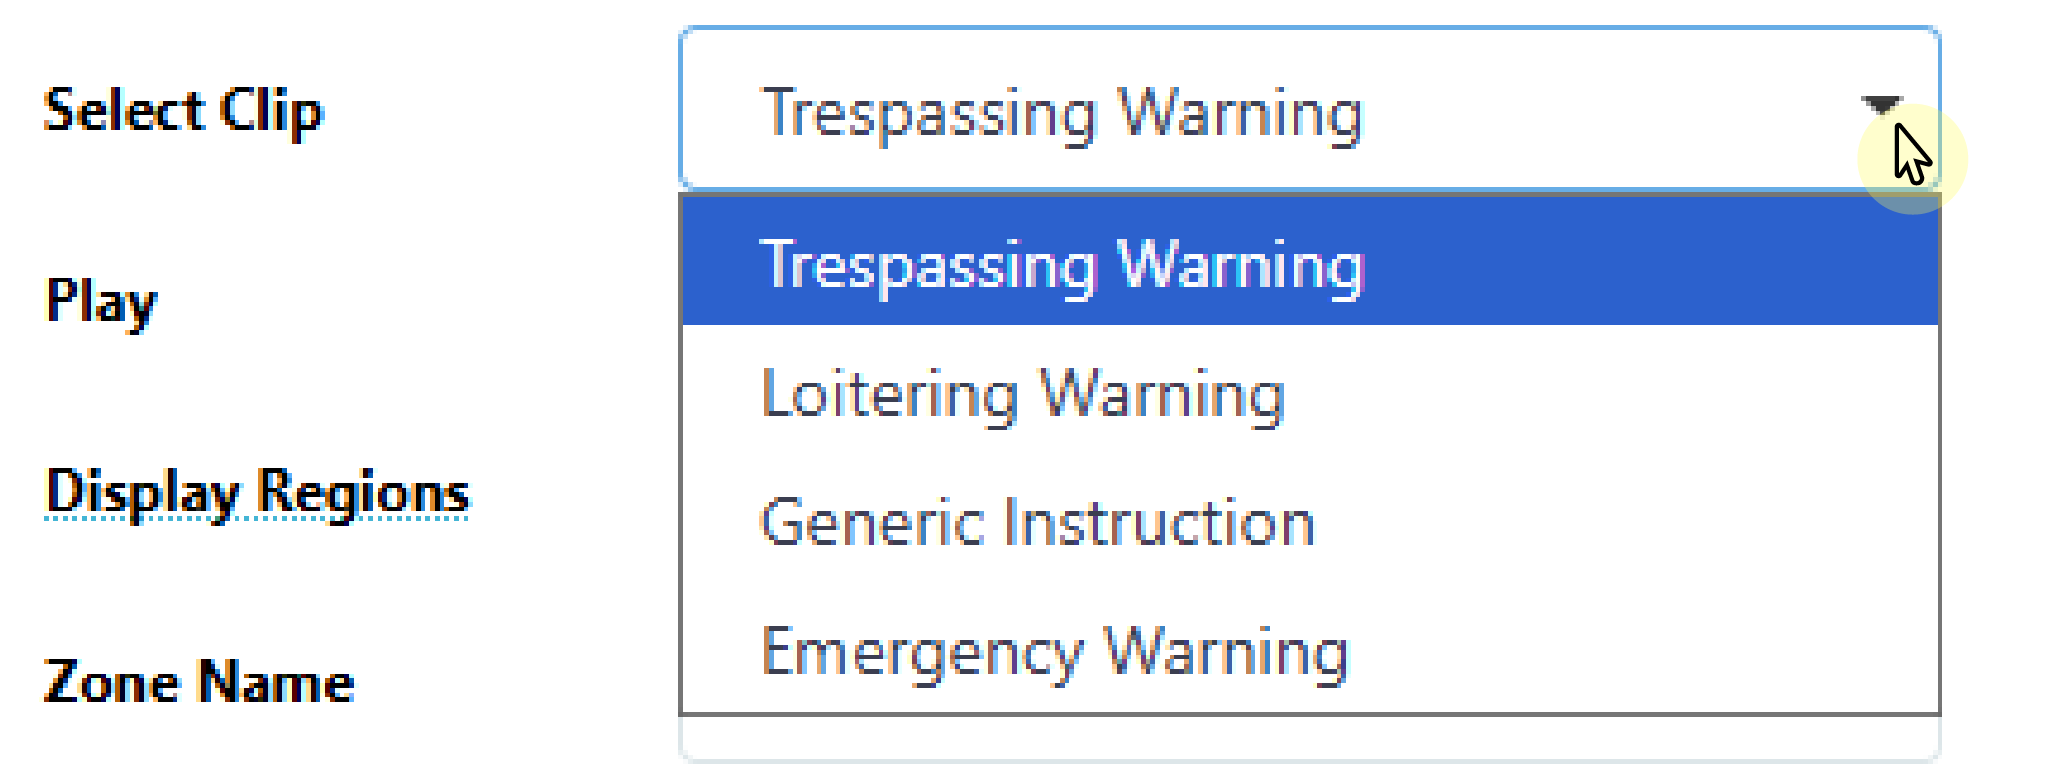
Trespassing Warning — “You are trespassing, please leave the area. This area is under video surveillance, and you have been recorded.”
-
Loitering Warning — “You are loitering in an unauthorized area. Please leave immediately or the police will be contacted.”
-
Generic Instruction — “Warning, you are under video surveillance. Please leave the area immediately.”
-
Emergency Warning — “Attention: please evacuate the area immediately.”
-
Speaker Test — “This is a test of an audio device. If you can hear this message, you are being audio and video recorded. This is a test of an audio device.”
Note: The Speaker Test audio message is unavailable for video verification and only plays when Test Audio is selected in the camera settings. Refer to Test Speaker Audio for more information.
Add 2-Way Audio Devices
To use 2-Way Audio, at least one ONVIF compliant IP-based audio device and one XV Camera should be added to the XV Gateway. To add the necessary devices for 2-Way Audio, complete the following steps:
-
Log into Dealer Admin (dealer.securecomwireless.com).
-
Go to Customers, and select the System Name the XV Gateway is associated with.
-
Go to Video, then select + Devices to XV Gateway.
-
Add any cameras or audio devices needed for 2-Way Audio. To learn how to add and edit devices on an XV Gateway, refer to Add Devices to the XV Gateway.
-
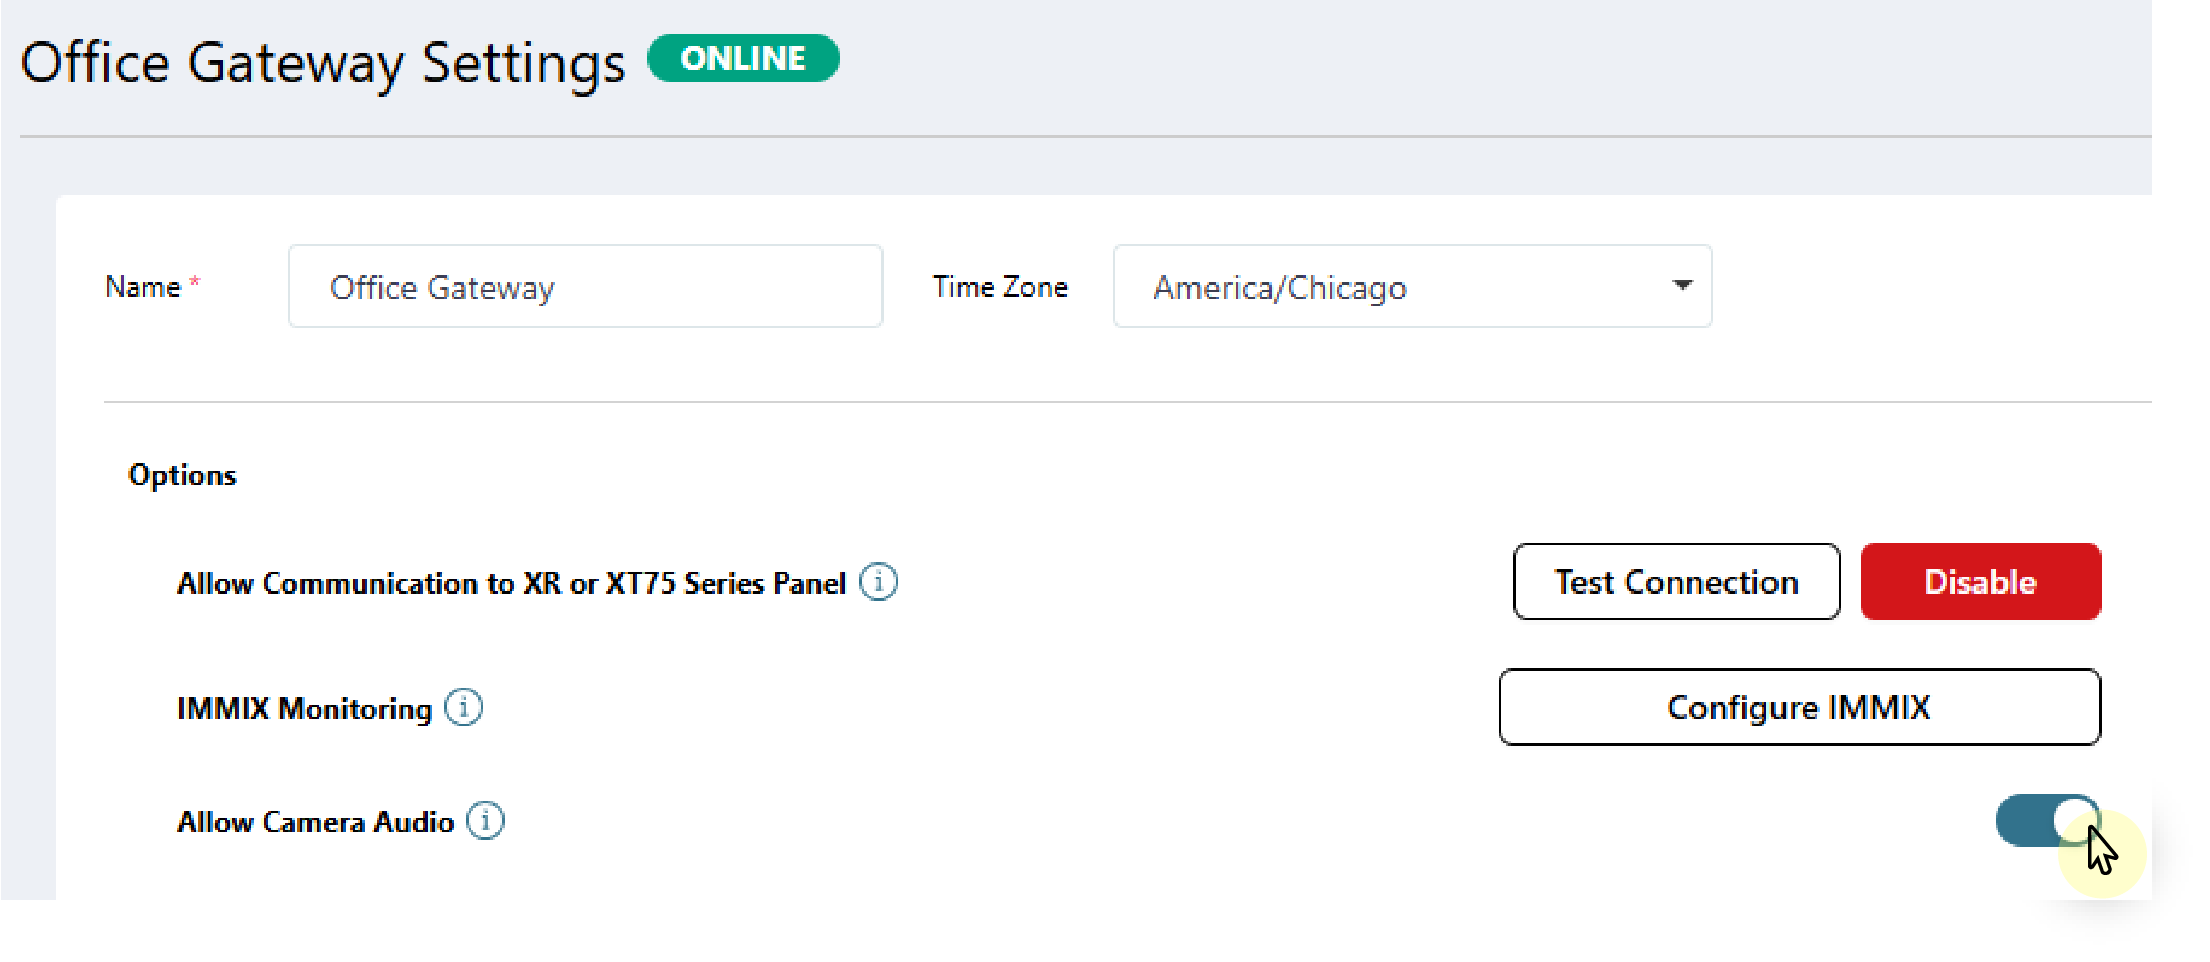
Once all necessary devices are added, go to Video, then select the name of the XV Gateway associated with the 2-Way audio devices.
-
In XV Gateway Settings, go to Options and toggle Allow Camera Audio ON.
-
A the top of the screen, select Save. Refer to the steps below to learn how to test a speaker’s audio.
Test Speaker Audio
Once you’ve added the necessary devices for 2-Way audio, follow these steps to test the speaker audio associated with the camera:
-
Log into Dealer Admin (dealer.securecomwireless.com).
-
Go to Customers, and select the System Name the XV Gateway is associated with.
-
Go to Video, then select the name of the camera associated with the system to access the camera settings.
-
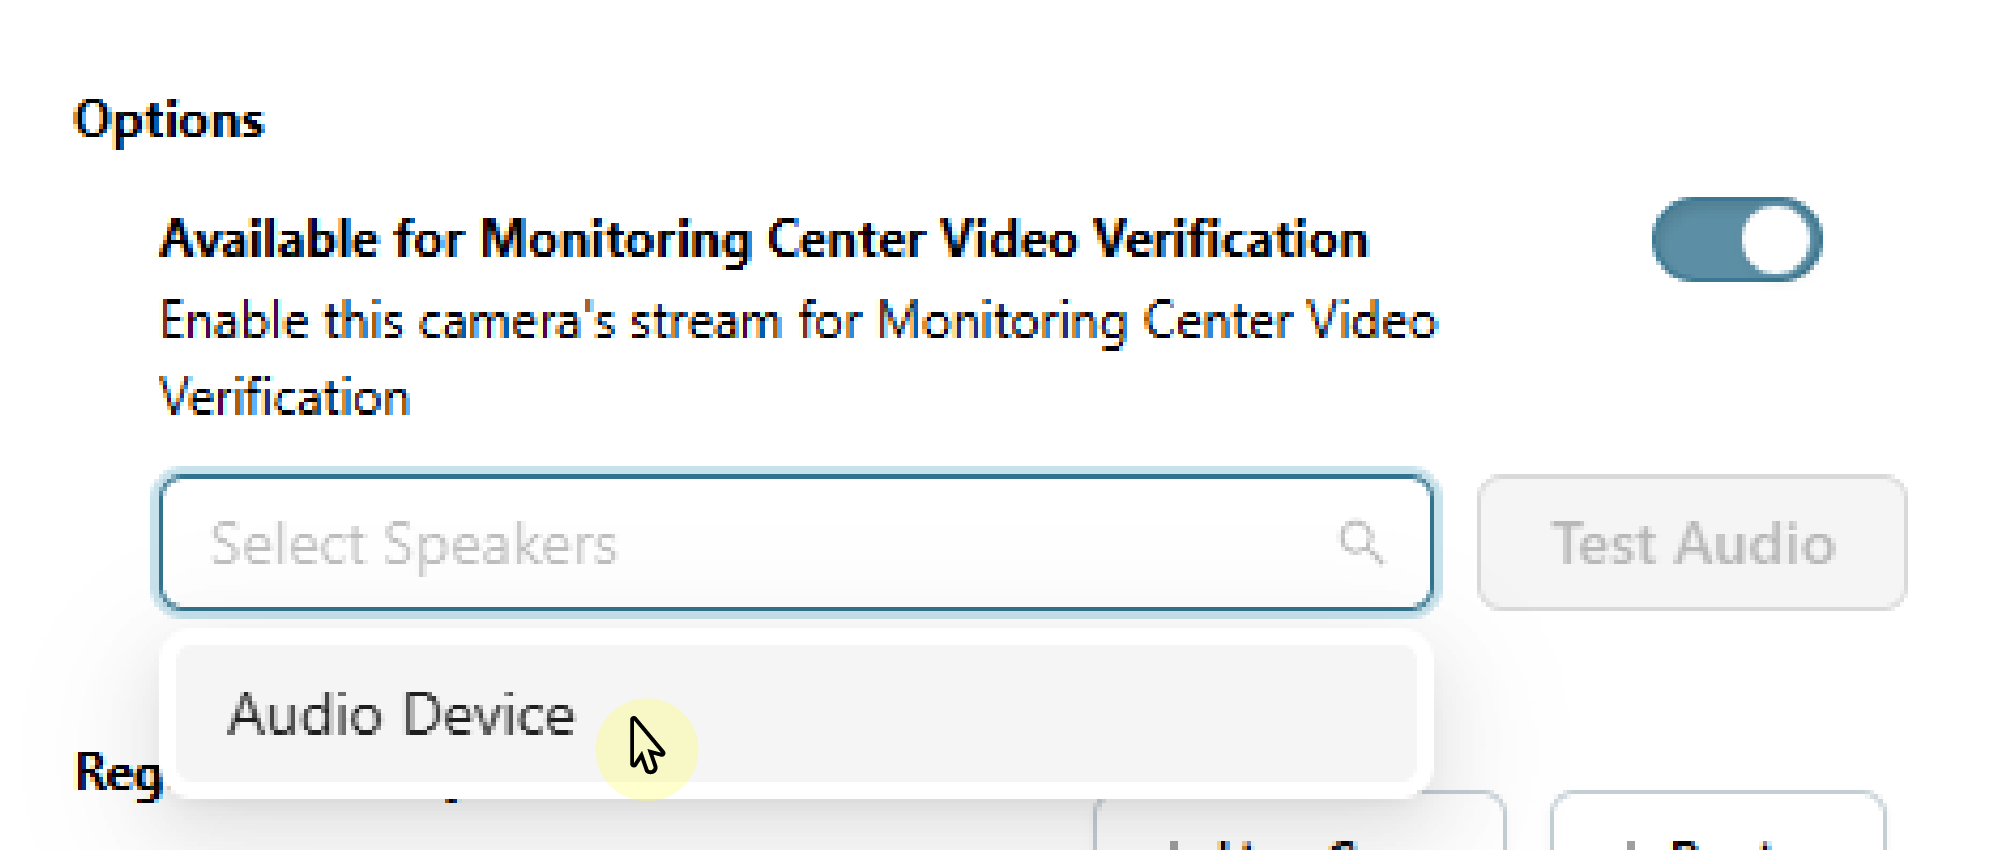
In Options, locate Available for Monitoring Center Video Verification and confirm it is toggled ON.
Note: If Available for Monitoring Center Video Verification does not display, ensure the feature is enabled. Refer to Enable Monitoring Center Video Verification for more information.
-
In the Select Speakers drop-down menu below, select the audio device you want to associate with the camera.
-
Select Test Audio to confirm the appropriate devices have been selected. An audio message plays the following message through all speakers associated to the camera: “This is a test of an audio device. If you can hear this message, you are being audio and video recorded. This is a test of an audio device.”

-
Select Save or refer to the steps below to learn how to set an automatic audio clip.
Set Automatic Audio Clip
Note: If Play Audio Clip on Detection does not display, ensure Allow Camera Audio is enabled. Refer to Add 2-Way Audio devices for more information.
To set an audio clip to play automatically upon detection in a specific region, follow these steps:
-
Log into Dealer Admin (dealer.securecomwireless.com).
-
Go to Customers, and select the System Name the XV Gateway is associated with.
-
Go to Video, then select the name of the camera associated with the system to access the camera settings.
-
In Regions & Analytics, find the region or line that you want the audio clip to play for when an armed zone is tripped. For more information about how to create a region, line, or camera alarm zone, refer to Add Regions and Analytics Settings and Create a Camera Alarm Zone.
-
Toggle Play Audio Clip on Detection ON.
Note: The audio clip feature is unavailable for line crossing and for regions with a set direction. If you have a direction tied to a region or line, Play Audio Clip on Detection does not display.

-
Select the drop-down box next to Select Clip to set the audio clip that plays upon detection.
-
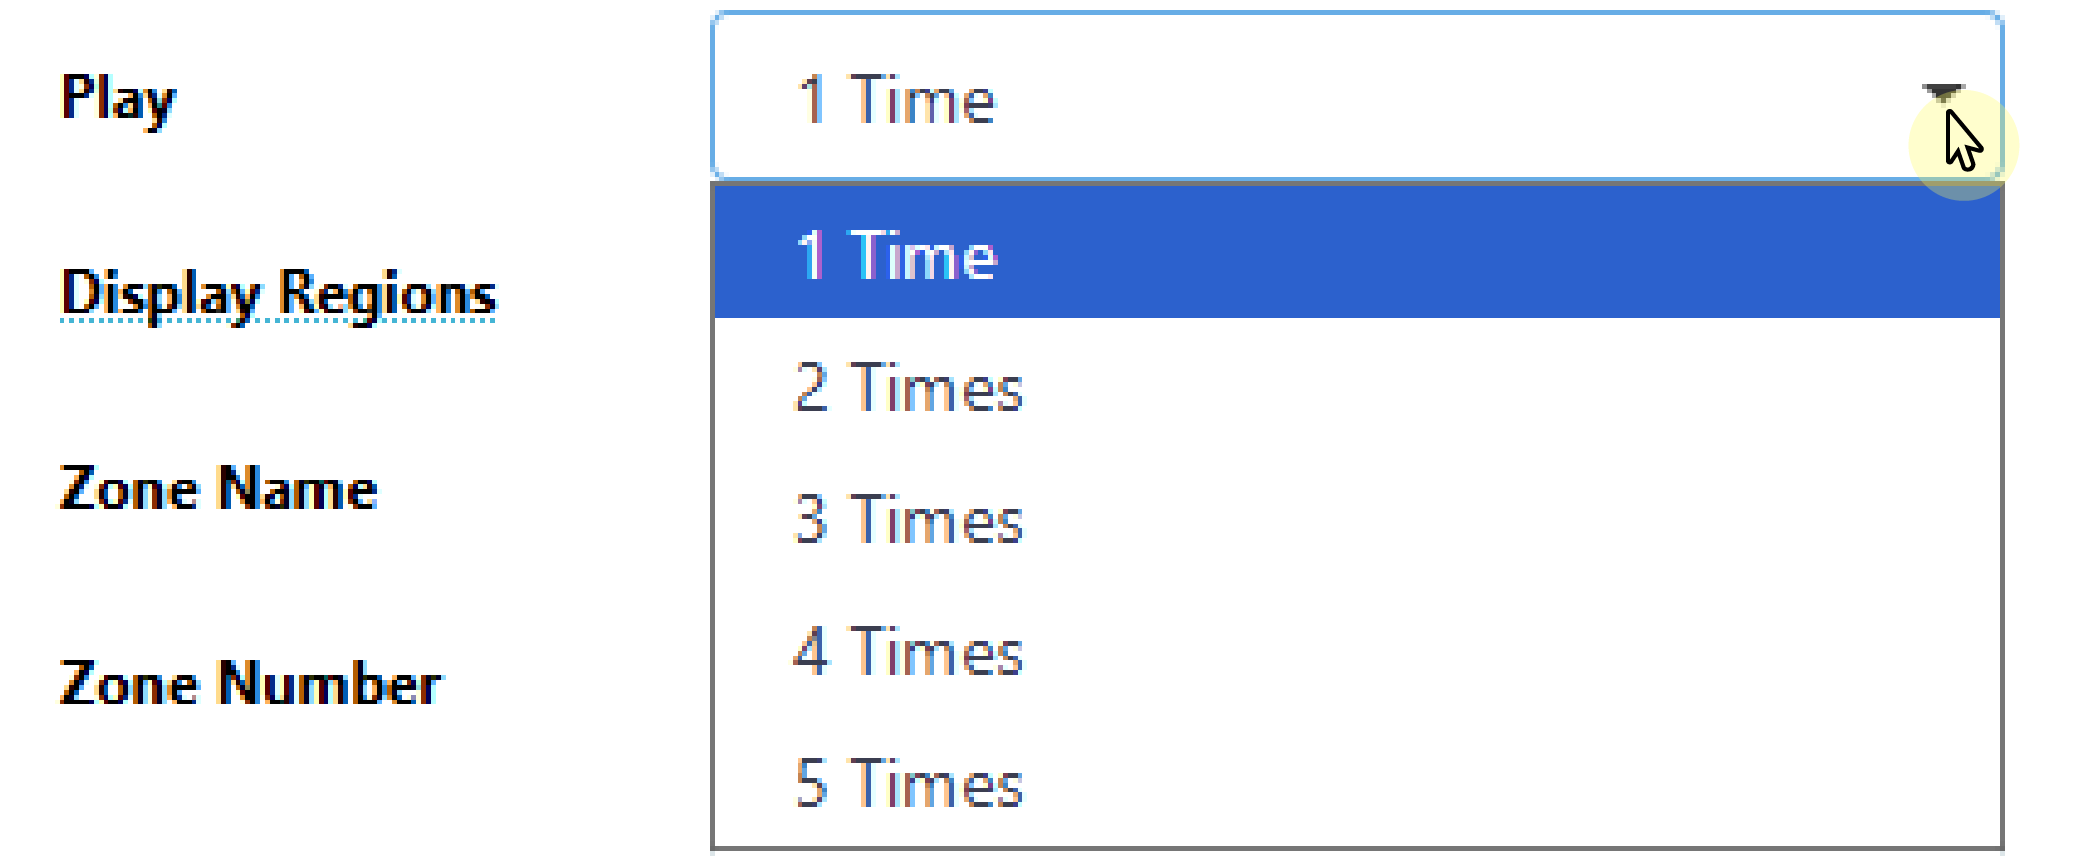
Select the drop-down box next to Play to set the number of times the clip plays. You can set the clip to play up to five times.
-
Select Save to apply the changes. Once a detection has been triggered, the alarm sounds and the audio clip plays. If there are multiple detections, the clip plays for each detection.